
Hello everyone and welcome to the Garden! So nice of you to drop by.
I would like to share with you my project using our very latest Kit, the French Garden Book Kit. These papers were designed by Denise Boddey and, if you're into shabby chic, you will absolutely love them. The colours are so pretty and there are lots of images for fussy cutting as well. The Kit is available to purchase as both a download and a fully printed version, whichever best suits your needs.
To give you some inspiration, the DT have been challenged to each create a Book with this Kit and here is my version. The design for the pages came from Kathy Orta's "My Design Mini'. She makes the most wonderful albums and has the most innovative designs, I love her work.
All the papers used for this book were edged with Gathered Twigs Distress Ink.

The Title is a 2Crafty Chipboard piece which was coloured with Distress Ink and then brushed with multi matte medium and randomly sprinkled with clear glitter.

The large flowers below are all available from Meg's Garden, as is the gorgeous piece of lace. The small flowers and the pearls came from my stash. I also tucked a little gauze in amongst my blooms.

Instead of Texture Paste which can be a little expensive to buy, I use Multi-Purpose Filler which is available at Hardware stores and costs only a few dollars for a 500gm Tub. I really love it because it is exactly the right consistency and it holds the shape beautifully as you can see below.

Before we go any further I must warn you that this will be a huge post. There are only 4 page sets, as you can see , but there are quite a few fold outs, pockets and tags etc. to show you so there will be a lot of photos.

Here are the first 2 pages.
Page 1 (inside front cover) has a butterfly, some small tags and the Queen of Spades which were all fussy cut from the Kit's ephemera. The 'Queen' was mounted on card stock and attached to the bottom flap. This flap opens down ...

... to reveal a photo mat and journaling spot ...


... and the top flap opens 'up' to, again, reveal another photo mat and journaling spot. I have used a magnet behind the card to keep the flaps closed.
The lace and the washi tape are, of course, available from Meg's Garden.


This page opens up to reveal more photo mats with the same stamp and washi tape. The stamps I have used in this Album are Kaisercraft's 'Script' and 'Arty' Stamps. The little white and red butterfly is also from the Kit's ephemera.

Pages 3 and 4. Of course page 3 is the back of page 2 and it has ...

... two pockets edged with the Sevington Border die from Memory Box ...
I would like to share with you my project using our very latest Kit, the French Garden Book Kit. These papers were designed by Denise Boddey and, if you're into shabby chic, you will absolutely love them. The colours are so pretty and there are lots of images for fussy cutting as well. The Kit is available to purchase as both a download and a fully printed version, whichever best suits your needs.
To give you some inspiration, the DT have been challenged to each create a Book with this Kit and here is my version. The design for the pages came from Kathy Orta's "My Design Mini'. She makes the most wonderful albums and has the most innovative designs, I love her work.
All the papers used for this book were edged with Gathered Twigs Distress Ink.
The Title is a 2Crafty Chipboard piece which was coloured with Distress Ink and then brushed with multi matte medium and randomly sprinkled with clear glitter.
The large flowers below are all available from Meg's Garden, as is the gorgeous piece of lace. The small flowers and the pearls came from my stash. I also tucked a little gauze in amongst my blooms.
Instead of Texture Paste which can be a little expensive to buy, I use Multi-Purpose Filler which is available at Hardware stores and costs only a few dollars for a 500gm Tub. I really love it because it is exactly the right consistency and it holds the shape beautifully as you can see below.
Before we go any further I must warn you that this will be a huge post. There are only 4 page sets, as you can see , but there are quite a few fold outs, pockets and tags etc. to show you so there will be a lot of photos.
Here are the first 2 pages.
Page 1 (inside front cover) has a butterfly, some small tags and the Queen of Spades which were all fussy cut from the Kit's ephemera. The 'Queen' was mounted on card stock and attached to the bottom flap. This flap opens down ...
... to reveal a photo mat and journaling spot ...
... and the top flap opens 'up' to, again, reveal another photo mat and journaling spot. I have used a magnet behind the card to keep the flaps closed.
The lace and the washi tape are, of course, available from Meg's Garden.
Here is the page fully opened.
Page 2 is a half page, and here I have done a little stamping for extra interest and added some more washi tape.
This page opens up to reveal more photo mats with the same stamp and washi tape. The stamps I have used in this Album are Kaisercraft's 'Script' and 'Arty' Stamps. The little white and red butterfly is also from the Kit's ephemera.
Pages 3 and 4. Of course page 3 is the back of page 2 and it has ...
... two pockets edged with the Sevington Border die from Memory Box ...

... and two tags. The bottom of these tags fold up when placed back in the pockets.

Page 4 has a belly band which can be used to hold tags or photos and, when you untie the ribbon the page opens up to reveal ...

... more photo mats.

Pages 5 and 6.

Page 5 has a pocket and tag. The paper on the pocket is from the 'Damask Garden Collection' which is another range of papers designed by Denise. I felt it fitted in very nicely with the 'French Garden' papers. The strip at the top of the tag was edged with Martha Stewart's Floral Vine Deep Edge Border Punch.

Page 6 is another photo mat. Isn't the paper beautiful?? If you wanted to you could fussy cut the flowers and leaves and simply use them as embellishments.

Pages 7 and 8.
I do hope you're still with us folks, we're nearly finished.

Page 7 is a pocket ...

... which is held closed by a magnet (also available from Meg's Garden) and holds a tag.

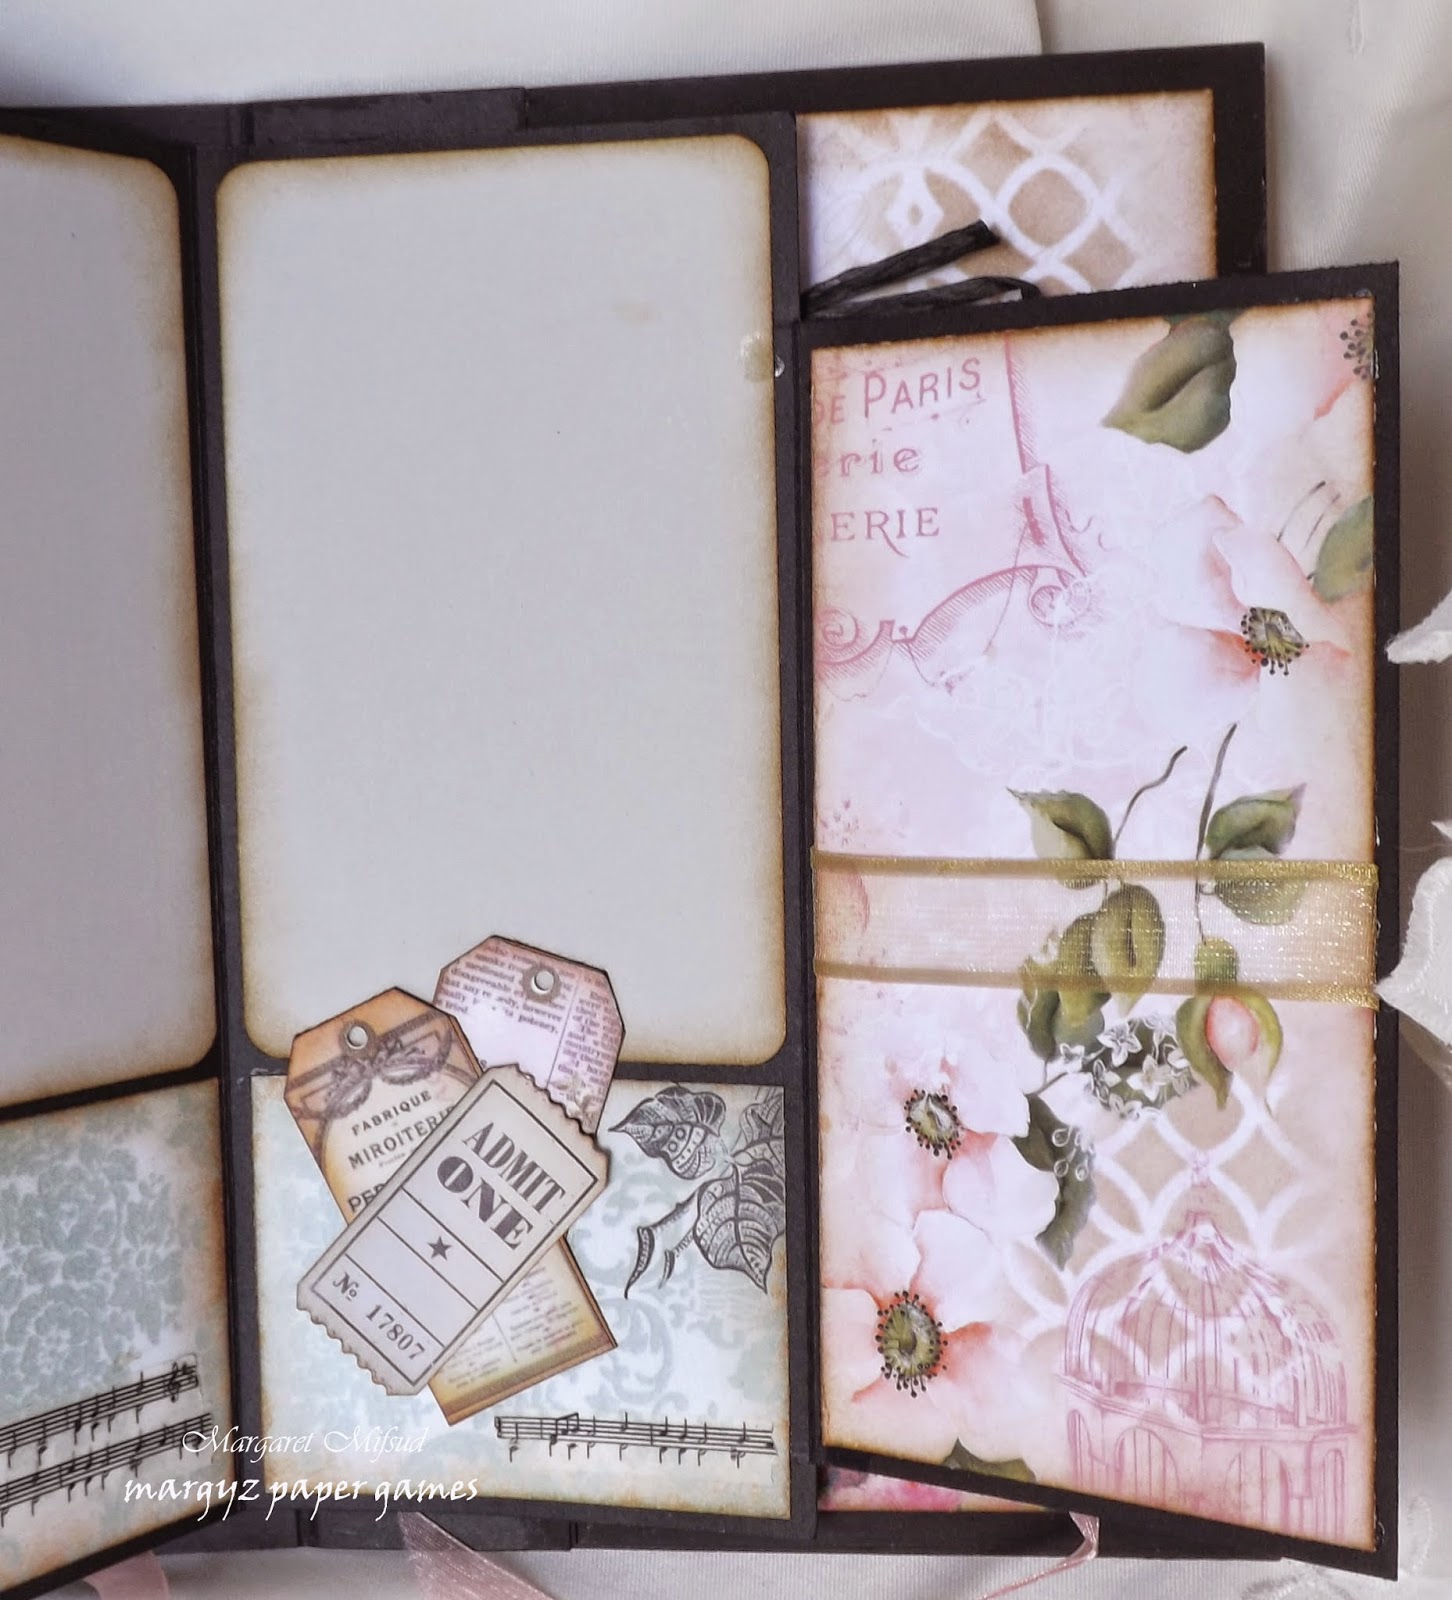
Page 8 is another half page that ties with a ribbon.

... which opens up to reveal (surprise, surprise!!) some photo mats ... and opens out again to reveal ...

... (bigger surprise!! LOL!!) more photo mats, one of which has a belly band made from a bit of ribbon from Meg's 'Camel Bundle' and the other has some fussy cut tags and tickets from the ephemera pages!!
Pages 9 and 10.

Page 9 is plain and simple, just a photo mat or journaling spot.

Page 10 has a pocket ...

... cut into the paper to hold ...

... a small booklet for photos which was simply bound with some black raffia from the Camel Bundle. Here I have again used the Floral Vine border punch and also added a fussy cut butterfly from the ephemera sheets.

Finally (Yayy!!) the back cover which was left fairly plain. I simply repeated the ribbon and pearl trim from the front and also added a metal trinket.

As I said at the beginning, not many pages, but lots of surfaces for photos, journaling and anything else you may think of.
I do hope you have enjoyed seeing my 'French Garden' Album. I didn't make it as shabby chic as I had intended to but I'm sure you can see the potential. I hope I have inspired you to try this Book Kit for yourself. It is gorgeous to work with and there are lots of elements to this Kit which I didn't even use in my book. To take a look at the full Kit HERE is the link.
Meg's Garden Products used
French Garden Book Kit
Blue & Cream Damask Garden 12 x 12 Sheet
Lace - 2 cm
Lace - 1.6 cm
Ivory Primula
Primrose Posy - cream
Small white roses - 2 cm
Ribbon and raffia from Camel Bundle
Music notes Washi Tape
Vintage Trinkets - Round Filigree Large
Thank you so much for visiting and enjoy the rest of your day.
oxox Marg
... which is held closed by a magnet (also available from Meg's Garden) and holds a tag.
Page 8 is another half page that ties with a ribbon.
... which opens up to reveal (surprise, surprise!!) some photo mats ... and opens out again to reveal ...
... (bigger surprise!! LOL!!) more photo mats, one of which has a belly band made from a bit of ribbon from Meg's 'Camel Bundle' and the other has some fussy cut tags and tickets from the ephemera pages!!
Pages 9 and 10.
Page 9 is plain and simple, just a photo mat or journaling spot.
Page 10 has a pocket ...
... cut into the paper to hold ...
... a small booklet for photos which was simply bound with some black raffia from the Camel Bundle. Here I have again used the Floral Vine border punch and also added a fussy cut butterfly from the ephemera sheets.
Finally (Yayy!!) the back cover which was left fairly plain. I simply repeated the ribbon and pearl trim from the front and also added a metal trinket.
As I said at the beginning, not many pages, but lots of surfaces for photos, journaling and anything else you may think of.
I do hope you have enjoyed seeing my 'French Garden' Album. I didn't make it as shabby chic as I had intended to but I'm sure you can see the potential. I hope I have inspired you to try this Book Kit for yourself. It is gorgeous to work with and there are lots of elements to this Kit which I didn't even use in my book. To take a look at the full Kit HERE is the link.
Meg's Garden Products used
French Garden Book Kit
Blue & Cream Damask Garden 12 x 12 Sheet
Lace - 2 cm
Lace - 1.6 cm
Ivory Primula
Primrose Posy - cream
Small white roses - 2 cm
Ribbon and raffia from Camel Bundle
Music notes Washi Tape
Vintage Trinkets - Round Filigree Large
Thank you so much for visiting and enjoy the rest of your day.
oxox Marg


