Showing posts with label filigree flower. Show all posts

18 May, 2018

THE PERFECT DAY ~ IT REALLY WAS . CREATING WITH SHADES OF GREEN RANGE

Hello fellow crafters,

Mary here today to share another layout for my Daughters wedding album using the Shades of Green Range.
The Perfect Day ~ it really was


Once again I have created a 12 x 12 page by using a piece of cardstock to adhere the A4 shades of green pattern paper to.


I recently purchased the Oval Die cut which comes with two dies, this is the large, but the small is also a good size, perfect for framing your photo. On the opposides of my page I added the Screen Print die in mint green  to add a touch of colour and a decorative element to my page.


I created a cluster in the corner of the photo with a filigree Flower placed a paper flower and leaf on the top , attached a charm heart with pearl trim and also placed a clear gem ball and 3 pastel enamel dots, all placed on a ribbon of lace.In the opposite corner I placed the Filigree stip with the Honey Bee charm.


I used the satin edged sheer ribbon to tie a bow so to me it almost looks like a book that you can open . For texture I added the flower pattern in each corner through a stencil with texture paste and coloured with distress oxide inks . The Happiness chippy was given to me by my friend Bec and I also coloured it with Distress Oxide.
Thank You so much for calling by, I hope I have inspired you to pop over to Megs Store and get yourself some gorgeous product to create your memories with.
Happy Creating
Mary x

20 April, 2018

Take time to love the little things...

Hello fellow bloggers...
I have been absent for a while and for that I apologise.  I have been working a lot recently however I have taken time for myself, over Easter, to get into my craft room and create for Megs' Garden.
It's my first time using the Shades of Green Collection, that all the other talented ladies have already showcased on Meg's blog, so here are the cards I have had the chance to play with over the Easter weekend.
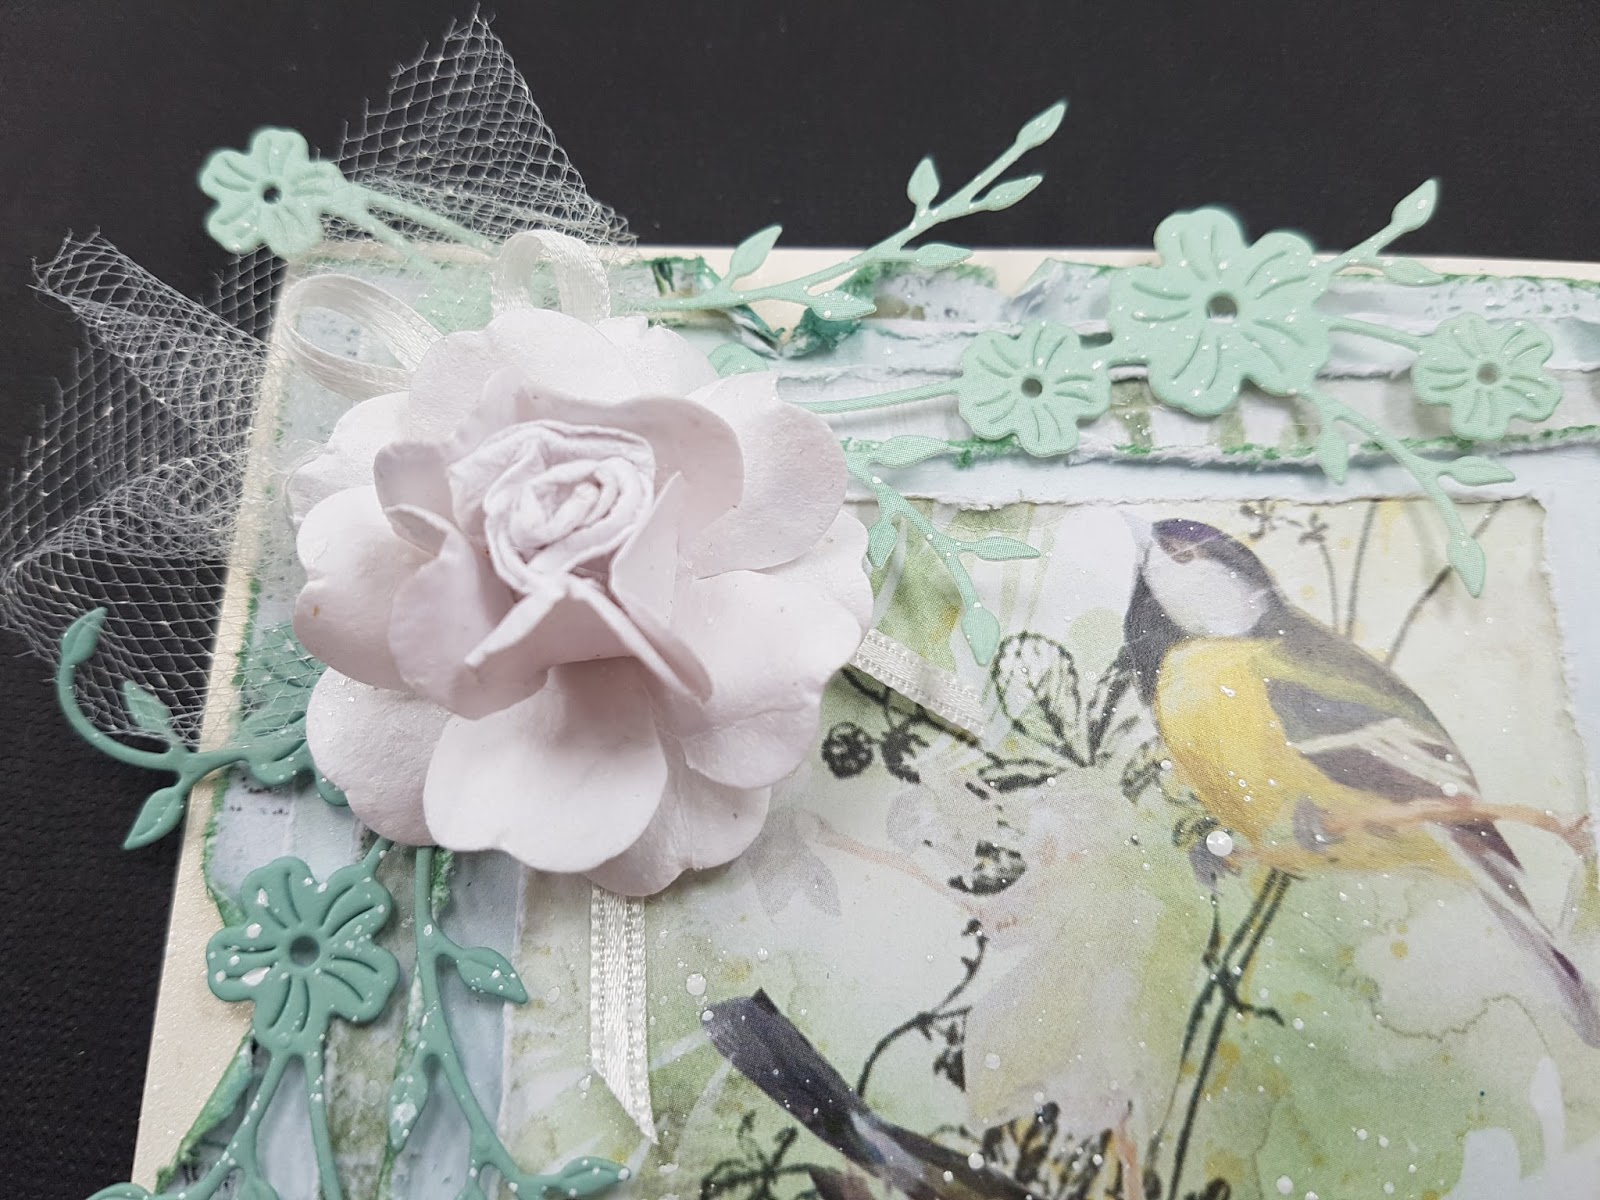
With the Card Artists' Packs/Mini Papers, I have used the Blue Tits background paper in the centre of some of the layered Shades of Green background papers.
One of the dies I have purchased recently is the Branch with Flowers die, I have used this in two different shades of sage green along the edges of this card. Placing a single French White Open Rose in the corner on some white satin ribbon on a bed of white tulle. Here are some close ups...


My second card, uses the pale roses background paper from the Shades of Green Collection.  With a heart doily and heart die, from the Hearts - Nestled Stitched Dies, I have lined the right hand side trying to show as much of the background paper.  I have used the branch with flowers die again, however I have cut the die into three pieces shoot out of the Filigree metal flower embellishment that I have centred with white mini rose buds. 
I also purchased a variety of gorgeous coloured enamel dots.  So with the perfect colour matching enamel dots I have highlighted the corner of the background paper. Here are some close ups...

On my final card of this blog post... I have used the time piece background paper from the collection. Using another beautiful die called Tender Greens, I have created a bed for a single French White Open Rose along with little leaves from the Branch with Flowers die, some basic sewing thread and a little "Take time to love the little things" sentiment card from the poetry cut and create ephemera sheets.  I have used a touch of lace around the edge to the flower for an element of something different.
Once again I have highlighted the corner with some pale mint green enamel dots. Here are some close ups...


I hope you love what you see and it has inspired you to create from these absolutely stunning products from Meg's Garden website.  Below is a couple of cuts outs of the Branch with Flowers die...

Take Care
Bec
xxx

10 June, 2016

CHERISH ~ ROSE QUARTZ

Hello Mary here to share another layout with the Beautiful rose quartz range.

I have used the Rose Quartz 05 12 x 12" page with the 4 x 12" matching strip.
I started by coating my page with clear gesso to prime the page for the use of aqua coloured pencils . I then cut the 4 x 12 strip into pieces and layered then and dragged white gesso over the strips to add definition to the strips. I added the soft pink aqua pencils to also define the strips.


I used the strips as the base or little nest to layer my photo of my Aunt and the lovely images from the Rose Quartz "Cut and Create " So lots of layers . As you can see I also added some texture paste through a mask for even more texture to the page.  I chose the photo of my Aunt as I thought it went perfectly with the image of the lady looking at the rose from the Rose Quartz Cut and Create Page.


How pretty are the images from the cut and create ! and the gorgeous vintage filigree flower and antique pink lace continues the vintage feel and the vintage brad I have added to the centre of the flower , I love it !


A couple of different views.
Everything I have used is from Meg Gardens shop , except some cotton and The cherish die cut word , the pink cardstock that I have ran through a die cut and the vine stamp, which are all from my stash at home.


and the whole layout
Cherish


You may notice I have also used the pearl trim in the corner of my layout as a corner decoration ( I actually used it to hide a mistake, always a way ) . The gorgeous Basket Lace Square Paper Doily adds another layer and a softness, they are HUGE doilies so you can cut them and get use for several layouts or simple use it whole

Thank You for calling by. I am sure you have been enjoying all the gorgeous projects from Megs Garden Girls, they are so creative. I am mainly a 12 x 12 layout girl, but their off the page projects are just simply  beautiful and so clever. Lots of inspiration from the girls.
Happy Creating and don't forget you can get all the supplies from Megs Garden Store

Mary x