Showing posts with label Off the Page Projects. Show all posts

04 July, 2020

My Collaged Folder

Hello everyone & welcome,

Today I have a project that I would love to share with you. The paper I have chosen is from the new collection called Inspiration in Lace cut & create sheets.


I have created a special folder just to store all of my Meg's Garden design patterned papers.


This is a Kraft coloured folder before its transformation. The folder measures 26 x 31.5cm.


To decorate my folder I firstly mixed some Matisse acrylic paint & Reeves iridescent medium together. This was applied to the whole folder both inside & out, then allowed to dry.


I then add some stenciling and stamping.


Next I started to decorate with images from the cut & create sheets & a paper doily.  I then added  embellishments of pretty lace, trims, trinkets, buttons, glitter glass, string of pearls, SA pearls, metal charms and punched out paper flowers to adorn the front cover of my folder.


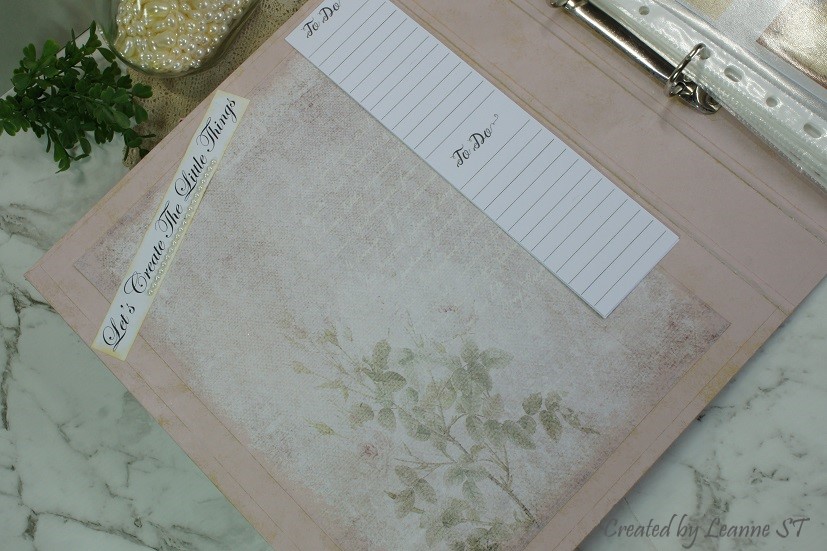
Inside front cover has also been decorated.
Plus, now I can easily flick through each sleeve to see exactly what I need and my papers are safe from being crushed. 


The inside back cover. I am so happy with the end result.

You will find this very feminine & pretty paper collection in Meg's Etsy store.
                                                   
                                                    Meg's Garden Etsy store
Until next time,
Happy creating,
Leanne

26 April, 2019

Beauty


I have been thinking outside the square - so to speak - when I received the latest collection of Vintage Journal Cards.


I was taken with the exquisite image of a beautiful lady with such deep and soulful eyes from Meg's new Vintage Journal Card collection.

Loosely cut around the design edge, then inked and mounted on to antique gold paper for the frame backing, this image was the start of something special.


A string of faux pearls line the frame, with a cluster flourish of flowers, lace and ribbon, the final touching elements, making for a truly special and unique gift.


With all of the beautiful embellishments, and using the Vintage Journal Cards found in Meg's Garden shop, you too can find inspiration and create something "out of the square".


Mary 

16 April, 2019

Vintage Shadow Box

Hello Everyone,

How Meg's Vintage Journal Card collections conjure up different ways to use the beautiful images!


From something bland to something beautiful!

I have used a plain MDF wood shadow box, painted antique cream and edged in ribbon and pearls. 

Filling each shaped opening, I have an abundance of paper flowers, more pearls, a crochet square, and even a piece of jewellery. I am never one to shy away from all things Over The Top!


By far, the star of the shadow box is, without a doubt, the delicate lady with her mirror image, from Meg's collection. 


Edged in fine die cut swirls with bling accents, paired with one of Meg's framed wording sentiments to complete, the overall finish makes for an unusual but unique decorator piece. 


Mary

05 December, 2016

Memories - Spring pastels collection

Hello,
This my first project for Megs garden design team, working with the delicate spring pastels collection which I adore.
I have decided to make a square wall hanging for my first project.  Its turned out beautiful, even if i do say so myself.

Thank you – memories hanging


I chose the memories page because of it lacy delicacy, and because the project is by way of a 'card' to my work colleagues on the occasion of my leaving.  The beautiful stitching was a perfect ready made title for the project.

1. On a 24cm square base of recycled card, paint about 3cm all around the edge in gold acrylic paint
2. Layer a 23cm square of darker co-ordinating paper (recycled A4 mauve paper from my paper drawer)
3. Trim spring pastels ‘memories’ sheet to 21.5 cm square, retaining the white border
4. Fussy cut hydrangea flowers from the ephemera sheet, lavender chalk the back and add dimension with a ball tool
5. Inspired by the stitch effect of ‘memories’ use a rough stitch effect to outline 3 rectangles on the page approximately 6x10 cm each
6. Mask the centres with a post it note, and use walnut stain distress ink to tint the background leaving the 3 panels the original colour.
7. Fussy cut the floral design on the paper to allow the edged ribbon and lace to slip in behind them.
I chose the lace and ribbon because I wanted to continue the delicate theme and not obscure the background.
8. Cut a 14x7cm luggage tag from dark card, I found a deep plum in my paper darwer.
9. Cut the same shape from a section of the ephemera page, leaving a 2mm border all round.  I just adored this section with its designand text.
10. Tuck behind the lace and adhere on foam tape for dimension
11. To match the gold border, apply gold gilding wax to the flower vintage trinket and adhere the small white rose in the centre.  Apply a small amount of purple chalk ink to define the edges.
12. Make a triple circle from the length of string.
13. Wind the two small rosebud stems around the string and tuck the sharp ends under the vintage trinket. Tuck the large rosebud and leaf in the hole of the tag.
14. Fashion a couple of loops from the pearl trim and 5mm ribbon, secure the ends in place with cotton thread, and tuck under the vintage trinket.
15. Make a slot in the top centre of the card and thread through the sage organza ribbon to make a hanging loop.
16. Finish the arrangement by positioning the fussy cut hydrangea flowers (making sure any stems align with similar lines on the background page), add diamante gem centres and a little glitter glue highlights.


I think you will agree these spring pastel papers make the perfect memories wall hanging,

hugs
Debbie


Ingredients:
Spring Pastels Collection - P1013
Spring Pastels Ephemera page
White Nylon Lace 38mm - L6899W
Green Leaves 5cm - gr leaves
Lg Mini Rosebud semi open - irt30
Mini Rosebuds white - gt-wh
Small Rose white - 005wh
Vintage trinkets Flower - al 101
White Pearl Trim
5mm purple silk ribbon
10mm purple edged organza ribbon
20mm Sage organza ribbon

String
1mm diamante gems
Glitter glue

Gold gilding wax
Gold acrylic paint

30 May, 2016

LIVE TODAY wall hanging

Greetings to all visitors & regulars to Megs Garden 
Annette here sharing the wall hanging created with one tiny piece of 
CHANTILLY CREAM
this beautiful range of papers is available 
also as downloadable to print yourself 
LIVE TODAY
 
I gessoed a piece of board, adhered muslin using 
gel medium
and then sprayed in several colours, 
the woven mesh was a placemat 
(I just knew would come in handy one day) LOL !!!
 brick work stencilled onto Kraft,
adhered lace under on left & over on the right side
white card inked and glued hessian & narrow lace
bronze embossed my frame & butterfly
adhered frame & live TODAY, 
finished base with part of a doily,
 a dangly earring, 
hessian flowers bronze key and leaves with a twist of dodo vine 
Top right corner has bronzed butterfly, hessian butterfly 
velvet flowers, leaves & a cameo
to hang I crocheted a loop in string & tied a knot to finish 
 thank you for calling by 
products available at MEGS GARDEN are:
Chantilly Cream
dodo vine
pink velvet flowers & velvet leaves
lace 
 Please take some time and scroll through the blog to view
 all the fantastic work from the GARDEN TEAM 
happy Scrapping 
hugz Annette x

23 March, 2016

Videos from Alena

Hello Bloggers

Alena received her package of Chantilly Cream papers & embellishments late - she lives in Slovakia so it had a long way to go

But she opened the package, set to work & created these 3 videos:

Post Card

Decorated Frame

Mini Album


You must have a look - the projects are fantastic


Bye for now
Meg
www.megsgarden.com

30 May, 2014

Slide Mailer Card

Hello Bloggers

Adriana shows us her slide mailer card:
'Hi everyone,
I have a quick and special little project 
that I have created for
my DT work for Meg's Garden
Using a microscope slide mailer with the
two slots and the stamps set which are all available
from 

Front cover


Inside

Outside cover
I made a very quick step by step on
this project.......

1. Cut out the middle of the insert of the 
Microscope slider mailer


2. Prime your slide mailer
with two coats of white Gesso. 
Leave to dry.

3. Apply, Wild Honey, Broken China Distress
Stains or paints. Blending the colours together, 
until you are happy with the results.

4. Using Rubber stamps , apply your selected designs
with black memento ink pad. I have used
TJ Design Elements rubber stamp collection
for the outside of the folder. 


For the inside I used
some Paris rubber stamps.

5. Decorate the front with metal elements and flower.

6. Cut out the vintage ladies images from the 
(I cut 3 images and then glued in the centre of the slide panels, decorate with metal embellishments around the edges.
on spine of slide folder.

Cut a butterfly from the 
glue on mailer as shown.


Meg's Garden products
Check out all the wonderful products from
and see more inspirational work from

Thanks for looking, Cheers Adriana XX :)'

Bye for now
Meg
www.megsgarden.com


18 April, 2014

Art on a Heart using the Damask Garden Papers

Hello Bloggers

Today we focus on another of the Damask Garden promo projects with an off the page projects:

'Art on a Heart'

Cut the chipboard to the size you want & sand the edges.  Trace the heart onto the patterned paper, cut & glue to the heart. The edges can be either distressed (here they were done with Faded Jeans blue) or painted. Punch holes in the tops to add ribbon. 

 A piece of lace was placed off centre, 3 flowers were fussy cut, curled, distressed & added to the heart using foam mounts. Diamante trim was added to the centres of the flowers & pearls glued into their centres. A jewelled pin was then added.


The final touches were labels cut from the Damask Garden paper which were mounted on chip with another piece of patterned paper & then tucked under the top of the lace & under the bottom flower. A piece of music transparency was also added for whimsy.


This is a pic of the chipboard before anything was done.  You are welcome to copy & paste this to do your own creation.  It can be made any size.

Could not have a promo without doing a couple of projects of my own.

Bye for now
Meg
www.megsgarden.com

08 April, 2014

Marg's Damask Garden Caddy

Hello Bloggers
Marg shares her Damask Garden promo caddy with us & also shows us how to do it:

'Hi everyone and a very warm welcome to the blog.  Thank you so much for visiting.
Today I'd like to share with you a Caddy I created from scratch.  I have to warn you though that this is going to be a pretty long post as I've created a Step by Step Tutorial as well.  So, I do hope you won't be put off.  Anyway, here goes.
First up, a little sneak peek of the finished piece.  
I hope this will entice you to stay till the end.  LOL!!


Step 1 ...  You need to determine what type of box you want.  In my case, I needed a box in which I could keep my Art Journals and a few supplies, such as Water Colour Pencils and Crayons.  So for that purpose, I decided I wanted a Caddy so I could have my Journals in one side and my supplies in the other.  You also need to decide what size you want your box to be and that, of course is determined by what you wish to keep in the box.  I measured the height, width and depth of the Journals and supplies and this is the design I came up with.


Step 2 ... Work out what pieces are needed for the box and the size they need to be.


As you can see, the size of these pieces corrolate to the dimensions on the original drawing.

Step 3 ... Cut out the pieces needed from your choice of product.  You can use cardboard or chipboard or any other material which has some strength to it.  I have actually used paperboard which is available from the Newsagent.  This is very similar to Chipboard but it does work out a little cheaper.


As you can see, the sizes of the pieces cut out are the same as the sizes on the drawing.  For the centre panel, the straight edge is 8" high and then I used a plate to draw the curve.  The heart shape was cut out using a Fiskars Cutter and Heart Template.  It didn't actually cut all the way through the board but I simply cut the rest of the way with a craft knife.  On the base, draw a line at the half way mark.  This is the guide for placement of the handle.  You should also mark the half way point on the longer side pieces for the same reason.  I forgot and had to do it after it was put together which was a bit of a pain. LOL


 Step 4 ...  To join the pieces together you need to cut some strips of card stock.  They should be about one and a quarter inch wide.  Then score them down the middle lengthwise and place double sided tape on each side of the score mark.


 Step 4 ...  Adhere the joining strips to each piece of the box.  For the base you will need to adhere a joiner on all sides as shown below.


 For the sides you will only need to adhere a joiner on one side edge of each piece.

For the handle you will need to adhere the joiners on both sides at the bottom and also on both sides of the side edges but only up to the height of the box.  In my case that was 5". 

 I have only shown it on two sides here but you will have to place the joiners on the other side edge as well.


Step 5 ...  Now we can start to put the box together.  When joining the side pieces to the base I found it was a good idea to first, take the backing off the double sided tape and then stand the side piece up along the base and push the joiner onto it making sure it sticks down really well.
  

As you can see below, it leaves that little bit of space between the two pieces which is necessary for movement in joining the side edges together later.  If you butted these two pieces together, you would not be able to lift the sides up to join them.  


Make sure you have one side joiner at each corner of the base. Here you can see how it looks with the sides attached.  


Now you can lift up each side piece and join the corners together ...


 ... and here is the basic box all joined up.  Now it's time to insert the handle.
Take the backing off the double sided tape on one of the bottom joiners, line the handle up to the centre guideline and stick the joiner to the base of the box.  Then stick down the joiner on the other side of the handle base.  Once it is stuck to the bottom you can then adhere the handle to the sides, lining it up on the guideline as shown. 


 Here is the basic box all ready to be decorated.  I really do hope you are still with me.  I did warn it was going to be a long post, didn't I ?????


So now I can show you the completed box.
TA!! DAAAAA!!


 To cover the box, I have used three different papers from Meg's stunning Damask Collection.  I will give you a list of all Meg's Garden products used at the bottom of this post.
 Although these papers don't need a lot of enhancement I did decide to do some masking and stenciling to make it more uniquely my own.


I've also used some Washi Tape and did some fussy cutting  as well.   Ran the frame on the front  through an embossing folder, coloured it with Black Soot Distress Ink and Versa Color Gold, and then it was clear embossed.  The quote was printed on some scrap DP and also clear embossed.  The clock  and the label were fussy cut from Meg's papers. 


 The sides were decorated with stencils, stamps, washi tape, a bling flourish and some flowers. On this side I fussy cut the label from another sheet and mounted it on some paperboard to give it a bit of dimension.


 I also fussy cut some of the leaves from the papers.


 A closie of the stamping and stenciling.


This is the other side before ...


 ... and after decorating.


 The inside ....


... and the handle.


I had a great time making this box and I hope I made the instructions clear enough for you to follow.  I also hope I didn't bore you to tears with such a long post and thank you so much for your patience.

As promised, here is the list of Meg's Garden Products used:
The Damask Garden Collection:
Blue Belle Jardiniere 12 x 12 Paper - P6380
Blue & Green Damask 12 x 12 Paper - P6368
Framboise Fleur  12 x 12 Paper - P6371
Forget me Not Mini Pack - S113
Old World Time - 1037
Small Rectangular Parisian Frame - fr005

Thank you so much for visiting and enjoy the rest of your day.
Take care and God Bless
oxox Marg'


What an awesome caddy - well done Marg.  I saw is in real life & it is so fabulous - very sturdy & beautifully done.  The decorations on the caddy were fantastic - the stamping & embellishments well chosen.  Thank you for the efforts in showing us how to do it - the instructions are really clear & detailed.

Bye for now
Meg
www.megsgarden.com