Showing posts with label paper leaves. Show all posts

18 February, 2019

Beautiful Thoughts

Hi Everyone, 

Today I have another card to share with you, using papers from both French Roses and Spring Flowers collections. 

Whilst slightly sombre in theme, it is still beautifully respectful in muted greens and creams. 


I used several die cuts on this card - the frame, sentiment and flowers, cut from papers in the collections. Meg's papers not only are great to use alone, they are also the perfect thickness and quality to run through your die cutting machine, even with the most intricate detailed die design.


The 3 cluster of flowers I hand rolled into shape, from a flat die cut design. I filled the centre of each with one of my favourite craft supplies - glitter! 
I love using up scraps, so I kept the off cuts from the frame die cut to include with the flower cluster. 


I placed my sentiment atop a lovely flower cut from the Cut & Create pages in the French Roses collection, and embellished with more die cut flourishes and a tonal fabric flower.

Inking lightly around the edges and raised areas, I kept the colours muted, for the beautiful cherub to be the stand out image. 


Meg's Garden shop has everything you need to create for all occasions life throws our way.

Julia

21 May, 2018

The Best and Most Beautiful Things in the World Cannot be seen or even Touched, They Must be felt with the Heart ~ Shades of Green

Hello Mary here again to share a layout using the Shades of Green range that will go in the album next to the last layout I shared as a kind of double page spread.
Once again I used two of the A4 Shades of Green Papers to create my 12 x 12 page.


So I just overlap my two A4 Pages to create a 12 x 12 size.


In my cluster I have used paper roses, pearl trim, paper leaves , a charm key and mesh ribbon, The Love word is cut from the cut and create sheet and I added a filigree strip with a enamel dot. In opposite corners of my photo I placed the brass corner drop with loop .


I have a strip of lace running down my page and for texture used a stencil and texture paste and added colour with my paints, I then added some light stamping

Thanks so much for calling by .
Don't forget to pop over to Megs Store for all your supplies
Happy Creating
Mary x


13 March, 2018

Two Cards using Shabby Chic Backgrounds

Hi Bloggers

With new dies & new papers on my work table, what does a girl do?

She just has to try some of them out - just to make sure they are OK to sell of course! Not just for fun!


 The first card is in pastel dusty pinks:


  • Pale pink Spotted paper on ivory cardstock with pink matting
  • pink antique nylon ribbon is wrapped around the inside of the card & tied into a bow on the front - I use clear clue dots to keep the lace in place & to anchor the ties where I want them
  • white puffy rose is inserted through a rose die (m356) with its edges tinged with my blusher, pale pink rosebuds, rose leaves, cherry blossoms, pink tassel & pale pink satin ribbon
  • waterfall 1 die (m376) with blush pearl highlights


  • inside the card shows the ribbon wrap with tags for sentiments
  • pale pink rose, a clock from cut & create sheet of Shabby Chic Backgrounds foam mounted on pink cardstock & a white doily


 The second card uses green as a highlight color:

  • Silver grey damask on ivory cardstock
  • Champagne organza ribbon in a bow with a hatpin, pearl & green bead is pinned through the bow
  • green paper leaves, cherry blossoms & an apple blossom flower on the side of foam mounted oval frame die (p6745) with cut & create ephemera flower


  • the oval (from the same die on the front of the card) is foam mounted with a small embellishment
  • the green die cut is from die m242 - Elegant Lines
  • the other inside is a panel from the same patterned paper with a die cut flower from the same paper - this die is an old one from my stash


Hope the 2 cards give you some ideas for your 'card ideas file' as well as showing some of the die cuts in action

Bye for now
Meg

05 January, 2018

Hello Bloggers

The Alchemy 101 & French Chic papers were picked up at the print shop. I put the French Chic A4 papers onto my Craft table in order to make some cards - had to switch my brain from grungy to shabby chic. I did so & made 6 cards.

The cards are all in different cardstock colours & fully decorated inside

Have a look at the video which shows all the details


Lavender cardstock, image from French Chic Ephemera, ivory silk flower, paper rose leaves, champagne ribbon & ivory tulle. Mats are done in dusky pink to highlight the image with white between the pink & the image as another highlighter. Interior done with lace over the champagne ribbon, images from French Chic ephemera & vintage trinket.


 Ivory cardstock, matting in the pink paper & the cover cut back 2 cm to show more of the pink paper which is a pocket on the inside. Champagne organza ribbon, narrow lace, ivory silk flower, more ephemera from the collection. A hat pin of beads


Blue papers were used on this one which opens from the bottom. Lace is tied around the top, pearls added as decoration. Ephemera from the Collection, more lace & some blue 3mm satin ribbon on the inside for pockets


This larger card is in greens with 2 shades on green cardstock, paper flowers with their twisted stems & a green organza ribbon. Inside a diecut & pocket with tags & green 3mm satin ribbon.


Lavender is always a beautiful colour to use - a lavender ribbon tied around the card, 2 punched butterflies, paper rose & rosebuds with a lavender sating ribbon. Inside has pockets, ephemera images, & more lavender ribbon.


Ivory cardstock is folded at the top, lace & ribbon decorated with 2 roses & a bow on the bottom of the front. A little book closed with a magnet & ephemera. The inside uses the multi pastel strip paper, lace, ribbon & ephemera


This card is probably my favourite. It is an accordion card on ivory cardstock closed with champagne organza ribbon. The front uses ephemera & a tag from the collection in a vintage ephemera envelope; a sign, 2 blue paper mini roses with rose leaves & narrow lace. The inside 4 pages use only patterned paper from the collection.

Hope you enjoy the cards & can collect some ideas.

Bye for now
Meg
www.megsgarden.com


30 October, 2017

A Christmas wreath

Hello everyone,
Leanne here with you today to share my latest project. A Christmas wreath using " A Twinkling Christmas" papers.
I have created the base from chipboard. Layers of gesso & texture paste were added to the chipboard shape then allowed to dry. Next I applied some faux snow & silver glitter. I have fussy cut around the pretty paper pattern designs, then fixed each piece in place. Lace, ribbon, trims, flowers & leaves were also added. 


Until next time.
Thanks so much for stopping by.
Have a wonderful day & happy creating.
Leanne

19 August, 2016

Blue Ladies mini book

Hello Bloggers

I love doing mini books & had started one several weeks ago using the Watercolours in Blue Book papers but was then stopped in my tracks when my website failed to publish;  I then had 2 weeks of computer dramas that stopped my design brain totally.

Finally got back to my mini book but all my original ideas were lost - the only thing I had done was to cut everything & make my pages etc. from pale blue cardstock - Bazzil Petalsoft.


On my list of 'To Dos' was to learn videos so that I could upload projects to YouTube - it was way down on my list but I decided it was time & pushed it to the top; I said sorry to facebook & blog postings & tried out my mini book pics in the software.

Here it is:


Not sure how the music got into it & still do not know how to add commentary
 but we are in the baby steps phase.

Products Used:


Laces - Lace 42 & L2976 on cover, spine & middle pages, L6899W on almost all pages

Pins of Jewels  on front cover

Vintage Trinkets  on front & back covers
 - handle (al 121), corners (al 128) & filigree (al 104)

Flowers & Leaves - throughout the book 
 Celestial White pack (da800) & Organza w pearl (org pearl)

Art prints by Monet -Ladies in White  S131 

All others in the book papers pack

Other notes:
Distress Ink - frayed burlap, Spine was done with the Petalsoft cardstock with the edges torn & distressed, the cabinet cards were made into little books, the laces on each page were designed as pockets for pics.


I have the new book papers Vintage Journal on my craft making desk & I am 
looking forward to making it.

 - lots of papers to cut & ideas to churn through, what colours will I use with it, what embellishments - rough or smooth & textures to investigate.  There will be no laces, flowers or frillies on this one.

Hope you enjoy my little book which I have called 'Blue Ladies' after the Monet ladies & the Ladies in hats by Harrison Fisher .

Bye for now
Meg
www.megsgarden.com


30 May, 2016

LIVE TODAY wall hanging

Greetings to all visitors & regulars to Megs Garden 
Annette here sharing the wall hanging created with one tiny piece of 
CHANTILLY CREAM
this beautiful range of papers is available 
also as downloadable to print yourself 
LIVE TODAY
 
I gessoed a piece of board, adhered muslin using 
gel medium
and then sprayed in several colours, 
the woven mesh was a placemat 
(I just knew would come in handy one day) LOL !!!
 brick work stencilled onto Kraft,
adhered lace under on left & over on the right side
white card inked and glued hessian & narrow lace
bronze embossed my frame & butterfly
adhered frame & live TODAY, 
finished base with part of a doily,
 a dangly earring, 
hessian flowers bronze key and leaves with a twist of dodo vine 
Top right corner has bronzed butterfly, hessian butterfly 
velvet flowers, leaves & a cameo
to hang I crocheted a loop in string & tied a knot to finish 
 thank you for calling by 
products available at MEGS GARDEN are:
Chantilly Cream
dodo vine
pink velvet flowers & velvet leaves
lace 
 Please take some time and scroll through the blog to view
 all the fantastic work from the GARDEN TEAM 
happy Scrapping 
hugz Annette x

15 July, 2015

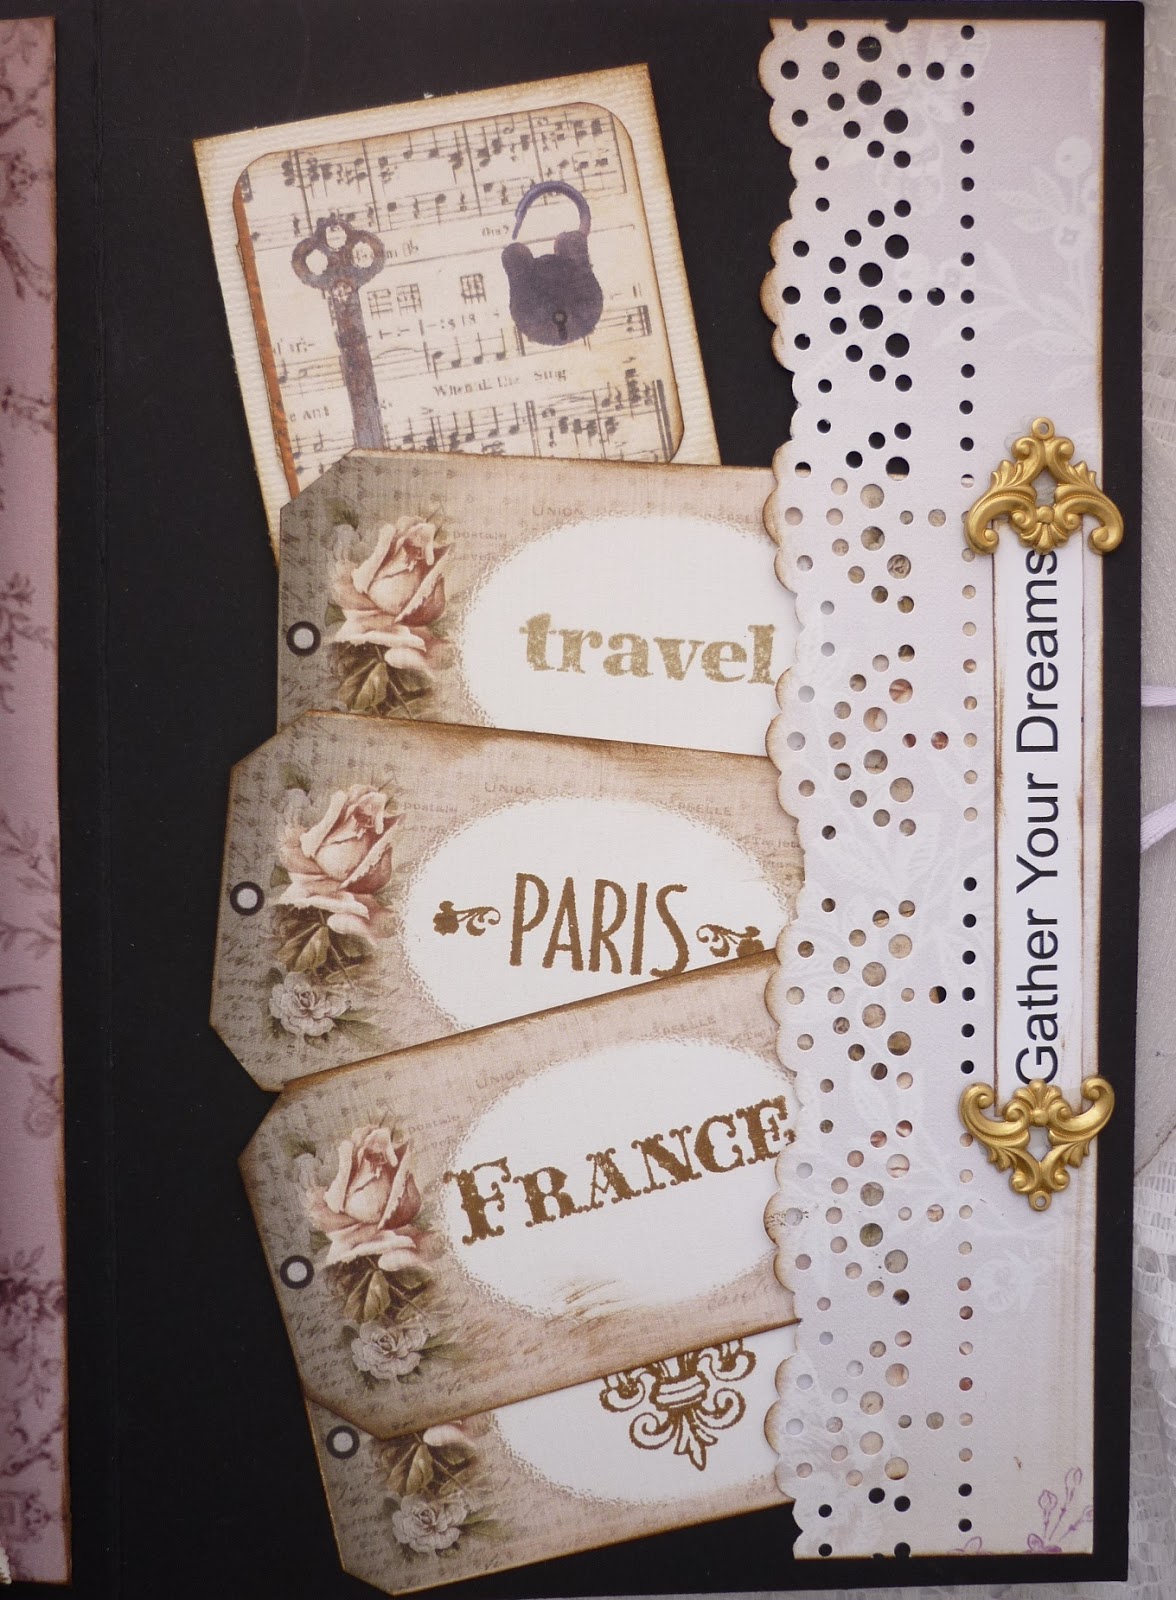
Gather Your Dreams mini book from Meg

Hello Bloggers

I finally finished this book. It sat on my project table while I had thoracic surgery;  it sat again patiently while I semi recovered; the book itself wondered if it would ever get finished.  
But I had to - other projects to start & complete. Like Christmas papers, a Christmas mini book in traditional reds & greens, a Victorian Christmas mini book, lacy Victorian ornaments, some new Australiana papers, new mini papers with ephemera project & more....


I used the 3 pale lavender papers on the cover, back & spine matted in a deeper lavender cardstock.  The cover was kept fairly plain with lilac velvet violas & leaves & some pearl sprays on the front.  No decoration was done on the back cover or spine but both were matted to match.

 Then the 2 green pages were used. The inside cover has a pocket with ephemera, and its opposite page embellished with a simple transparent butterfly with its wings lifted.


 Pages 3 & 4 were chosen to go together - page 3 has a brass bee with its wings lifted, a beaded pin, ribbon & paper flowers. Words were also added. Page 4 has a transparent butterfly


Page 5 uses the French writing paper with an envelope pocket to hide secret dreams. Page 6 has a beautiful Vintage lady, double matted & embellished with brass corners.


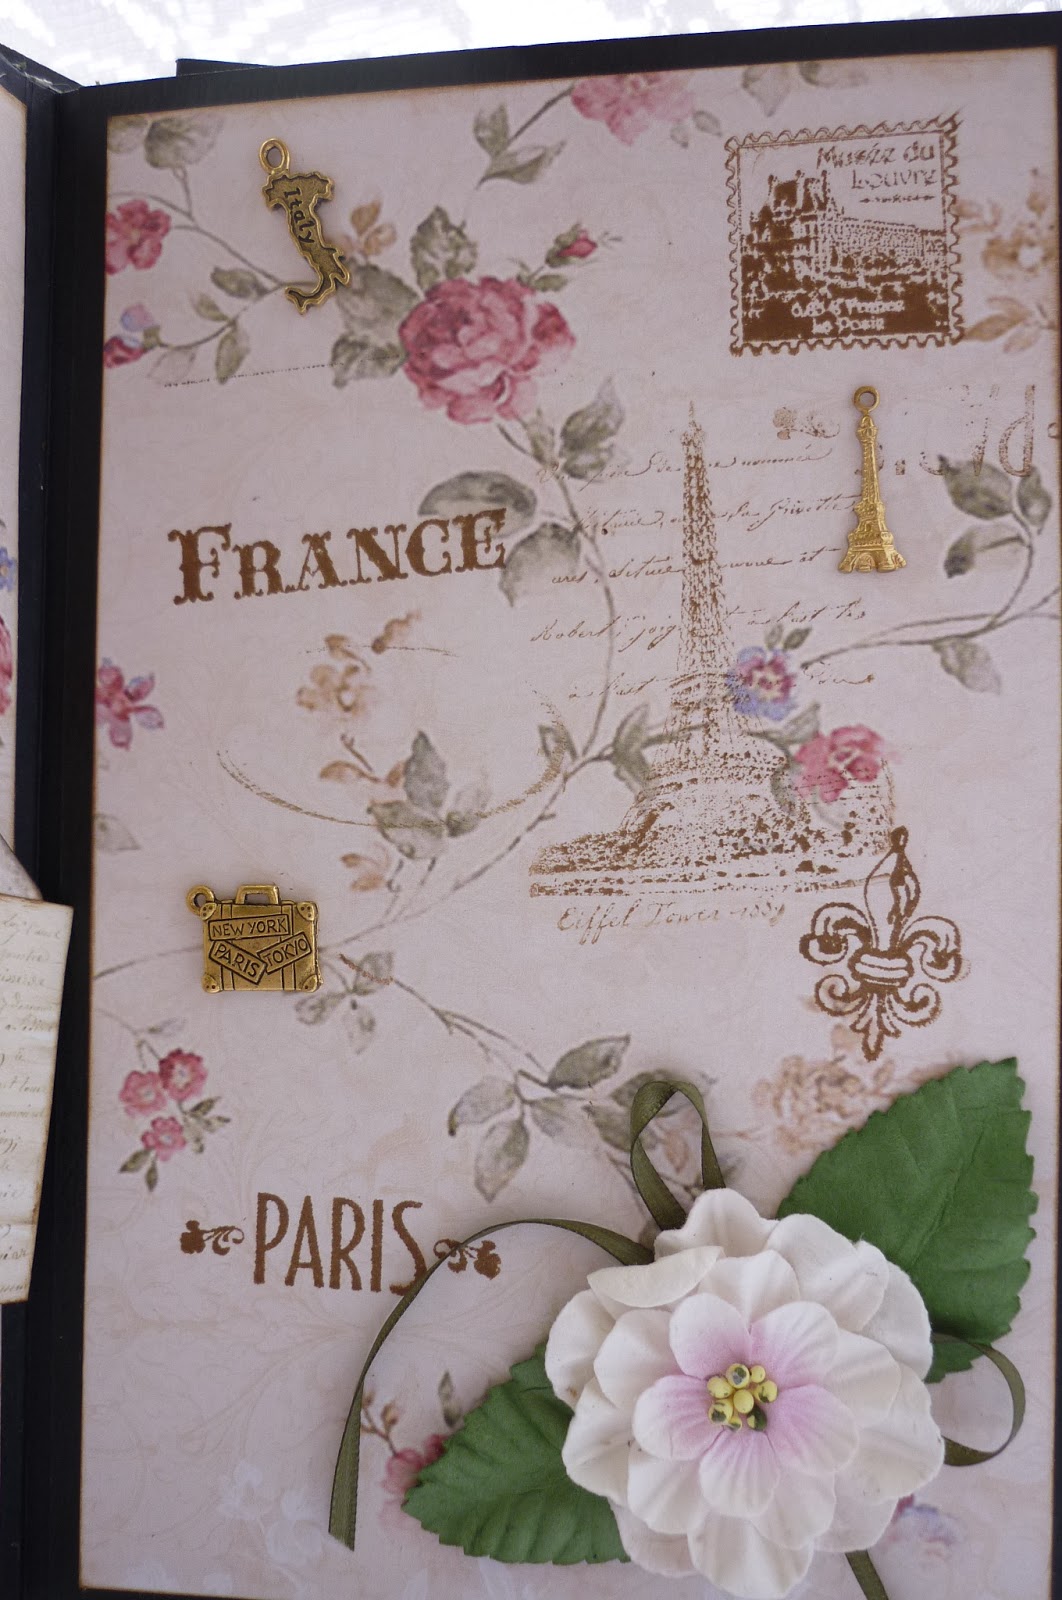
Pages 7 & 8 use the gorgeous pink papers with paper flowers, travel charms & Journey to France Rubber Stamp Collection - the theme being Dreaming of travel to Paris & France.


Page 9 is left as it is.

Page 10 is a lift out with the ribbon pull on the side & uses the 5 blue/green papers.   

The inside of the pullout is embellished with paper flowers & leaves, has room for listing your dreams on the one page & also on the tags in the bottom pocket


Opposite the back of the pull out is a cabinet card ephemera made into a small folder & embellished inside with some of the ephemera in the pack.


Over the page, I have used a page from an old French book, tucked into a mini 

square lace doily with ephemera. Wanted a little bit of very vintage here; also as a break before the last pullout  of the book.


This pullout, with the ribbon  tab, uses the 4 Mulberry papers.


Inside the pullout - on one side there is a round doily pocket with ephemera tucked in & embellished with a musical charm


The other side has a pocket down the side with tags to use for your dreams.


This  is the back of the pullout - the 2 pages allow plenty of space to list dreams.  The 2nd page is the inside back cover or the book


Hope this gives you some more ideas on how to use the Gather Your Dreams mini book kit which is available as a printed product or you can download & print it yourself.

Dimensions:
patterned pages in book kit  4.75 x 7.5"
cardstock for pages  5 x 7.75"
cover - cardstock & cardboard  5.25 x 8"
(matt - 5x7.75")

I use the Stack the Deck method: flaps 7.75" & spine 2.5"

Bye for now
Meg

From Meg's Garden: