Showing posts with label Alchemy 101 Paper Collection. Show all posts

13 May, 2019

His story

Hello everyone & welcome,

Today I have a masculine mini album that I would like to share with you. This album features paper from the Vintage Journal Cards - mixed series, plus Alchemy 101 collection and Sherlock III - A New Case A4 papers. 

The front cover has lots of embellishments starting with this die cut shape, the large gears die, some buttons that I like to collect, black seed beads and gold pearl trim. These are all great embellishments for that masculine look. I love all of the images scattered throughout as they suit the vintage style of my album.      
Each piece of paper and image has been distressed using a paper distressing tool. I followed this with lots of inking. The colour ink pad I chose was 'Gathered Twig'.
There are lots of pockets and tags in this album.

Plenty of room for writing or adding photos.


This album is held together with O rings, allowing room for more pages to be added at a later date.
I am so pleased with how this album has turned out. Be sure to stop by Meg's Garden online store for products used to create my masculine vintage journal album.

Until next time. 
Thank you so much for stopping by.
Have a wonderful day & happy creating.
Leanne

25 March, 2018

Easter eggs by Meredith Hilly


Hello everyone.
I would like to show you the Easter eggs I made using Megs Garden embellishments and papers.
I used duck eggs as they are larger but chook eggs can be used instead.
After blowing the egg yolk out I painted this egg with a moss green paint and then a coat of crinkle crackle paint. I used toilet rolls as frame work for all of my Easter eggs stands. Decorating the roll in different ways.


This velvet flower was the perfect colour for my egg.


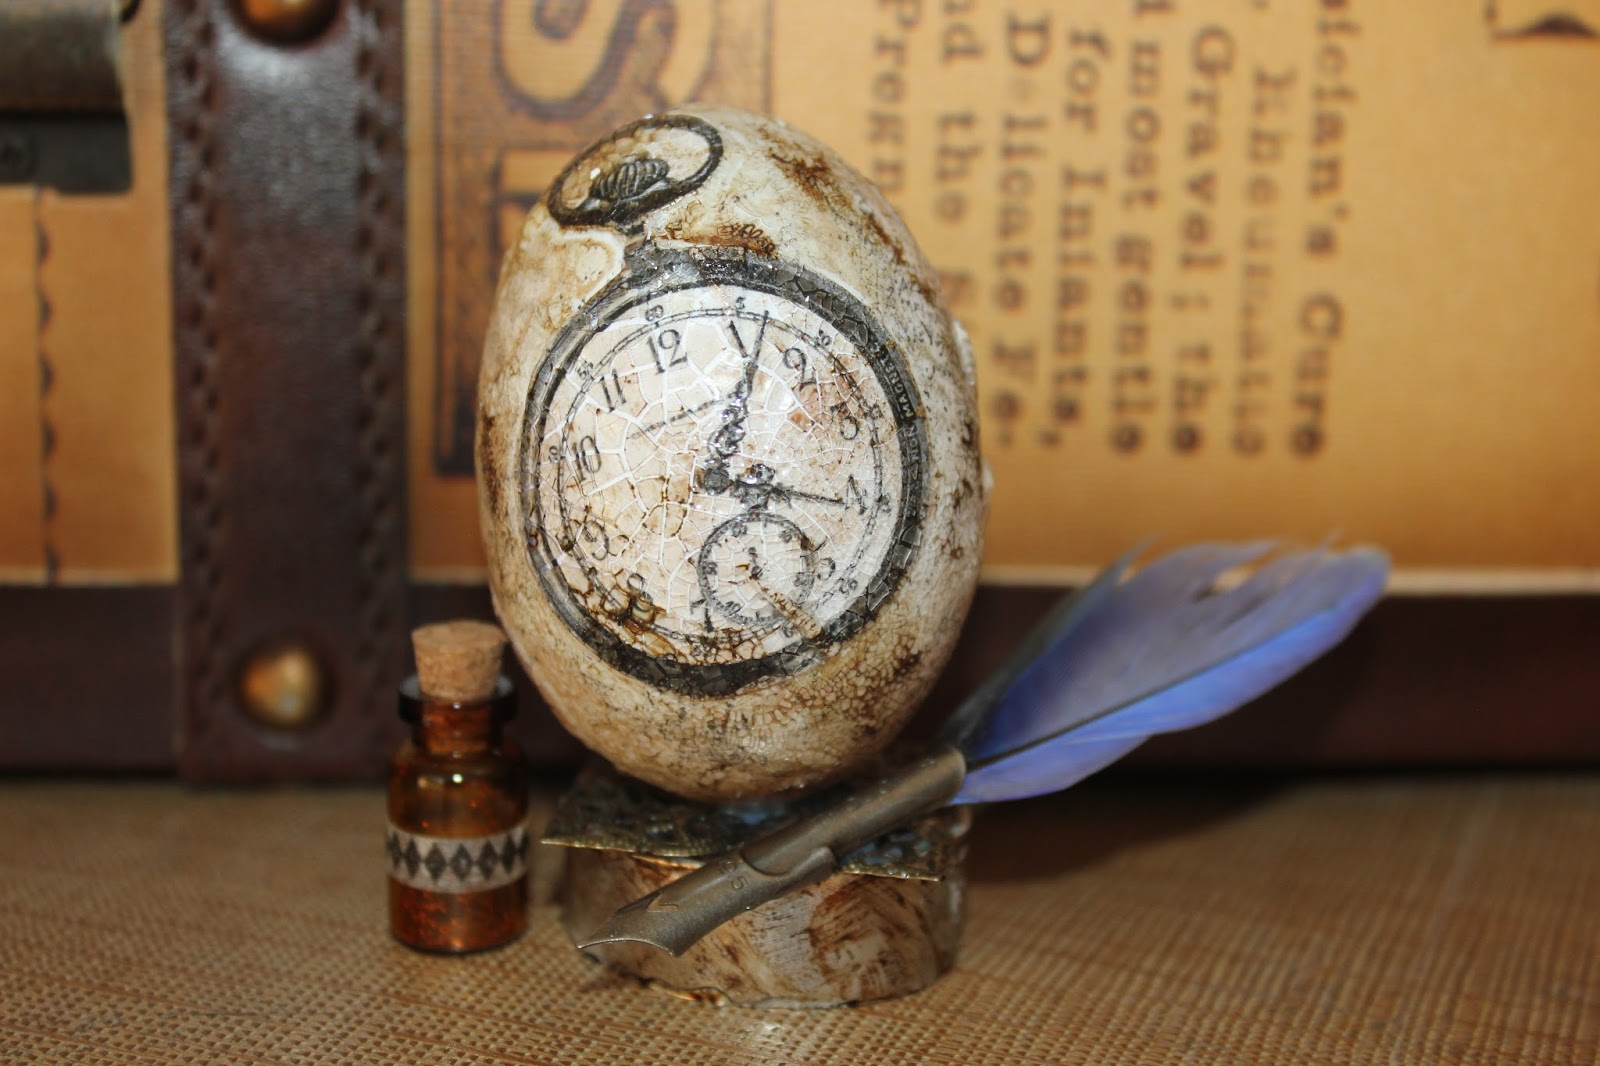
This lovely egg I painted first. After drying I cut out pictures and scrunched them into balls. There are so many pictures you can choose from at Megs garden to cut out. Clocks , flowers , ladies. The possibilities are endless. The scrunching breaks down the paper fibre making it easier to glue onto a curve surface. Then using wood glue mixed with water I softened the paper. Gentle smoothing the paper onto the egg. Don't over work the paper as it will loose the picture and colour.


While the eggs has the wood glue mixture on it you can attach lace or ribbon to the egg.
When the egg is dry the hole used to blow the egg can be used as a anchor for flowers and leaves.


I did the same process with this egg. Glitter works great on the flower and pictures.


Adding pearls and small embellishments like dragon flies makes the egg more detailed.


The base of this egg stand was painted with pink paint and I added lace with pearls drops. I cut up the round silver trim ribbon to use  for smaller decorations. Don't ever be afraid to cut off small portions of lace and ribbon. They make wonderful embellishments.


And now for the boys.  I  choose my photos to cut out from  Alchemy 101 papers. I followed the same process as above but when the egg was dried I coated it with crinkle crackle. When this layer dried I used a dark coloured ink pad to wipe over the egg. This will go into the cracks. Before the ink dries wipe of excess with a tissue.


This egg I did not paint. I stamped it with stamps. You will need to roll the egg along the stamps to get most of the image on the stamp.


Again I used a toilet roll and painted it. Attaching the ribbon with the very cute cog and frog.


I hope you enjoyed this post as much as I did making the eggs. There is so much to be created using megs garden supplies on your very own Easter egg. Give it a try. Makes a lovely gift at Easter time without the calories.


Megs Garden

My Stash
Paint
Ink


19 March, 2018

Gift envelopes with alchemy 101 | Marina Gridasova

Hello Meg's Garden fans!
Marina is here today and I want to share with you my new projets with  Alchemy 101 collection. You know this is vintage collection with mixed-media look but also it's perfect for men works. Want to see the proofs? Here they are!  :-) Three different gift envelopes with one Alchemy 101 collection :-)
the first one
 some close-ups:


 I wanted to create different works, so decided to use contrast papers and here background is in cold grey tones and central cluster is in warm brown tones. For all envelopes as first step I fussy-cutted all the details from Ephemera sheets and after just layered all of them before got the perfect result.

the second one:
 details:


 here I used warm colors for the background and added dark elements for the contrast. the big clock is perfect for the main accent :-)

and the last one for today
 a few details:


this envelope is my fav :-)  because it is in light colors, despite the vintage appearance of the collection and the abundance of brown. and the best part of it this little pretty tag :-)

Hope you were enjoyed and inspired by my works and this collection and will create your oun Alchemy 101 projects!
Have a great day,
Marina.

05 February, 2018

happy memories together layout by Marina Gridasova

Hello! Marina here again with another one oylish layout using Alchemy 101 collection.
 a few close-ups:


I used this sheet for the background and the dark layer is Alchemy 03 paper. Most of layers were cutted from this sheet and from another pages of Ephemera from this collection. It was great that ephemera sheets had enough of elements different sizes and colors, because here I need to use some white accents (because this colour is on the photo) and I cut some of them and used. Also great here are some different tickets and tags and I use them here too.

22 January, 2018

Remember layout by Marina Gridasova

Hello ladies and gents! Marina here with you today and I'm happy and proud to be a designer for Meg's Garden! Woohoo!
And here is my first work with Alchemy 101 collection.
 details:


This collection is vintage in neutral colors, so I can create a layout about my nephew with mixed-media look. I cut a bacground with Silhouette Cameo and stamped the bottom layer to add more texture. From my stash I used banner, chipboards and hand-made cork embellishments.
Hopeyou will like my work )))
Have a good day,
Marina.

10 January, 2018

Shabby Chic Backgrounds, Die Cuts & Magical Creating

Hello Bloggers
Happy, Healthy, Fun & Creative New Year

Lots to report to you - a New Paper Collection
& a New Product Line


Shabby Chic Backgrounds:

A set of papers in the shabby chic style
- in pale pastel colours designed for papercraft art
- that requires a simple paper with a light colour
- but with a very small amount of detail to create a perfect background.

There are 12 background papers - pinks, lavender, greens, blues, creams, music, lace & stripes
plus  2 papers of watercolour florals that are
perfect to use with our NEW PRODUCT LINE

The Backgrounds are available in digital download or printed in:
A4 papers
Card Artist packs

Preview video: https://youtu.be/8XIgeOnCTJw

New Product Line - DieCuts
 

I have been looking at these for quite a while - started searching for dies that would suit the Meg's Garden style of papers & embellishments & I have combined several suppliers to create a fabulous collection.
There is a section of stand-alone dies:
flowers, wreaths, tags, circles, curls, corners, sprays, borders  & more....
link to dies:  http://megsgarden.com/contents/en-us/d10813_Dies.html


The other section contains Bundles of Stamps & Coordinating Dies:

Link to Bundles: http://megsgarden.com/contents/en-us/d10816_Bundle-of-Dies-_-Stamps.html.


The philosophy to the bundles is Layering; layer the stamps on top of layered dies & create dimension on your project.  Each bundle has layering tips as shown in the bundle above - Vintage Roses - with five different roses of various sizes, and plenty of corresponding leaves, you will be able to to make endless floral arrangements!   55 stamps + 16 dies in this bundle.

You can have serious fun creating magic on your papercraft art piece


The other papers from the end of last year are still new:

1.   French Chic - a feminine, pastel collection ideal for the shabby chicers


available  in digital download or printed in:
Mini Book/Album
A4 papers
Card Artist Packs

Link to Papers:  http://megsgarden.com/contents/en-us/d10810_French-Chic.html
Preview Video:  https://www.youtube.com/watch?v=k_mOnZttmps

Ephemera in all the shades to embellish...
Tags, Tickets, Frames, Flourishes, Posies, Vintage Ladies, Birds, Butterflies...

2.  Alchemy 101 - this will be a series of grunge for Mini Albums & Papers
 - ideal for mixed media additions
 
18 pages of beautifully distressed & inked grunge pages. 8.3x11",
8 double pages 5x7", 1 alternate dbl page (use as pages or for cover decos);
1 dbl lined pages; 5 pages of ephemera, tags, tickets, tabs & cabinet cards

available  in digital download or printed in:
Mini Book/Album
A4 papers

Preview Video:  https://youtu.be/0nw_nA-6NM4
Link to Papers:  http://megsgarden.com/contents/en-us/d10808_Page-457.html

Ephemera are grungy, fabulous & suit the papers perfectly       


What a way to start a magical year of inspiration!       

Bye for now
Meg
www.megsgarden.com

Attention Aussie Paper Artists - join the Design Team & you can start
 playing with these papers - email me 


Meg Foreman – Mgr Director Meg’s Garden P/L
megsgarden@outlook.com
www.megsgarden.com
megsgardenblog.blogspot.com
https://www.facebook.com/megsgardencraftsupplies
https://www.youtube.com/user/megsgardenpapercraft.videos