Showing posts with label canvas. Show all posts

29 August, 2019

Blank Canvas

This was a work of love, a blank canvas, so to speak!


I covered the front of what was a plain canvas, with Meg's Garden papers and inked around the edges.
Next, I hand sewed pearl beads to an old doily which was then glued in place. 


The main feature is the gilded metal oval frame. The whimsical picture of a pensive lady suited this perfectly. A fancy glitter die cut completed the look. 
The frame was secured to the canvas, and adorned with beautiful fabric flowers, ribbon and pearls. 


For the full range of flowers, ribbon and other decorative items, excellent for vintage work like this, be sure to visit Meg's Garden!


Mary

10 August, 2018

Mixed Media Canvas


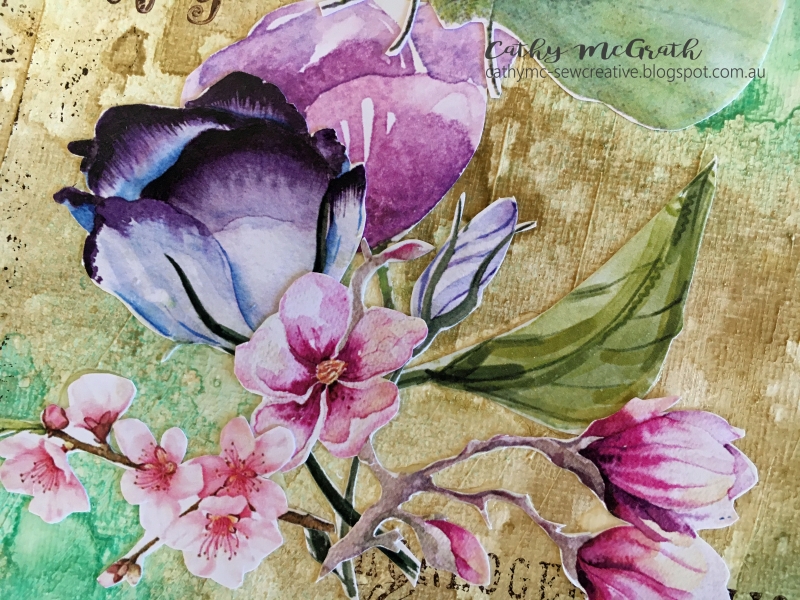
Hello everyone! I hope that you are keeping well. With each of the collections available at Meg's Garden, a special addition are the cut and create ephemera sheets.  I had a few left over from a few collections and I decided to use them as a collage to create a mixed media canvas.


I fussy cut the images with my scissors and adhered them using Prima's soft matte gel.
I used some stamps by Tim Holtz to create my background, and some of Kaisercraft's texture stamps to add a vintage look to the canvas.
I used inks and papers that were of similar colour when I was planning my design. It was also complimented with brown to add a vintage aged look.

After completing one canvas, I had a lot of fussy cut pieces left over so I made another canvas.

I linked images that had a similar watercolour look.


I also wanted the butterfly to be a main focus for the canvas.
Again, I used Prima sprays in the background, and kept them as muted as possible to keep in the same style as the main images.
The same techniques of adhering the images was used and the same stamps were used to create the background.


Supplies:

Meg's Garden - cut and create


Thanks so much for stopping by Meg's Garden today!
Hugs from Cathy


25 February, 2016

Chantilly cream (dreamer) canvas and LO

              Hi Bloggers and lovers of Megs beautiful goodies,Trish here today with a couple  of  beauties I  have whipped up (parden the pun)
My Canvas I have called dreamer
I have used the 6x6 card pack,Flitter flakes on the butterfly,velvet flowers and die cut leaves from Megs Garden


I added part of an old handerkerchief to my canvas

My granddaughter Eilidh sounds like Aley
I used 6x6 papers,i also used the cut and create A4 paper for my LO
I had some German scrap lace border so used that for contrast


I hope you enjoyed your stroll through Megs garden and enjoyed the Chantilly Cream as much as I did

09 January, 2016

Mixed Media Canvas by Mabel Sim


Hi! Mabel here and I'm making a Mixed Media Canvas today.

I'm using Café au Lait Papercrafter Pack (20126) for this entire canvas. I simply fussy cut of the ephemera as well as distressing the edges of the papers with my Prima Marketing distressor. I also used Twinkling H20s from ColourArte for the watercolours you see. For my sentiments, I used Kaisercraft's Azure from Blue Bay collection.


List of Supplies 

Meg's Garden

Puffy Paper Flowers (puffies)
Café au Lait Papercrafter Pack (20126)
Diving Sparrow (m0090)
Ivory Pearls (iv pearls)
Princess Cut Filigree (h100)

That's all for this post!
Thanks for reading! :)


22 February, 2015

"Gather Your Dreams" - Mixed Media Collage Canvas

A big hello to Meg's Garden fans and friends! Sarah here today and I am so excited to share my first Meg's Garden Design Team project with you! The Butterfly Collection is just so beautiful to work with and one of my favourite pages in the collection is the "cut & create" page, which is just full of beautiful little bits of ephemera that can be layered and collaged; so I decided to use the cut & create elements to create a collage canvas.
I started off by cutting an 8x10 piece out of the "Another Delicate Garden for Butterflies" paper to fit the top of my canvas - this paper has a very subtle pattern which peeks through the shimmery watercolours in places. I used a butterfly stencil and modelling paste on the background paper before painting it. I then cut out all the little ephemera from the "cut & create" paper and created my collage, working from the bottom right to the top left corner. I tucked pieces of lace from the Meg's Garden store in with the collaged papers for added texture. I fussy cut the butterflies and title from The Butterfly Collection papers and added them on top of the collage with a collection of flowers from the Meg's Garden store and from my stash. I used the shimmering watercolours on the flowers and to splatter the canvas. I also tucked in a few metal elements from Meg's Garden. Finally, I added a few different sized half-pearls from my stash. Here are some close-ups and different angles of the finished canvas!


Thanks so much for stopping by the Meg's Garden blog today! I hope you liked my "Gather Your Dreams" canvas!

Meg's Garden Products Used:
The Butterfly Collection papers - cut & create; Another Delicate Garden for Butterflies and The Butterfly Mini Pack.
Vintage Trinkets - Filigree Flower, Extra Long Filigree and Butterfly.
Cotton Lace (Cream)
Small Roses (White 1cm)

17 September, 2014

Butterfly Bay Window by Angela Johnson

Hello my crafty friends.

When I received my Slide Mailers from Meg's Garden, I really loved the shape of the windows.
I had so many thoughts and ideas rolling around on how to use these little beauties, I just had to use one.
These are obviously designed to hold securely your glass slides for postage,
but I had a different purpose in mind.
Coupled with some beautiful paper from the Correspondence Collection
designed by Kerry-Jean Watson and some butterfly images, I created myself a little bay window scene.


Can you tell that recently I have been on a bit of a canvas and Mixed Media kick.

For this project I carefully separated the pieces of a Quad Slide Mailer, and slightly curved
the windows to create my bay window.
I then cut my sheet of Distressed Letter paper into little bricks.
To allow the bay window to pop, I dry brushed my brick background with a little Gesso.
I also die cut the leaves and flowers from paper from the Gentleman Collection.

Meg's Garden Products Used
Vintage Photo Distress Ink
6" x 8" Canvas
Matisse Turquoise Background Paint
Gesso
Flower Die

I thought this might make a wonderful gift to a special someone.
So as a bonus project, I created a handmade card to accompany it.


Meg's Garden Products Used
Other Products Used
Vintage Photo Distress Ink
Leathergrain White Cardstock
Cardstock Scarps for Matts
Cheesecloth Offcut
Gesso
Flower Die
Doohickey Die
Chocolate Kaisercraft Pearls

Thankyou all for stopping by and happy crafting to all.

30 July, 2014

The Sky's the Limit by Angela Johnson

Hello all my crafty friends.
Today I am bringing you my very first Design Team Project for Meg's Garden.
When I first received my papers from Meg's Garden I was so excited, the papers were gorgeous.
The only problem was, because I liked them, I didn't want to cut into any of them.
Well, that wasn't going to get me far was it.
So I took a pair of scissors, took a long deep breath, and cut into a sheet.
For this month's project I choose to work with The Gentleman's Collection
designed by Kerry-Jean Watson.
The papers are beautifully distressed and aged, and are perfect for masculine projects.
I thought this canvas would look great hanging in a gent's office for some inspiration when needed.


 This paper collection just called to me.
I love hot air balloons; I think they are majestic and awe inspiring.
I still remember around 17 years ago travelling to work at 5am and seeing their outlines
in a misty sky. Simply Beautiful.

For this project I wanted the look of a sunrise, so I cut 2 strips the size of my canvas.
I then cut both sheets at one time so the rays would line up.
I distressed and inked all my edges with Vintage Photo.
I also moulded each balloon and banner gently to give them a 3D look.
For the quote, I took the commonly used 'The sky's the limit' and added to it.
I really like how it turned out.

Meg's Garden Products Used
Other Products Used
Vintage Photo Distress Ink
4" x 12" Canvas
Matisse Turquoise Background Paint
Black Sharpie

But wait, there's more.
What did I do with all the leftover pieces of paper?
I made a card and a tag of course.

The first is quite a masculine tag.
I just loved playing with that starburst/sun ray pattern.


Meg's Garden Products Used
Other Products Used
Vintage Photo Distress Ink
Kraft Cardstock
Turquoise Brad
Yellow Leaf and Blue Flag
Recycled Packaging
For my tag however, I wanted to take the papers in a different direction.
I wanted to show the versatility of The Gentleman's Collection.
I created a feminine tag with lots of Meg's Garden embellishments.
  Meg's Garden Products Used
Other Products Used
Victorian Velvet Distress Ink
 Sheer Ribbon, Gold Bottle Cap
Chocolate  Pearls
Recycled Packaging (used as Tag base).

Thank you all for stopping by and happy crafting to all.
 

24 July, 2014

Mixed Media Canvas


Hello everyone! Today I am sharing my first project as a new Design Team Member with Meg's Garden. I have decided to create a canvas. After seeing the papers, I felt inspired to create a vintage styled dress. The papers I am using are from the Correspondence Collection which are designed by Kerry-Jean Watson.


To create the background, I cut random strips of Tucson 1909 and French Account and glued them down with Mod Podge to the canvas. I then applied some stencils using modelling paste to add texture and also where the two papers joined. Once dry, I used different pink and brown mists and sprays to decorate.

To create the dress, I used French Account and Mademoiselle Louise. I made a paper mock up first to see if I could actually make it! I used a basic dress template to glue/attach each section onto as I constructed each section. The base section is 30cm x10cm and is just fan folded and attached using Scor tape.I also inked the edges to add definition to each section using a distress ink.


To create the ruffle/gathers, I cut 3 scallops and pinched them into shape. I then added bows and roses.


I used a distress ink to colour the centre of two of the flowers, just to add some colour.

Meg's Garden Supplies
Bridal Veil Flowers
TCW Specimens


These papers are just so versatile and I hope you have a chance to create with them.


Thanks for stopping by
and have a great day!
Cathy