Showing posts with label cut & create papers. Show all posts

10 April, 2020

Butterflies in Pink & Green


Who doesn't love butterflies? Using Meg's Garden Pink and Green collection, I have created another two cards, ready to fly.


The base is a delicate green damask design, with distressed edges and inked in a toning colour. 

I selected two butterfly images from this beautiful collection, and cut around with decorative scissors to look like postage stamps, and mounted on cardstock using the same effect.


A piece of muslin is placed between the two butterflies, with a delicate pink paper flower, sheer ribbon bow and a small satin bow completing the look. 

This card could quite easily be used for a birthday, thinking of you, or get well soon sentiments.


With Mother's Day in mind, I used similar techniques and design for this card, but in pinks. The muted base again sets the perfect start for embellishments.


Delicate pink embroidered ribbon is placed at opposite edges to the butterflies, add in feathers, a pastel pink flower, satin edged ribbon and fancy bling complete this pretty in pink look.

All available now in Meg's Garden!

19 December, 2019

I Believe in Santa


For something different this Christmas, I have created a tri-fold card. 

Not only a lovely card to give this season, but can also be used as a table decoration piece.


Red, green and glitter gold ribbons cut and adhered at an angle completely cover and form the front of the card.

Embellishments from Meg's Garden, including gold leaves, a beautiful fabric flower and a Cut & Create sentiment to finish.


Inside is more ribbon, this time a gathered panel for effect and texture. 


Another beautiful Christmas image from the new Christmas Cut & Create papers features in the centre.


Keeping with traditional colours, I embellished with coordinating green and gold leaves and glitter flowers.

These items, and so much more, can be found in Meg's Garden, for a truly handmade Christmas!

Mary


19 August, 2019

Hello Paper Artists
We are committed to continuing our creative year with some new Vintage Papers 


1.  New Junk Journal
with Corrugated Card Cover


Both Digital & Printed Papers Available at:https://megsgarden.com/collections/junk-journals

Video of a Finished Journal (shown above):  https://youtu.be/B7HYbSHlIWk


As well as this journal there is also :
2. A new set of Cut & Creates Ephemera in vintage style
(only 3 are shown here- video shows all)


9 papers 8.3x11", 300dpi, jpg format - 8 with ephemera &
 1 with vintage lined papers
  • Vintage in style so they can be used with any of the vintage style art projects including the above book
  • Designed for Junk Journals but ideal for any project looking for that perfect vintage addition
  • There are several larger images that can be cut for tuck spots or as pages in a journal
  • There are several images that can be cut into washi tape - especially the left side on the bottom paper.
  • Add words to the tags to define your project
Video of  New Vintage papers: https://youtu.be/F74N2boUy3M

What a way to continue a magical year of inspiration!       

Bye for now 
Meg
www.megsgarden.com
 
Meg Foreman – Mgr Director Meg’s Garden
megsgarden@outlook.com
www.megsgarden.com
megsgardenblog.blogspot.com
https://www.facebook.com/megsgardencraftsupplies
https://www.youtube.com/user/megsgardenpapercraft


14 August, 2019

A Decorative Folio

Hello everyone & welcome
Today I would like to share with you a decorative folio that I have created. This would make a lovely gift and could be used for writing or drawing.

The outer cover is made from chipboard, and has been covered with patterned paper and pieces from  cut & create sheets which are available from Meg's Garden online store.


The cover has also been embellished with die cut shapes, ribbon, lace, cheesecloth, a button & metal charm, seed beads, paper flowers, self-adhesive pearls as well as punched out paper shapes. There is lots of paper distressing using a paper distressing tool. I have inked the edges of the patterned papers with distress ink called walnut stain & Inka Gold: Gold was used on the edges of the chipboard cover for a touch of elegance.  


Inside the cover there is a tea-stained envelope that has been embellished with a paper doily, lace, die cut & punched out shapes as well as pieces from the cut & create sheets.


With some handmade paper ready for writing or drawing this whole bundle of paper can be easily removed or individual sheets can be removed one at a time.


A decorated card with a tuck & a tag sit happily inside the envelope.


The back cover of the folio.

I hope I have inspired you to give this project a go.

Until next time.
Thank you so much for stopping by.
Have a wonderful day & happy creating.
Leanne

09 May, 2019

Concertina Queen

Hi Everyone,

Using one full sheet of Meg's new Art Tags, I created this special friendship card. 


By using the lines as my guide from the individual tags, I was able to make the once flat sheet into a concertina card with the Tag designs as my base. I trimmed the Tag sheet, removing the tabbed tops to create straight edges.. However, if you take a close look, you'll see I've repurposed the cut off tabs as embellishments in the card! 


I wanted a contrasting yet complimenting colour for the other side of the card. As always with Meg's vast collection of patterned paper, I was able to find the perfect blue floral print for the card. This also gave me my colouring guide, bringing the blue from inside to feature on the front sides. 


With a friendship card in mind, I found appropriate sayings and sentiments to decorate, whilst also leaving blank spaces for the giver to write their own words. 


From past Cut & Create collections, as well as Meg's range of beautiful flowers, I was able to pick the perfect tonal embellishments, and also imagery complimenting the friendship theme.

Using ribbon from Meg's shop, the final touch to the concertina card is wrapping it up like a gift, making the perfect card and gift in one for someone special. 


Julia

03 April, 2019

When you're searching for a pen and paper..


We've all been there, on a call or needing to write down a thought before it disappears, we can never find a pen and paper when we really need it.. 

With this (daily!) conundrum in mind, I was inspired to create post it note Tags with Meg's new series of Art Tags, so I can always have pen and paper at the ready!


The perfect size to be handheld, lightweight, and can easily hold a magnet on the back for more placement options, the new Art Tags have many uses and functions - as well as looking pretty!


With both masculine and feminine Tag designs available, I created note pads to suit both, as well as making them ideal for any occasion or gift. 

Decorating the Tags was a joy, using past and present Cut & Create collections. 
One of my favourite things about using Meg's Garden designs, is that no matter whether old or new, the collections will all tone - so finding that perfect embellishment to finish off any project is easy and stress free.     


Using the Tag shape in full, the design gave me the perfect area to pop through an eyelet to attach the pen. 
I used coordinating ribbon to anchor the pen to the Tag, as well as loop through the pen lid - making sure you're never without a trusty pen when you need! 


I hope I have inspired you to check out the new Art Tags, and try something creatively new today!

Julia 

01 April, 2019

Tag Marks the Spot

Hi Everyone,


As an avid reader, I am forever starting new books and needing something to mark my spot to come back to when reality calls. As soon as I received my Art Tag's, the latest instalment to Meg's Garden,  I was instantly inspired and knew exactly what I was going to make -bookmarks! 


From one page of Art Tags, accompanied with Cut & Create sheets, I created 4 bookmarks. 
With a variety of colours and patterns in both masculine and feminine designs, the possibilities are endless.   


As with all Meg's Garden collections, each blends in, is suitable and coordinates with collections past and present, so finding tonal and fitting embellishments was easy, and most importantly - fun!  


I used few embellishments, including background stamps and feathers, wanting to keep the main focus to three or four selected Cut & Create images. Each cut out is inked around the edges, some with distressing, so they all have their chance to stand out.


As the finished Tags need to be relatively flat for use as a bookmark, I was able to go all out decorating the tops with ribbons galore! Doing this was also a good stash buster, as I was able to use up many left over pieces of ribbon and lace.


I can't wait to see these bookmarks spilling out atop of the latest best seller!


Julia


16 February, 2019

Awesome Foursome

Hi Everyone,


I was inspired by the large and beautiful single flowers featured in the Cut & Create sheets, I gathered all my left-over bits and pieces and used them to make four simple but stunning cards.


The Cut & Create flowers are easy to trim around and mount - I then layered with laces, ribbon tied into bows, bling, pearls and paper flowers.


Spoilt for choice in the French Roses collection, I selected a background paper with delicate pinks to feature the bold blood red hues and a muted cream paper to tone with one exquisite ivory bud. 


Finally, to make a decision on a sentiment! French Roses has so many evocative and whimsical words and phrases with delightful fonts to pick from. 

This collection has been a joy to work with.

Mary

13 August, 2018

So in Love with You ~ Spring Pastels

Hello Mary here today to share a layout created with the A4 Spring Pastels  Range

So in Love with You


The inspiration for my page started with the gorgeous Vintage Print on Vellum Image .I received it in the last Package of DT goodies and I was instantly drawn to the colours and then the sentiment ~ So in Love with You inspired me to create another page for my Daughters wedding album and how divine is the Spring Pastel PP !


I used the "Love" sentiment from the Cut and Create sheet which I shaded with mauve ink and also added the elegant lady from a Cut and Create sheet at the side of my photo.

In amongst the flowers I have made a bow with sheer ribbon and also placed Dodo vine wire and a couple of fussy cut flowers from the cut and create sheet 


I was really happy with how this layout turned out.
And because I hate to waste anything and had some paint left on my palette whilst doing a project I created a tag with a beautiful image from the Vintage Beauties Cut and Create Sheet along with the Dream Sentiment, I can now add this to a layout or a card.
You can find so many beautiful products at Megs Store for all your creating needs.


Thank You for calling by
Happy Creating
Mary x


10 August, 2018

Mixed Media Canvas


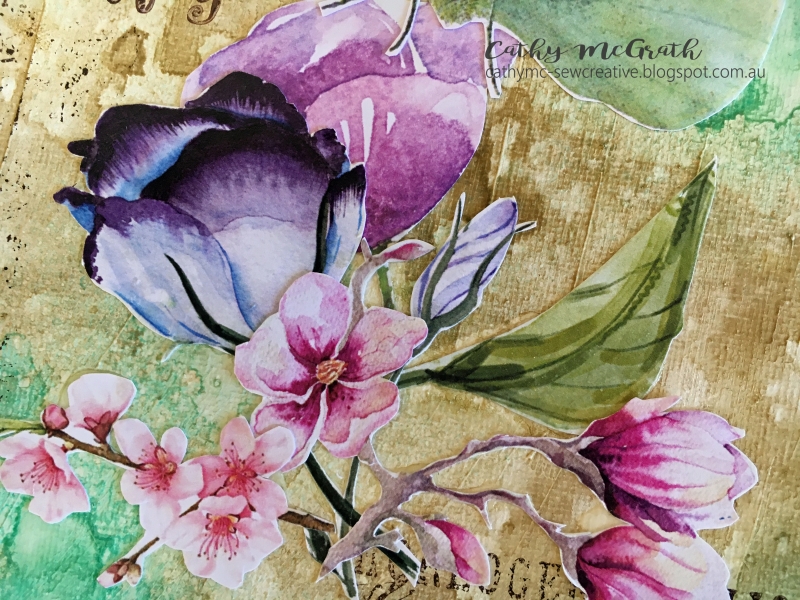
Hello everyone! I hope that you are keeping well. With each of the collections available at Meg's Garden, a special addition are the cut and create ephemera sheets.  I had a few left over from a few collections and I decided to use them as a collage to create a mixed media canvas.


I fussy cut the images with my scissors and adhered them using Prima's soft matte gel.
I used some stamps by Tim Holtz to create my background, and some of Kaisercraft's texture stamps to add a vintage look to the canvas.
I used inks and papers that were of similar colour when I was planning my design. It was also complimented with brown to add a vintage aged look.

After completing one canvas, I had a lot of fussy cut pieces left over so I made another canvas.

I linked images that had a similar watercolour look.


I also wanted the butterfly to be a main focus for the canvas.
Again, I used Prima sprays in the background, and kept them as muted as possible to keep in the same style as the main images.
The same techniques of adhering the images was used and the same stamps were used to create the background.


Supplies:

Meg's Garden - cut and create


Thanks so much for stopping by Meg's Garden today!
Hugs from Cathy


24 July, 2018

Getting in gear for a new case.

Hello everyone,
I have a new layout to share with you today. I have used the Sherlock lll A New Case 12"x12" patterned papers, the cut & create sheets & corrugated cardboard to create my vintage grunge style page.


I have used the following products:-
Metal dies: Gears Large:M277 
                   Greenery: M338
I have used lots of metal charms & some ribbon, jute twin, mesh trim, products available form Meg's Garden Online Store.

Until next time.
Have a wonderful day & happy creating.
Leanne