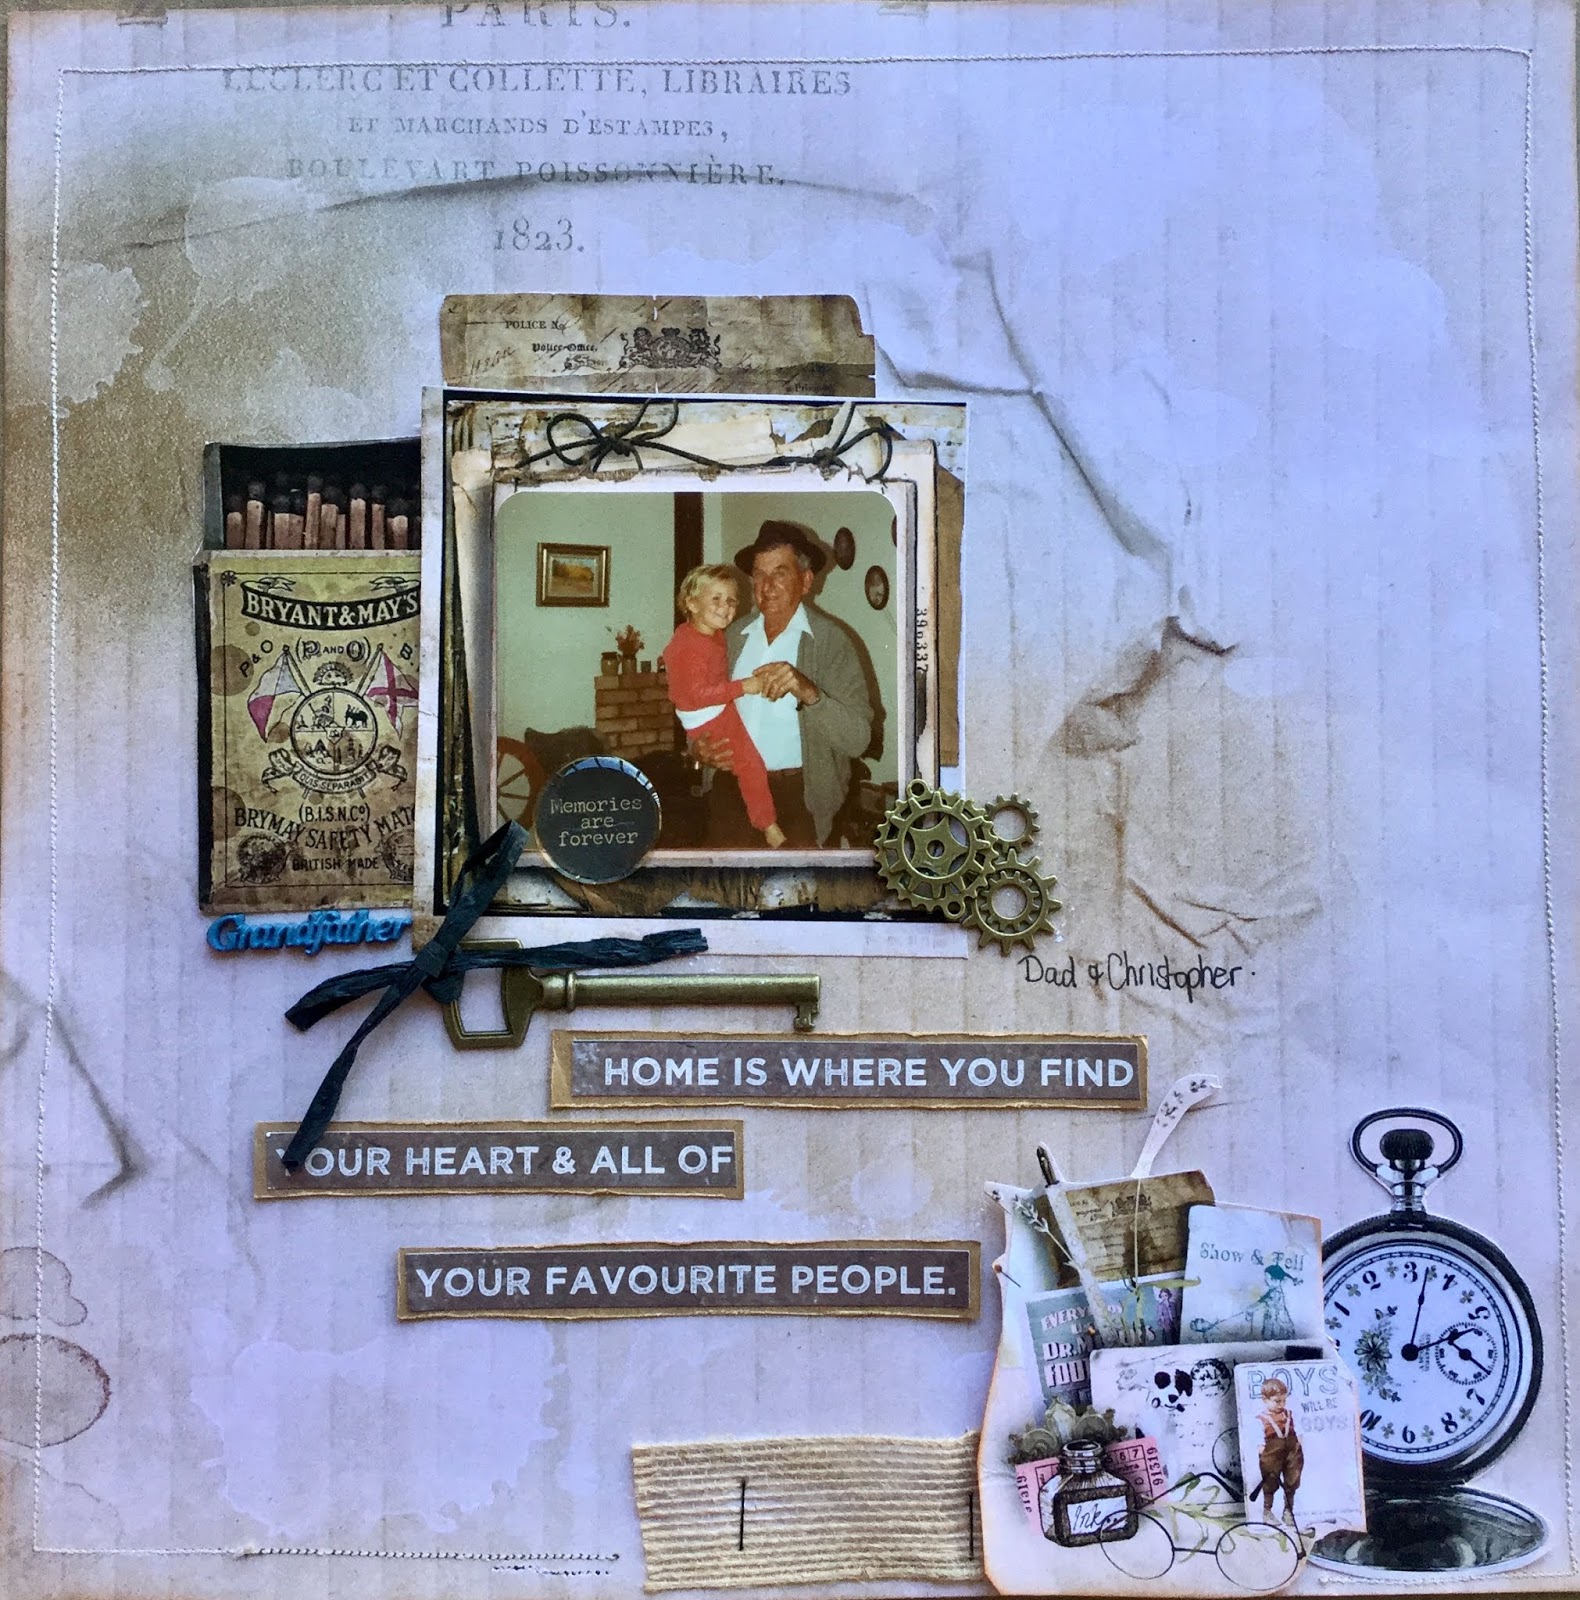
I also layered some coggs in the corner of my photo and placed the key underneath tied with black raffia. The box of matches I cut from the cut and create sheet and wanted to add this as my father was a smoker from a young boy. For a mat for my photo I layered images from the cut and create sheet .
Thank You for calling by, I hope you find time to be creative and visit Megs Store for a whole range of beautiful products to create with. Check out the DT inspiration on the blog for some lovely inspiration.
Happy Creating
Mary x
Hello Mary here today to share a project with you using the Sherlock Journal Vol. 11 Range.
When I received this range I knew exactly what I wanted to create with it. I take photo's of my family vintage photo's with props that belonged to my family, a friend said I should make a book of them for future generations, so some of those photos make an appearance in the book and some are the originals. Sherlock Journal Vol. 11 is perfect for such a project.
Because I did quite a few pages I thought I would show a few in pictures and also made a little film of the book completed. I will start with my front cover
I created a pocket with the postcard and have slipped family paper clippings etc inside as well as a tag documenting my Great Grandparents For the Pages I made from cardstock I have used a thick tissue paper that has fibres in it and I inked, misted and stamped it to give a old appearance and scrunched it as I glued it on , I have used this technique on most of the pages that I used cardstock as my base for the page. I also heavily inked the pages with Tim Holts Vintage paper Ink. The other half of the journal I adhered Sherlock Journal Vol 11 pages back to back.
The photo on the right opens back
To reveal some family photos tucked in the envelope from the cut and create sheet. I fussy cut the envelope to create the opening in the envelope. I then made a pocket from a image on the cut and create to slip the tag with journalling in opposite the photos.
I added the bead to the end of the string to act as a page book mark. A tag slides down behind the photo with journalling.
To read the journalling I just need to pull the tag from the side of the photo with the ribbon.
I will finish with this page of my Grandparents, as I don't think the video showed the whole page. Loved thefiligrees for embellishing the page of my journalling.
You can find the products ( only a small few are from my stash ) and the gorgeous Sherlock Journal Vol 11 at Megs Store .
I hope You enjoyed my project as much as I enjoyed creating it ,and my first attempt of a video.
Happy Creating
Mary x
Hello fellow scrappers! Cathi here with another project using the gorgeous The Sherlock Book Kit by Watson. I decided to make a layout with mine using the book pages and amazing ephemera provided in the kit!
For the background 12 x 12 inch page I used the The Gentlemen Collection: Gentlemanpaper. To me, in the Sherlock Book Kit there was a lot of masculine ephemera, many using new inventions for the turn of the century and one even looking like a globe...which reminded me of the Worlds Fair... I tucked that into the layout here and decided to use this amazing photo I have in my family collection of my Great Great Uncle Leo at the St. Louis World's Fair in the early 20th Century. Roller skating was being demonstrated there as a possible entry into the Olympics. Leo and his buddies looks so cool posed here!!
Above you can see several layers of ephemera cut out and layered under my photo. I have also made some gorgeous flowers using the Bitty Blossoms die I have in my stash and papers from the book kit.
I added a fun ticket cut out from the kit, and here you can see the masking misting and stamping I have added to my background. I thought the title "Skater Boys" worked well for this!!
Tucked in behind the photo cluster I have one of the tag cut outs from the kit and have added some journalling information. I attached the Filigree Oval Vintage Trinket to the tag to help pull it out and to add some gorgeous detail to the layout.
I had a great time putting this together and I hope that you enjoyed it!!
Hello friends! It's Cathy here today and I'm so excited to share with you my second mini album using The Sherlock Book kit. This mini album uses paper bags, LOTS of paper which enables you to fill it with lots of photos, embellishments, journalling and memories.
To help you get started, I have supplied a list of measurements for the album, to make things easier for you as well as a start to finish video tutorial to help you along the way. My second video is a walk through of the completed album to give you ideas on how you can start to embellish your album. I used stamping as a way of personalising my album. These papers are so versatile that you can use your stamps to start your album in the theme/direction of your choice.
I was inspired by My Sisters Scrapper and followed one of her tutorials for the construction of this album. The decorations/embellishments are my style!
Here I have used some stamps to add some spaces to journal.....they are interactive as well....
The album has flaps that fold out, giving more space for photos etc. Again stamps have been used for embellishments.
This is a page with a photo mat....
Project Cutting Guide
Item
Measurement
Extra Information
6 x black paper bags
Trim paper bag to 7 6/8”
(purchased from Spartys part of Spotlight)
Flap using black cardstock
7 ½” x
5 ½” six in total
Score on side at ½
and use a decorative punch to punch along the other side
Flap mat using papers from the collection
4½ x 7
3/8” twelve in total
Page
No trimming required
six pages in total
Back of page
Trim 3” of the bottom of one book page from the collection, leaving
you two parts.
This is the page where there is the folded section of the paper bag.
It will form a pocket.
Photo mat using black cardstock
7½ x 5”
This will be inserted inside the paper bag. There will be a total of
six.
Photo mat contrast
7¼ x 4
7/8”
This is where you place your photo.
Hidden Hinge Binding
11¼ x 7¾”
Score both ends at 2”. Then score at :
½" ½ " ¼", repeat until
reaching the end 2” score line.
Cover using chipboard
two 5 ¾
x 8½” for the
cover and one 2” x 8½”
for the spine
I used a 0.6mm chipboard thickness for my album.
Cover Papers
two 12.5cm x 21.5cm for the covers and 12.5cm x 4” for the spine.
Yes, I do work in both cms and inches. This will leave a small border
around your papers.