Showing posts with label sheer ribbon. Show all posts
16 December, 2018
30 October, 2018
12 September, 2018
Vintage Journal Card
Hello Mary here to share a card created with the new Vintage Journal Cards now available in Megs Store
I mounted the journal card on a piece of cardstock and used foam dots to raise the image. As my base I have used the Watercolour Background Paper, which has the lovely touch of the photo corners.
Under the raised image I have placed the Lattice and circle die cut and a strip of lace at the side . I finished off the card with some pastel enamel dots and the sheer green ribbon bow.
I mounted the journal card on a piece of cardstock and used foam dots to raise the image. As my base I have used the Watercolour Background Paper, which has the lovely touch of the photo corners.
Under the raised image I have placed the Lattice and circle die cut and a strip of lace at the side . I finished off the card with some pastel enamel dots and the sheer green ribbon bow.
I decorated the inside with a image from a cut and create sheet.
The Vintage Journal cards come in Florals, Vintage Ladies and Vintage Men. I think these along with the cut and create images are also great for Journals and Mix Media Projects.
I hope I have inspired you to get creative with the lovely goodies in Megs Store
Happy Creating
Mary x
10 September, 2018
VINTAGE JOURNAL CARD
Hello ! Mary popping in to share another card using the Vintage Journal Cards, using the flower theme journal card.
They make for soft and romantic cards.
For this card I have used along with the Journal card a image of the lady from the cut and create sheet , the pastel enamel dots and the soft sheer green ribbon. I have used the lovely water colour PP from Megs Garden as my background.
Thank You for calling by and I hope you take the opportunity to visit Megs Store, these products truly inspire one to create.
Happy Creating
Mary x
They make for soft and romantic cards.
For this card I have used along with the Journal card a image of the lady from the cut and create sheet , the pastel enamel dots and the soft sheer green ribbon. I have used the lovely water colour PP from Megs Garden as my background.
Thank You for calling by and I hope you take the opportunity to visit Megs Store, these products truly inspire one to create.
Happy Creating
Mary x
13 August, 2018
So in Love with You ~ Spring Pastels
Hello Mary here today to share a layout created with the A4 Spring Pastels Range
So in Love with You
I used the "Love" sentiment from the Cut and Create sheet which I shaded with mauve ink and also added the elegant lady from a Cut and Create sheet at the side of my photo.
In amongst the flowers I have made a bow with sheer ribbon and also placed Dodo vine wire and a couple of fussy cut flowers from the cut and create sheet
I was really happy with how this layout turned out.
And because I hate to waste anything and had some paint left on my palette whilst doing a project I created a tag with a beautiful image from the Vintage Beauties Cut and Create Sheet along with the Dream Sentiment, I can now add this to a layout or a card.
You can find so many beautiful products at Megs Store for all your creating needs.
Thank You for calling by
Happy Creating
Mary x
08 June, 2018
Vintage Spirit ~ Sherlock 111 A New Case Range
Hello Mary here to share a layout I created with the new range available in Megs Store ~ Sherlock Holmes 111 A new Case. I chose the 12 x 12 papers
This photo was in my Mum's photo album and I need to find out her story. I scanned the writing on the back to add to my layout and for the clue whom this lady is ~ her name being Lottie. My Grandmother on my Fathers side had a twin sister Lottie , but I am pretty sure this is not her, but rather a relative on my Mothers side as "The Glen" was my Grandparents home on my Mothers side. Anyway I will ask my Cousin when I next see her as she is probably the only one alive now that might know.
I was thrilled to receive the fringe tassel in my pack, how gorgeous is it ! I added the pearl trim and sheer ribbon to it and also placed the green with gold ribbon under the inscription from the back of the photo along with the ink nibs.
I am loving the branch with flowers die , as it is so versatile and I placed it along side my photo . I layered a couple of images from the cut and create sheet and also used the large round fligree and added the lion door knock charm to it.
The 12 x 12 pages comes with a 4x12 strip and I have used this to tear and place under my photo, which I then swiped over with Gesso to add definition to the edges . Also to my page I added some stamping and washi tape.
Thank you so much for calling by and I hope you take the opportunity to visit Megs Store, so much gorgeous product !
Happy Creating
Mary x
Vintage Spirit
I was thrilled to receive the fringe tassel in my pack, how gorgeous is it ! I added the pearl trim and sheer ribbon to it and also placed the green with gold ribbon under the inscription from the back of the photo along with the ink nibs.
I am loving the branch with flowers die , as it is so versatile and I placed it along side my photo . I layered a couple of images from the cut and create sheet and also used the large round fligree and added the lion door knock charm to it.
The 12 x 12 pages comes with a 4x12 strip and I have used this to tear and place under my photo, which I then swiped over with Gesso to add definition to the edges . Also to my page I added some stamping and washi tape.
Thank you so much for calling by and I hope you take the opportunity to visit Megs Store, so much gorgeous product !
Happy Creating
Mary x
19 April, 2018
SHABBY CHIC BACKGROUNDS, ENAMEL DOTS AND DIES
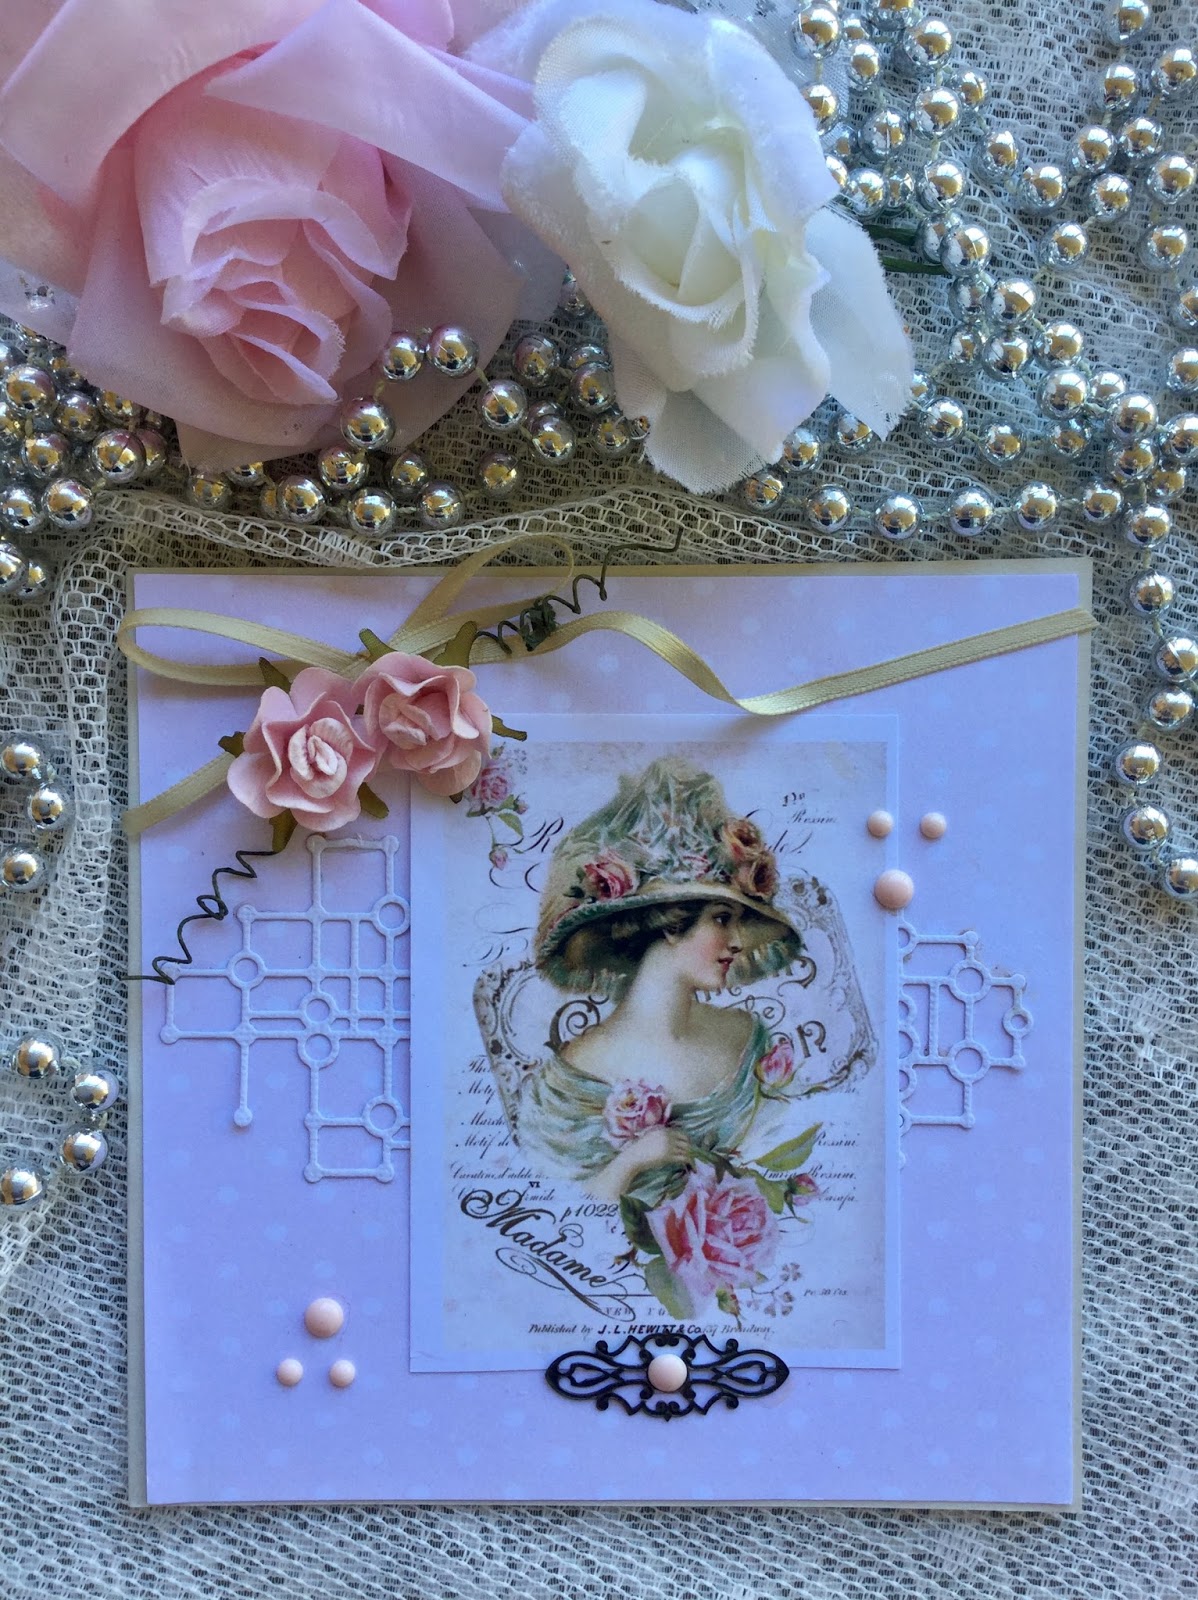
Hello Mary here to share some cards I have been working on with the Shabby Chic Backgrounds card pack. The colours are so soft , pretty and romantic.
Everything I have used to create my cards can be found in Megs Store. I love this die , which is called lattice and circles , it is so versatile and I purchased the pastel enamel dots that work beautifully with the shabby chic papers, but there are all the colours available in the store. The background is a soft pink and white polka dot patten.
This card the Background is lovely shades of green, so I chose embellishments with green hues. The ladies dress has touches of gold in her green dress , so I added the green and gold ribbon and also added white lace under the lattice and circle die. I used the pink enamel dots to compliment the flowers and die cut and used a organza ribbon for a touch of softness. The image of the lady and the Dream sentiment can be found on the cut and create sheets.
My last card the background is shades of mauve and once again I have used the Lattice and circle die ( told you I liked it ) I then used images I have fussy cut from the cut and create sheets and added the enamel dots and a sheer green ribbon on my fussy cut rose.
Thank You for calling by and if you have a special person that you would like to create a beautiful , unique card for , especially made by you, visit Megs Store for beautiful supplies.
Happy Creating
Mary x
Everything I have used to create my cards can be found in Megs Store. I love this die , which is called lattice and circles , it is so versatile and I purchased the pastel enamel dots that work beautifully with the shabby chic papers, but there are all the colours available in the store. The background is a soft pink and white polka dot patten.
Thank You for calling by and if you have a special person that you would like to create a beautiful , unique card for , especially made by you, visit Megs Store for beautiful supplies.
Happy Creating
Mary x
24 March, 2018
LIFE IS A JOURNEY ~ SHADES OF GREEN
Hello Mary here to share another layout with the range Shades of Green
Because I am creating these layouts for my Daughters album I turn them into a 12 x 12 layout by simple adding the A4 pattern paper to a sheet of cardstock.
I added some texture with a rose stencil and texture paste and added some pink tones with water colour paint. Under my photo more texture using one of the dies from the store. There is a huge rang of dies to choose from, this one is called Screen Frame. The butterfly has been fussy cut from the Shades of Green Cut and Create Sheet and I have used lace and sheer green ribbon and the crystal jewel to nestle the flair. Under the butterfly I have one of Megs doily's peeking out.
My title which is from The Cut and Create sheet I have framed with a chippy I embossed from my stash and then added the pastel enamel dots either side . Meg has enamel dots in all shades in the store. To pick up the shades of green in the paper I placed the Carte Postcard from a cut and create sheet at the top of my photo, I think it ties in nicely with the greens on the PP.
I finished the layout by fussy cutting the single white rose from the cut and create sheet and placing it as though it is falling from the bouquet .
Thank you for calling by , I hope I have inspire you to create with the gorgeous romantic papers and embellishments.
Happy Creating
Mary x
LIFE IS A JOURNEY
Because I am creating these layouts for my Daughters album I turn them into a 12 x 12 layout by simple adding the A4 pattern paper to a sheet of cardstock.
I added some texture with a rose stencil and texture paste and added some pink tones with water colour paint. Under my photo more texture using one of the dies from the store. There is a huge rang of dies to choose from, this one is called Screen Frame. The butterfly has been fussy cut from the Shades of Green Cut and Create Sheet and I have used lace and sheer green ribbon and the crystal jewel to nestle the flair. Under the butterfly I have one of Megs doily's peeking out.
My title which is from The Cut and Create sheet I have framed with a chippy I embossed from my stash and then added the pastel enamel dots either side . Meg has enamel dots in all shades in the store. To pick up the shades of green in the paper I placed the Carte Postcard from a cut and create sheet at the top of my photo, I think it ties in nicely with the greens on the PP.
I finished the layout by fussy cutting the single white rose from the cut and create sheet and placing it as though it is falling from the bouquet .
Thank you for calling by , I hope I have inspire you to create with the gorgeous romantic papers and embellishments.
Happy Creating
Mary x
05 March, 2018
A Good Friend Knows all your best Stories
Hello Mary here to share another layout for my daughters wedding album . I also created the layout for a challenge at Artastic where the theme is Girls Only. You can view the story on my blog
To create the layout I have combined two ranges . I have used the 12 x 12 Paper from the Lavande Range as my base and to it I added the A4 size Spring Pastels Range . I really liked how the two combined created a lovely pastel palette that are also the colours in the bouquets .
I have fussy cut the flowers and Laugh images from the Cut and Create Papers and added some pink sheer ribbon from Megs Store as well.
I love the soft delicate feel the Hydrangea petals falling down the page give which I have also fussy cut from the Shabby Chic cut and create sheet.
Also sharing a card made with the Shabby Chic Background card pack paper. You receive 12 backgrounds in the pack , 2 of each design . Makes card making so easy
I have used one of the new dies in the shop , the wildflower die ( the doily die is from my own stash) Lace from Megs shop and the Lilac and butterfly images fussy cut from the Shabby Chic cut and create sheet
Meg has a load of new product in the store at the moment, fabulous dies and so much more .
I hope you take the time to pop over and check them out.
Happy Creating
Mary x
To create the layout I have combined two ranges . I have used the 12 x 12 Paper from the Lavande Range as my base and to it I added the A4 size Spring Pastels Range . I really liked how the two combined created a lovely pastel palette that are also the colours in the bouquets .
I have fussy cut the flowers and Laugh images from the Cut and Create Papers and added some pink sheer ribbon from Megs Store as well.
I love the soft delicate feel the Hydrangea petals falling down the page give which I have also fussy cut from the Shabby Chic cut and create sheet.
Also sharing a card made with the Shabby Chic Background card pack paper. You receive 12 backgrounds in the pack , 2 of each design . Makes card making so easy
I have used one of the new dies in the shop , the wildflower die ( the doily die is from my own stash) Lace from Megs shop and the Lilac and butterfly images fussy cut from the Shabby Chic cut and create sheet
Meg has a load of new product in the store at the moment, fabulous dies and so much more .
I hope you take the time to pop over and check them out.
Happy Creating
Mary x
05 October, 2017
Jingle all the Way
Hello Mary back to share some more Christmas Cards created with the new "A Twinkling Christmas Range " and also a layout combining Ephemera from the " A Twinkling Christmas " and PP from the Lavande Range.
Firstly the layout
I really wanted to use the Baubles and tinsel from the Ephemera Sheet on a layout and combined with the PP from the Lavande Range it worked perfectly. I find one of the great thing about the ranges from Megs Garden they work well together
I have used the sheer pretty pink ribbon to attach the baubles to the tinsel and then a sheer silver ribbon to attach the bauble falling to the side. The Christmas tree and deer's are stamps and I added a silver star to the tree from Megs Store. The stars come in a strip and are self adhesive.
Jingle all the Way sentiment is cut from the Ephemera sheet and I shaded it with ink.
I will finish with a couple of Cards created so easily with the "A Twinkling Card Pack"
For this Card I simply added the Glass Bauble fussy cut from the Ephemera Sheet raised it with a foam adhesive to give depth and finished the card with the gold bow
I hope you are inspired to start Your Christmas projects and you can find all your needs at Megs Store.
I will pop back soon with more Cards I have created
Happy Creating
Mary x
Firstly the layout
Jingle all the Way
I really wanted to use the Baubles and tinsel from the Ephemera Sheet on a layout and combined with the PP from the Lavande Range it worked perfectly. I find one of the great thing about the ranges from Megs Garden they work well together
I have used the sheer pretty pink ribbon to attach the baubles to the tinsel and then a sheer silver ribbon to attach the bauble falling to the side. The Christmas tree and deer's are stamps and I added a silver star to the tree from Megs Store. The stars come in a strip and are self adhesive.
Jingle all the Way sentiment is cut from the Ephemera sheet and I shaded it with ink.
I will finish with a couple of Cards created so easily with the "A Twinkling Card Pack"
For this Card I simply added the Glass Bauble fussy cut from the Ephemera Sheet raised it with a foam adhesive to give depth and finished the card with the gold bow
I will pop back soon with more Cards I have created
Happy Creating
Mary x
07 August, 2017
My Heart was lifted on the wings of a thousand Butterflies ~ Parisian Garden Range
Hello Mary here today to share with you a Layout I created with the Parisian Gardens A4 Pattern Paper , that I have turned into a 12 x 12 layout.
I simply added the A4 Parisian Gardens PP to a 12 x 12 piece of white cardstock.
I have added a strip of antique pink nylon Lace fdown the side and then a pattern image from the cut and create sheet in the white space. I have tied a sheer ribbon across the bottom of the layout. All these can be found in Megs Garden Shop, Why not take a stroll through the shop for these and many beautiful products. Meg has just released a new range, which you can view here and here
Thank You for calling by.
Happy Creating
Mary x
I simply added the A4 Parisian Gardens PP to a 12 x 12 piece of white cardstock.
I have added a strip of antique pink nylon Lace fdown the side and then a pattern image from the cut and create sheet in the white space. I have tied a sheer ribbon across the bottom of the layout. All these can be found in Megs Garden Shop, Why not take a stroll through the shop for these and many beautiful products. Meg has just released a new range, which you can view here and here
Thank You for calling by.
Happy Creating
Mary x
22 June, 2017
Darling Live Your Best ~ Lavande Range
Hello Mary here to share another layout using the new Lavande Range.
How pretty is this Paper ! My last layout was quite clean and simple , because honestly these papers are so beautiful I don't like to cover them too much. But this time I resisted and decided to go a little OTT , just to show not to be scared to get a little arty with the papers if you choose.
with the 12 x 12 papers you also receive 4" x 12" strips. I used one of these strips cut down to mat my photo under the black cardstock (you can just see some pattern around the edge )
I have added pieces of mauve mesh around my photo at certain places to add a bit of colour and softness. I used the fancy round frame to highlight my title and I tied the soft mauve sheer ribbon around it and then weaved it through the flower cluster. All these products can be found at Megs Store,
From my stash added paint drips, texture paste through a stencil, water paints and a little stamping to the page .The chipboard "darling" is from A2Z Scraplets.
If you pop over to Megs Store you can view the whole Lavande Range by clicking on the YouTube Link
I hope I have inspired you to take a look at what is available In the Lavande Range , as it is so beautiful to create with.
Until next time
Happy Creating
Mary x
Darling Live Your Best
How pretty is this Paper ! My last layout was quite clean and simple , because honestly these papers are so beautiful I don't like to cover them too much. But this time I resisted and decided to go a little OTT , just to show not to be scared to get a little arty with the papers if you choose.
with the 12 x 12 papers you also receive 4" x 12" strips. I used one of these strips cut down to mat my photo under the black cardstock (you can just see some pattern around the edge )
I have added pieces of mauve mesh around my photo at certain places to add a bit of colour and softness. I used the fancy round frame to highlight my title and I tied the soft mauve sheer ribbon around it and then weaved it through the flower cluster. All these products can be found at Megs Store,
From my stash added paint drips, texture paste through a stencil, water paints and a little stamping to the page .The chipboard "darling" is from A2Z Scraplets.
If you pop over to Megs Store you can view the whole Lavande Range by clicking on the YouTube Link
I hope I have inspired you to take a look at what is available In the Lavande Range , as it is so beautiful to create with.
Until next time
Happy Creating
Mary x
28 May, 2017
Heritage Journal ~ Sherlock Journal Vol 11
Hello Mary here today to share a project with you using the Sherlock Journal Vol. 11 Range.
When I received this range I knew exactly what I wanted to create with it. I take photo's of my family vintage photo's with props that belonged to my family, a friend said I should make a book of them for future generations, so some of those photos make an appearance in the book and some are the originals. Sherlock Journal Vol. 11 is perfect for such a project.
Because I did quite a few pages I thought I would show a few in pictures and also made a little film of the book completed. I will start with my front cover
I created a pocket with the postcard and have slipped family paper clippings etc inside as well as a tag documenting my Great Grandparents For the Pages I made from cardstock I have used a thick tissue paper that has fibres in it and I inked, misted and stamped it to give a old appearance and scrunched it as I glued it on , I have used this technique on most of the pages that I used cardstock as my base for the page. I also heavily inked the pages with Tim Holts Vintage paper Ink. The other half of the journal I adhered Sherlock Journal Vol 11 pages back to back.
The photo on the right opens back
To reveal some family photos tucked in the envelope from the cut and create sheet. I fussy cut the envelope to create the opening in the envelope. I then made a pocket from a image on the cut and create to slip the tag with journalling in opposite the photos.
I added the bead to the end of the string to act as a page book mark. A tag slides down behind the photo with journalling.
To read the journalling I just need to pull the tag from the side of the photo with the ribbon.
I will finish with this page of my Grandparents, as I don't think the video showed the whole page. Loved the filigrees for embellishing the page of my journalling.
You can find the products ( only a small few are from my stash ) and the gorgeous Sherlock Journal Vol 11 at Megs Store .
I hope You enjoyed my project as much as I enjoyed creating it ,and my first attempt of a video.
Happy Creating
Mary x
When I received this range I knew exactly what I wanted to create with it. I take photo's of my family vintage photo's with props that belonged to my family, a friend said I should make a book of them for future generations, so some of those photos make an appearance in the book and some are the originals. Sherlock Journal Vol. 11 is perfect for such a project.
Because I did quite a few pages I thought I would show a few in pictures and also made a little film of the book completed. I will start with my front cover
I created a pocket with the postcard and have slipped family paper clippings etc inside as well as a tag documenting my Great Grandparents For the Pages I made from cardstock I have used a thick tissue paper that has fibres in it and I inked, misted and stamped it to give a old appearance and scrunched it as I glued it on , I have used this technique on most of the pages that I used cardstock as my base for the page. I also heavily inked the pages with Tim Holts Vintage paper Ink. The other half of the journal I adhered Sherlock Journal Vol 11 pages back to back.
The photo on the right opens back
To reveal some family photos tucked in the envelope from the cut and create sheet. I fussy cut the envelope to create the opening in the envelope. I then made a pocket from a image on the cut and create to slip the tag with journalling in opposite the photos.
I added the bead to the end of the string to act as a page book mark. A tag slides down behind the photo with journalling.
I will finish with this page of my Grandparents, as I don't think the video showed the whole page. Loved the filigrees for embellishing the page of my journalling.
You can find the products ( only a small few are from my stash ) and the gorgeous Sherlock Journal Vol 11 at Megs Store .
I hope You enjoyed my project as much as I enjoyed creating it ,and my first attempt of a video.
Happy Creating
Mary x
Subscribe to:
Posts (Atom)


