Showing posts with label Small Roses. Show all posts

19 June, 2017

CARDS in LAVANDER


Hello,
thank you for popping into 
MEGS GARDEN blog
 Annette here today to share 
4 cards created with 'LAVANDE' papers from 
I really enjoyed working with this very pretty range 
the colours had a sweet elegance & everything just flowed together

inked die cut leaves, a wee bottle of beads tied with a satin ribbon & a tiny frame   
lace around the edge, a frilled lace on each side
a metal flower halved & rubbed with inka gold to highlight the colour
turned over corner filled with flowers & a golden shoe hanging from satin ribbon

lilac hand dyed lace, gems, tiny frame with a perfume bottle & a fussy cut 
lady in an elegant gown all tied with a spotty organza ribbon.

All these cards could be given for any special occasion
PRODUCTS USED :
Forget me not - antique purple 
Small Roses - lavender & white 
Green Leaves 
Puffy Paper Flowers
Thank you again for visiting Meg's Garden,
while you're here take a scroll &you are sure to be inspired by the 
Garden Girls & their beautiful creations.
Happy Scrapping
Hugz Annette xx


31 January, 2017

DELIGHT IN THE MEMORIES ~ PARISIAN GARDENS COLLECTION

Hello Mary here to share another layout using the Gorgeous Parasian Gardens Collection. I LOVE this collection and I am enjoying creating with it.


The images from the cut and create sheets are perfect to create tags, cards etc. At the moment I am really loving them to make tags on ripped up pieces of cardboard. I love the irregular edges and texture it gives and then I can add them to layouts or cards as I go and so many beautiful images to chose from to go on the tag.


I have used the lovely long oval fligree in the top right hand corner of my photo and just added a little pearl. The "inspire" word ,  tab image on the side of  my photo and beautiful , vintage lady image are all from the Cut and Create Sheet. I added a little rose and the soft , ribbon, all from Megs Store  ~and the layout was done. I am finding the papers are so beautiful that less is more on the layout.
Thank You for calling by I hope you Love the Parisian Gardens range as much as I do.
Happy Creating
Mary x

22 November, 2016

A TOUCH OF BLUE~ WATERCOLOUR IN BLUES

Hello Mary here to share a card I recently made for a friends birthday, using the Watercolours in Blue Range 
It is so easy to create a card with Megs Garden's coordinating rage of papers and Cut and Create Images.


To add softness and interest I added a piece of the Large Lace doily under the layers and used images from the cut and create sheet as my top layers.
I then decided to make a envelope for my card from the Same Pattern Paper in the Watercolours In Blue range, that I used for the base of my card.
The front of the envelope


and there I have a coordinating Card and envelope for my friend for her birthday. The vintage lady is from my stash, the rest of the products can be found at Megs Garden. 
Until next time
Happy creating
Mary x

26 September, 2016

Vintage Journal - A card by Margaret Mifsud

Hello everyone and welcome to the Megs Garden Blog.  So pleased you came by for a visit.

I'd like to share a card I created with the gorgeous new paper line by Megs Garden called 'Vintage Journal'.  I have used one of the papers from the A4 printable sheets.  I absolutely love this version because I can print out exactly the page I want and even alter the size if necessary .. brilliant.  

The paper used is Vintage Journal 01 and, as I wanted a soft and subtle look to my card, I did lighten the colour a little before printing. 


This card was actually made as a Get Well card for a very dear friend of mine who was in Hospital for an operation.  I wanted it to be bright and cheerful and to, hopefully, raise her spirits.

The extra layers were simply torn to size and, to soften the look even more, I gathered some lace from my stash and layered it in between.

The flowers are all available at Megs Garden.  I will leave a list of products at the end of this post.  I usually get my flowers in white so that I can then colour them to suit my project if necessary.   


The frame was made with a silicon mould and Mod Podge Melts.  The chippie is from a Circle Word by 2Crafty Chipboard.  I simply cut away the circle, coloured the word with gesso and then, while it was still wet, sprinkled it with glitter.

The inside was decorated with the same paper.  I'm afraid the lighting wasn't very good when I took the next two shots, hence the colour looks greyish.  I use natural light so am very dependant on the weather being nice and sunny but on this day it wasn't co-operating.  Still, it does show the lovely pattern on the paper and next time I will just have to take all the photos at the one time.

With all the layers and flowers, etc. that I place on the front of my cards it is sometimes difficult to keep them standing up so I do, at times, have to add paper to the back to balance the weight a little.  It works!! 


I am very happy to say that my friend came through her ordeal with flying colours and is well on the mend.

Megs Garden products used:

Thank you so much for stopping by and taking a look at my little creation.  While you're here, why not check out the amazing projects made by my Teamies and also, take a look around the 
Megs Garden store.  I am sure you will find lots of things you cannot live without.  I know I do .. every time .. LOL!!

Take care and God Bless.
oxox Marg

14 September, 2016

Vintage Journal Papers With A Twist

Hello there, and welcome to Meg's Garden!
I'm going to take a moment to introduce myself - I'm Julianne (otherwise known as Jules The Bling Princess). I've been scrapbooking for over ten years and have recently joined the Meg's Garden Design Team. I look forward to sharing lots of scrappy inspiration with you over the coming months. 

"MAGIC HAPPENS..."

All my life I've been a bookworm and collector of books, so when I saw this new range from Meg I knew exactly what I wanted to do with it. I wanted to create a layout that captures the magic of reading, how every book can take you to a different place and a different time. 

My style is very feminine and pretty, and I wanted the layout to hold all those little details that you would discover if you were exploring a new book. 


I felt that a layout about magical things had to include stars and bling, so I used coloured texture paste and a star stencil to create my magical background. I continued with the sparkle element by adding rhinestones to the background and chipboard (I used metallic ink on the chipboard pieces for extra sparkle). 

And if you look closely, you will see that I've used the Ephemera packs to create visual triangles on my layout - three tags, and three floral circles. 


I've used all three Ephemera packs on my layout - Time, For A Gentleman, and For A Lady. That's the great thing about these ranges of ephemera - you can mix and match all of them with these papers. 

The flowers and laces I have used on my layout are all from Meg's Garden. I have coloured the lace and large paper rose with Glimmermist to match these papers. That is what I love about white laces and flowers - you can colour them any colour to match whatever you are working with.  


Here, you can see how I have layered my papers to create a textured border around the outer edge of the layout. I have used Vintage Journal papers 02, 05 and 06. With a little ink and distressing, they have created a gorgeous border to frame the layout. 


The starting point of this entire layout was the book at the bottom of the page. I have cut out a duplicate copy and raised it with foam tape, creating the springboard for my entire layout. From there, I added a raised image of a Gothic lady, and all the flowers, layers and elements around the book. My idea was to make it appear that the book was opening, and everything was pouring out from within. 


If you look closely, you can see that I have raised the clock-watch (from For A Gentleman ephemera pack), and added a metal circle and metal brad for extra detail and depth. I have finished with a layer of Glossy Accents around the outside to create a glass-like image.

Thank-you for stopping by and joining me today. If you have any questions about this project, don't be scared to ask. I'm happy to answer all questions. 

If you would like to view more of my work, please visit my blog:


Have a great day, 
and I hope you can join me again soon.

Julianne. xxx

18 March, 2016

Chantilly Cream Greeting Card

Hello my crafty friends, this is Patti back with you using up some of my leftover Chantilly Cream bits and bobs.


I hope you'll join me on todays video where I even reveal my messy desk!  I'll share how my 'mind' process works on creating a card with bits and pieces.  Such a fun project, I just love doing this and seeing what evolves.  I've used mainly Meg's Garden Chantilly Cream collection, there may be a stray item or two from another collection or my stash.  I've used a 6" square card base today, using Spellbinders Celebra'tions Cuddle Cream cardstock, one of my favs.


I've layered this gorgeous Gardenia flower with a few of the Copper Paper leaves and tucked in some tiny flowers here and then.  I went back off camera and scrunched and tucked in some tiny pieces of lace I'd been saving, just what the flower cluster needed for depth.


On the right side I cut a doily in half and pleated it in the middle.  A small staple holds the pleats together until I get it glued in just the right spot.  I added a tiny bow of dyed seam binding in the lower right and even though you don't see it in this photo I used my Scallop Corner Chomper on the outside corners of the card base.


After I finished filming I thought this upper right corner was a little naked so I went back hunting for a sentiment and found this Live Today snippet.  I fussy cut it out and backed it with a couple of layers of packaging scraps.  The antenna are the left over piece I snipped off the pearl spray that's tucked into the flower cluster.  I went over the antenna with Diamond Stickles to give them a little sparkle. The layers are distressed with my Tim Hotlz distressor and then tucked between are little pieces of lace.


Inside is a simple distressed mat of the Chantilly Cream striped paper with a trimmed flag of lace and a strip of Meg's lace over top.  Thanks so much for joining me today, I hope you'll stay and watch the video.  All supplies will be linked directly below the video.


Supplies from Meg's Garden

03 October, 2015

Forgotten Meadows Blooming by Trish

Hello and welcome to Megs Garden,i hope you like the forgotten Meadows collection as much as I do.I have used Forgotten Meadows Fresh daisies 12x4 strip with afternoon letters12 x12 paper and joined them together with a flower die.


Megs garden products used
Forgotten Meadows collection,lace,Organza flower,tiny roses
I hope you enjoyed your stroll in Megs garden,untill next time, Trish


29 September, 2015

'Gather Your Dreams' Mini Album - Margaret Mifsud

Hello sweet visitors and welcome to Megs Garden Blog.  So nice to have you here and hope your day is going well.

I'm here to share another Mini Album with you.  This one is made with the 'Gather Your Dreams' Book Kit.  This is a lovely kit with purples and pinks and greens and lots of gorgeous floral images.

This is just a small Album with a waterfall and an accordion booklet as well.  I  do have to warn you though, there are a lot of photos and I mean a LOT of photos.  So, maybe grab yourself a cuppa and a comfy chair and .. here we go.  Hope you like it.

The Cover.


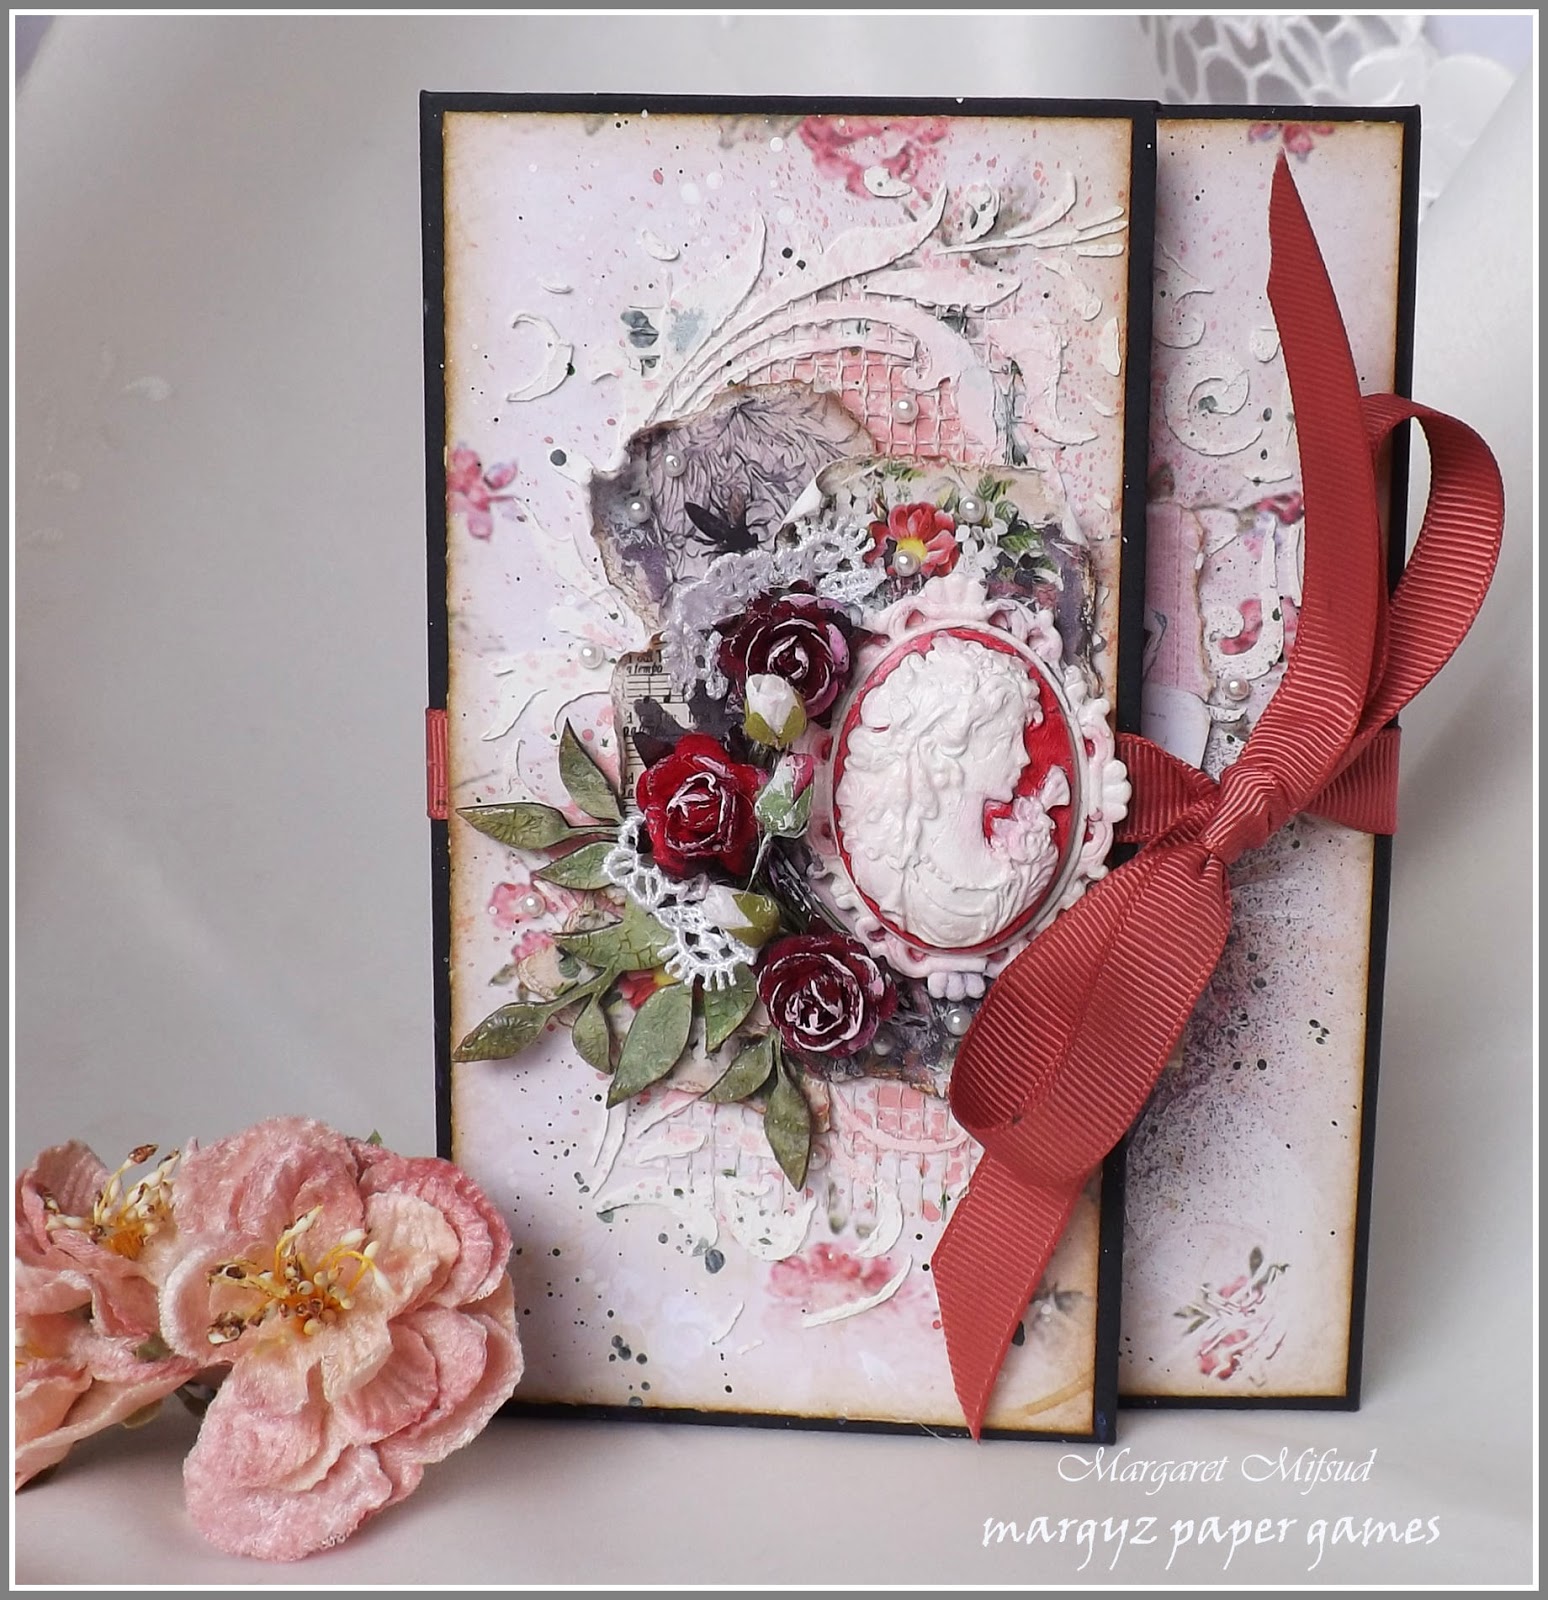
Added a strip of dry wall tape on the cover and then did some stenciling with Tim Holtz's Flourish stencil and texture paste.  Sprayed in the center with watered down acrylic paints and created some splatters around the edges.


I used some of the labels from the kit to add the layers.


The cameo and frame were made with air dry clay and some moulds.  They were both painted with acrylic paint and then glued together and sealed with matte medium.  The small roses were coloured with acrylic paint as well (watered down of course, so I could spray it) and I tucked some small pieces of lace into the cluster.


This lovely leaf chippie is the 'Mini Branches' from 2Crafty Chipboard.  It was coloured with Versa Color stamp pads in two shades of green and then covered in Clear Rock Candy crackle paint.  Once everything was assembled and glued down I dry-brushed the flowers with a bit of gesso and added a few stick-on pearls in and around the cluster.

Opening the book.


I tore the edges of the small labels in the kit, edged them with 'Gathered Twigs' Distress Ink and layered them on the inside front cover.  Added a Tim Holtz Chit Chat Sticker and one of the lovely butterflies from the Butterfly Transparency sheet.   

 
This is the right hand side of the cover .. the part that folds in underneath.  I'm not quite sure what to call it but it was stenciled the same as the main part of the cover and then it was sprayed with 'Afraid of the Dark' Glimmer Mist.  I used another of the labels from the kit  as the base for the Title which is also part of the Kit.


Open the right side (that pesky bit that I can't put a name to LOL!!) and you can see the waterfall section of the book.


I used one of the lined pages from the 'Sherlock Book' for this journal page and fussy cut some floral images from a scrap piece to decorate the edges.

The Waterfall Booklet.


I love the pretty floral images on these papers, don't you??  So gorgeous.


There is room for 7 wallet sized photos in this little booklet.  I have left this first page blank ..


.. and here I've added another vintage image from the Kit to give you some idea of how it looks with a photo.  Of course, you could add another photo on the bottom page, or you could use it for your journalling.


I have simply placed some washi tape in the small bit of space between the pages.


Open the right side again and you can see the Accordion Booklet and the inside back cover.


Here I have fussy cut some of the floral images to create a little pocket.


The tag is one of the images from the 'Cut & Create' pages of the Book Kit.  There are a number of these lovely vintage images and I have used some of them in this book.

The Accordion Booklet.


I don't embellish my mini albums a great deal because I don't like too much bulk in my books but I do like to use stencils to add a bit of interest to the pages.  Here I've used my fave stencil, Tim Holtz's Latticework with Gathered Twigs Distress Ink.


Before I show you the inside pages of the Accordion Book I thought I would show you this view so you could see how it all works.


Opening the booklet to the right you can see another lovely vintage image from the 'Cut & Create' pages.  I've simply framed the photo with some die-cuts and added some micro beads and a few seed beads as well as a Chit Chat Sticker. 


Similar embellishment here with a die-cut,  micro beads and a Chit Chat Sticker ..


.. and the same again here.  I haven't filled all the pages with images .. just enough to give you an idea of how it would look once photos are added.


 Opening the booklet to the left, I haven't added any pictures on these pages.  Just did a little stenciling and added some more die-cuts.


The back of the Album where I've just added a small metal trinket.  Done!!  I did warn you that there were a lot of photos didn't I??  I do hope you were able to stick it out to the end and, of course, I also hope that you enjoyed your visit.

Megs Garden Products used. 

Gather Your Dreams Book Kit
Mini Rose Buds
Small White Roses
Filigree Strip

If you would like to take a closer look at these products simply click on the name and it will take you straight to the relevant Megs Garden area.

Thank you so much for visiting the Garden.  Why not take a further stroll around and take a look at the wonderful creations by my Team Mates, you will love them.

I hope you enjoy the rest of your day.
Take care and God Bless.
oxox  Marg