Showing posts with label cut and create paper. Show all posts

21 April, 2019

Tag, You're It


For something different, this time I used Meg's new Art Tags as a feature layer, one of many layers in this masculine birthday card. 


The new Art Tags are versatile, and can be used both as something practical or decorative. In this instance, I have gone for decorative. 


For my other layers in this card, inspiration for colouring and style was gained from past collections, including Sherlock, and also pages from an old dictionary. 
All coordinating together perfectly. 

The Sherlock collection also provided me with the embellishments from its Cut & Create sheets - the ideal balance of masculine yet decorative was easily achieved. 


For this card, I also wanted to add an insert, again making a feature of the dictionary paper and a corner cluster of Cut & Create imagery. 


One of my favourite creative techniques is distressing, and making use of paper in other ways. For the front of this card, I rolled dictionary paper to create an eye catching detail, texture and body as well as serve as the base for my sentiment.

Embellishing again in tonal colours, finding the perfect finishing touches amongst Meg's variety of chipboard and adornments. 


Creating something masculine, stepping out of your comfort zone need not be hard, thanks to Meg's Garden collections! Be sure to check out the new Art Tags, both in masculine and feminine designs, for your next creative project. 

Julia

22 March, 2018

One Paper Torn in Half

Hello Bloggers

I took 1 piece of paper from the Shabby Chic Backgrounds Collection Card Artist Pack & tore it in half & decided to make 2 cards in totally different styles - 1 Shabby Chic & the other Slightly Grunge.  Did not think it would work BUT ...


This is the paper I chose - the Music paper

Here are the 2 cards:

1.  Shabby Chic Style


The cardstock chosen was a deep rose colour from my stash (sorry no source colour available)
I used a round doily background & layered the torn half of the music paper - this was distressed, inked & the edges curled. The pink edges were from my blusher brush

 The embellishments include a Pink Wild Rose, 2 White Paper Lilies, 1 Cherry Blossom with tinted pink edges & a Small White Paper Flower surrounded by a diecut flower with pinked edges (m356 open roses) as well as 3 paper leaves.  The pink die cut with a pearl highlight is from diecut Carousel m392.

There is no inside deco on this card since I had a slight woopsie with a bottle of glue which glued the card together.


2.  Grunge/Slightly Grunge/Masculine


The other half of the Music paper.   I was quite amazed by the results of my experiment using the 1 paper with 2 totally different styles.


The edges are distressed more than the first card, inked with frayed burlap & the corners curled. Cardstock was a light brown taupe & the layer was a scrap from old papers. The jute string was tied around the brown cardstock & the black diecut (Large Gears m277) was tucked behind before mounting on the card of ivory cardstock.  
 A Cut & Create Ephemera was foam mounted & a skeleton leaf tucked behind it. The other black diecut is from die Scribbles & Scrap m3130.


Inside the card are more scraps.  The brown/taupe cardstock creates a spot to slide a scrap of the patterned paper embellished with a vintage trinket. 


The other inside has more scraps of cardstock & cut & create pieces.
The black die cut is from the same die used on the front - Scribbles & Splat (I think this is the splat) m3130. This is a great & fun die. Some more jute string to carry the design through the card


It was fun doing this experiment which I did not think would work - I challenge you to try it.

Bye for now
Meg
www.megsgarden.com

24 January, 2017

SHE LEFT A TRAIL OF GLITTER ~ SPRING PASTELS COLLECTION

Hello Mary here today , creating with the gorgeous Spring Pastels Collection


I chose to keep the layout quite simple, as the papers are just so darn nice, I don't think it needs a lot of embellishment


The butterfly in the top corner I have fussy cut from the cut and create sheet , along with the "Love" sentiment. The butterfly in the bottom corner I used a Craft knife to cut around the image on the PP enough for the corner of the photo to slot in
I used the Pearl trim and twined it amongst the chipboard piece from A2Z Scraplets. With the little flower edged organza ribbon, that is ever so delicate , I cut the flowers individually and placed here and there  on my page.
Thank You for calling by, don't forget to visit Megs Store for some beautiful papers and embellishments.
Happy Creating
Mary x

12 January, 2017

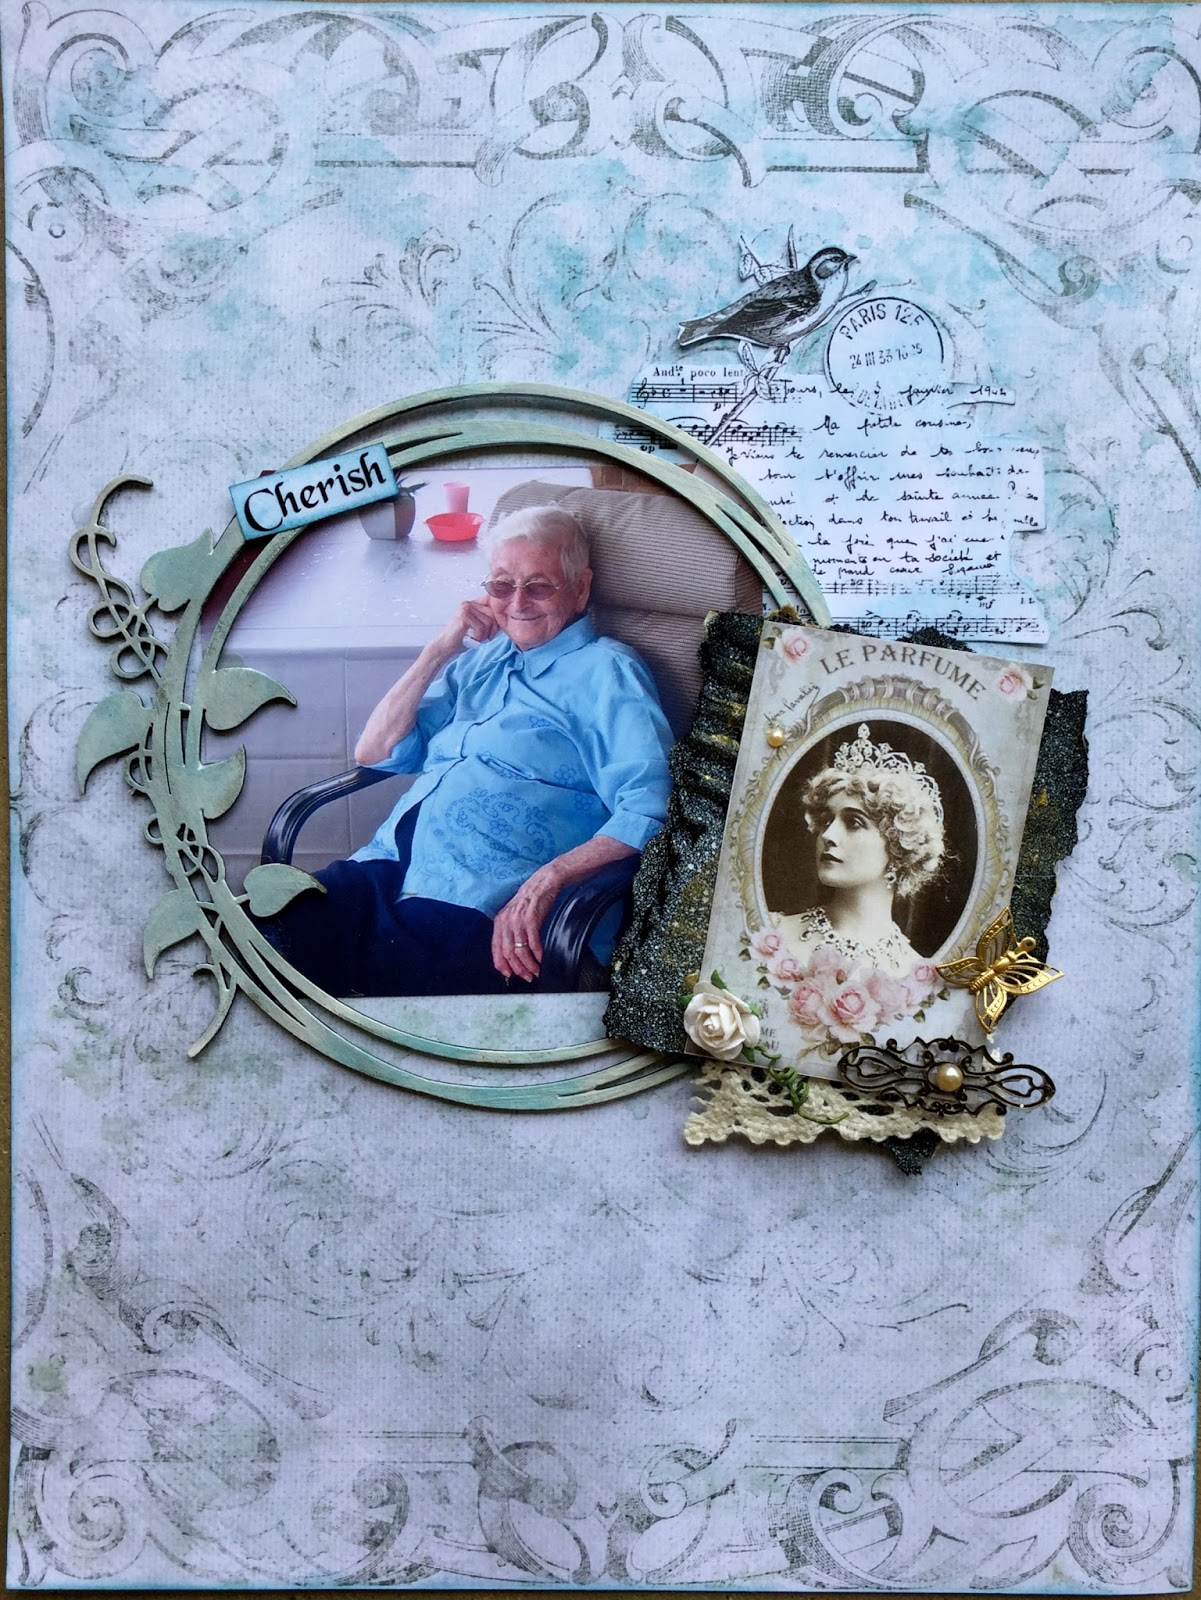
CHERISH ~ PARISIAN GARDENS

Hello Mary here to share a layout with the beautiful new range Parisian Gardens .
Oh my , when I opened the box I was in heaven &  literally could not wait to create with it. As I looked at each of the beautiful pages , I had ideas running through my head.
I did sit down and create a page that afternoon and busting to create more projects with this range when I get home from holidays.
Cherish


Once again I have kept my layout quite simple , as the papers are so beautiful , they don't need a lot of embellishment I feel.


I have fussy cut the music/ script/bird piece from the images on the cut and create sheet and inked it slightly with a blue shade. I made a tag from the image of the beautiful lady on the cut and create sheet  and embellished it with the gold butterfly charm , rosette and vintage trinket and lace
The Word Cherish I have used as my title and cut it from the cut and create sheet.
The only product not from Megs Garden is the Circle Chippy, all other products I have used you can find in Megs Store
Until next time
Happy Creating
Mary

20 August, 2015

Be True To Yourself by Dana Tatar - English Rose Garden + Forgotten Meadows Collections


Hi! Dana Tatar here today sharing a layout that I created with the gorgeous new English Rose Garden collection. I used neutral patterned papers, Sunshine on Petals and the Trips to the Village Half Sheet, from the Forgotten Meadows Collection for the background of this page. I then added whipped spackle through a stencil, which I then colored with mist and ink, to the top half of the page to add some texture to my design. I cut large flowers from the English Rose Garden Roses and Flowers patterned paper to create a floral base for the photo.


I cut this gorgeous vintage photo from the English Rose Garden Cut and Create patterned paper. I matted this image with a Circle Paper Lace Doily and a piece of chipboard from by personal supply. I filled in the white space around the image with flowers and leaves from the Temptations in Cream and Sage Bundle and some pink flowers from my personal supply.


I cut this butterfly from the Butterfly Collection Cut and Create Ephemera Sheet.


I finished this layout with a rub-on title from my personal supply.

Thanks so much for stopping by today!

Meg's Garden Supplies:
Butterfly Collection Cut and Create Ephemera Sheet
Circle Paper Lace Doily
English Rose Garden Cut and Create
English Rose Garden Roses and Flowers
Forgotten Meadows Sunshine on Petals
Forgotten Meadows Trips to the Village Half Sheet
Temptations in Cream and Sage

31 July, 2015

Hello bloggers Trish here,today i have the beautiful Forgotten Meadows "My Garden" LO and card to share

These were my window pots and garden before I moved to the coast and didn't scrap.
I used micro beads on the tips of the daisies,Forgotten meadows cut and create paper.


                                        Thanks for taking a stroll through Megs garden with me