Showing posts with label organza ribbon. Show all posts

12 January, 2019

Decorative door hanger

Hello everyone & welcome!

Today I would love to share with you a project I created for Meg's Garden Blog.
A decorative door hanger using A4 watercolour paper and the Vintage Journal cards series: called Vintage flowers. 

I so love this pretty image and the delicate shades of pink.
My hanger was created from scratch. Firstly I traced around a door hanger shape onto stiff cardboard & cut
out. I traced this shape onto the A4 watercolour paper.  This was then cut out & inked in a soft brown shade before being adhered onto the cardboard door hanger shape.
Layers of lace, tulle and die cut shapes were added. A cluster of pink roses & rose buds and leaves adorn the corner of the image. To finish I added some glitter glue & pearls. A gorgeous project to create. My door hanger now sits on a cupboard door in my craft. 
Stop by Meg's Garden online store for all of these goodies and create your very own unique door hanger.

Until next time.
Thanks so much for stopping by.
Have a wonderful day & happy creating. 
LEANNE

21 October, 2018

With Love

Hello everyone & welcome!

Today I would love to share a very pretty card made in some of my favorite colours of pink and green. These pretty papers are from the Vintage Journal Card series called Vintage flowers and the A4 watercolour papers which are available from Meg's Garden online store.
To create my card I first die cut an oval shape in the watercolour paper.
Next insert the Vintage flower card image behind the raised die cut oval shape. All papers have been inked in a soft shade of green.
To finish I added a cluster of paper roses, a stamped sentiment, an organza bow, a metal charm, a large self-adhesive pearl and a touch of glitter.


Until next time.
I hope you all have a wonderful & happy creating.
Leanne


08 August, 2018

Vintage Floral Journal Cards from Rose

Hello Bloggers
Our latest Guest on the Design Team is Rose Parker (aka my sister). I sent her a pack of the Vintage Journal Cards - Floral along with some ribbons, patterned papers, flowers etc. 

These are the 2 cards she made using the Blue Florals:

They are both done on white cardstock with 2 different blue cardstock mat layers

Card #1:
The little book on the front sits on a large white die cut frame on a torn embossed blue-grey mat; as well as a white curved die cut border strip at the bottom on a torn white corrugated paper.


The little book uses the same blue-grey cardstock & carries the colour of the torn mat.  On the front is the Blue Bird Floral card embellished with 2 corners in the same cardstock: it is embellished with blue iris satin ribbon & 2 white silk flower forget me nots. The little book has plain paper inserts held in by the satin ribbon tie - you could also use lined paper, some poetry, pics or a special message.


Card #2:
Many layers on this one:  The first is an embossed white panel that goes the full width of the card & about 2/3 down topped with a torn pale blue-grey cardstock square, a blue small envelope & then a white die cut decorative circle.  At the bottom of the card is a  piece of lace topped with a strip of white torn corrugated paper & a strip of border punched cardstock has been used on the bottom of the card embellished with 2 pearls.  The front of the card has a small organza bow with a white paper lily & a blue paper wild rose.


The Vintage Floral Journal Card is mounted on the pale blue-grey cardstock (same as the mat), then a white cardstock mat with the borders punched edges & a double ribbon used as an opener.

The pic below shows how the front looks with the Vintage card open - the envelope can hold whatever you want.  The top pic shows the Vintage Card closed (magnet on both sides).


Hope you enjoy her cards - there are 4 more to be shown - each different, all with many layers & lots of ideas

Bye for now
Meg - sister of Rose

PS. The Floral Vintage Journal Cards have been used in our First Card Kit

14 July, 2018

Sherlock III: a New Case - Spread the word...

Sherlock III: a New Case -
Spread the Word
Hello everyone, popping in to the blog today to show you some cards I created with this beautiful collection!
All the cards are using the A4 pages, cutting out the most beautiful elements on the pages to make the centrepiece of each card.
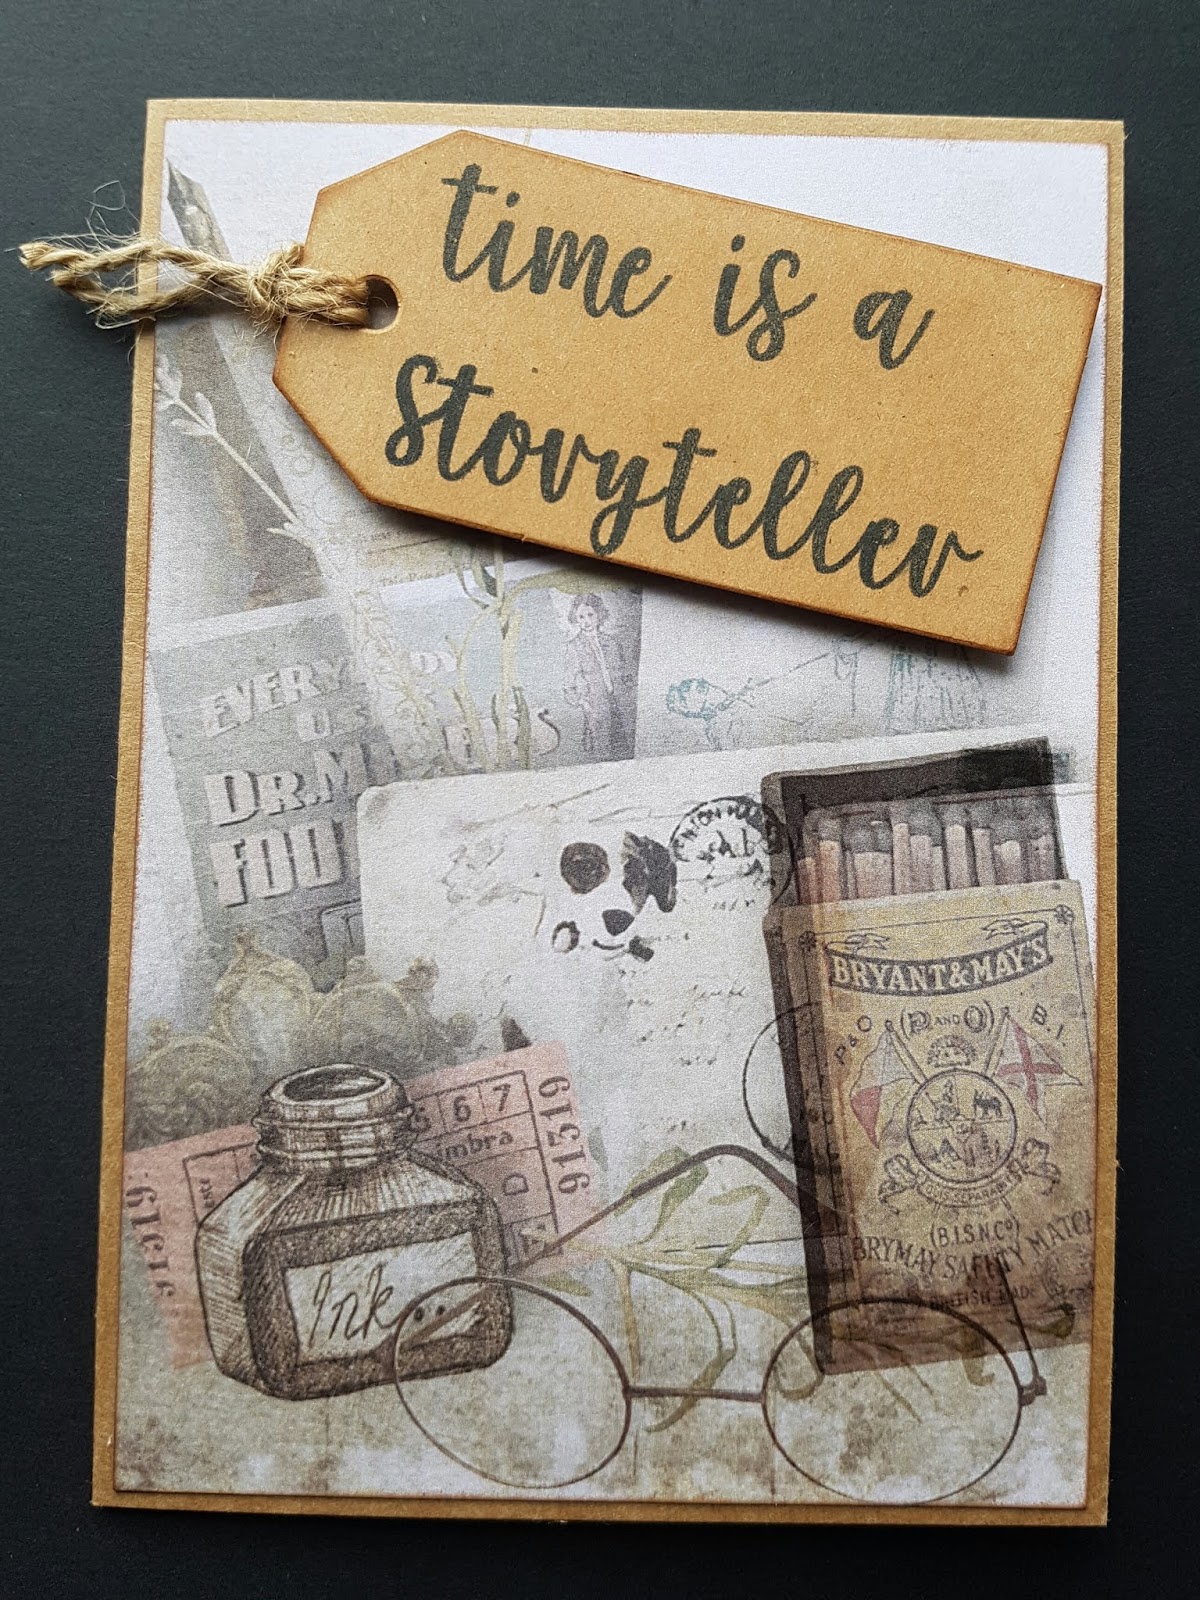
This card uses the ink pot as the inspiration, I have added the pen nib and the sentiment "Spread the word" to create a writers theme.  The organza ribbon tied in beautifully with the vintage photo ink around the background paper.
This card has such a beautiful background paper that I left it so simple with a mink/taupe organza ribbon and the muted rhinestones from the diamond sheet, available at the website.
This card has such a detailed background paper that all I needed to do was ink the edges with vintage photo ink and add a sentiment.  I used "Time is a storyteller" because the paper looks like a collection of someone's belongings.  I added jute twine to the tag I created.
This card uses the top of one of the A4 collection papers and the postcard is a green text so I used a green backing card, embellishing the card with the green velour flower trim and an organza ribbon bow.  I have added sage green rhinestones from the emerald sheet.
All of these items can be purchased at Meg's Garden store.
Hope you have enjoyed seeing my card creations today and pop back again to see more wonderful creations of the design team here at Meg's Garden blog.
Take care
Bec
xxx

11 May, 2018

A card for Mother's Day

Hello everyone & welcome!
I have created a feminine card using the patterned papers & ephemera sheets from the Shades of Green collection.
 I have distressed the edges of each of my patterned papers then inked the edges with Tim Holtz's distress ink: old paper.

This is also the first time that I have used foamiran to create flowers. I die cut the foam using the Roses frilled edge die. I coloured the die cut foam pieces with Tim Holtz's distress crayons before layering each piece to form my flowers. Stamens were added to the centre of each flower.
Until next time.
Have a wonderful day & happy creating.
Leanne

07 April, 2018

SHADES OF GREEN - TEAPOT CARD WITH TIMELESS CARDS

Hello Everyone,

Here I am again today sharing with you Meg's Garden 'Shades of Green' Collection.  

I am using Pack No. 2  and the Cut & Create from this Collection and hope that you enjoy todays viewing.

Firstly, to match last month's tea cup card, I decided it make a Teapot Card, which was lots of fun putting together.


Here is the other side.

The card can be opened up for the sentiment to be written inside and then tied together with ribbon bows.

I then set about making some matching cards from this Collection.

And now for some close ups, showcasing the many varied embellishments from Meg's Garden.


Love these Doilys.


I hope you have enjoyed our journey today and that it has inspired you to start creating your own beautiful cards from Meg's Garden Collections.
Remember to check out the Labels to see all the items used on my cards.  Until next time.....enjoy your creating time.   Regards Liz.

13 March, 2018

Two Cards using Shabby Chic Backgrounds

Hi Bloggers

With new dies & new papers on my work table, what does a girl do?

She just has to try some of them out - just to make sure they are OK to sell of course! Not just for fun!


 The first card is in pastel dusty pinks:


  • Pale pink Spotted paper on ivory cardstock with pink matting
  • pink antique nylon ribbon is wrapped around the inside of the card & tied into a bow on the front - I use clear clue dots to keep the lace in place & to anchor the ties where I want them
  • white puffy rose is inserted through a rose die (m356) with its edges tinged with my blusher, pale pink rosebuds, rose leaves, cherry blossoms, pink tassel & pale pink satin ribbon
  • waterfall 1 die (m376) with blush pearl highlights


  • inside the card shows the ribbon wrap with tags for sentiments
  • pale pink rose, a clock from cut & create sheet of Shabby Chic Backgrounds foam mounted on pink cardstock & a white doily


 The second card uses green as a highlight color:

  • Silver grey damask on ivory cardstock
  • Champagne organza ribbon in a bow with a hatpin, pearl & green bead is pinned through the bow
  • green paper leaves, cherry blossoms & an apple blossom flower on the side of foam mounted oval frame die (p6745) with cut & create ephemera flower


  • the oval (from the same die on the front of the card) is foam mounted with a small embellishment
  • the green die cut is from die m242 - Elegant Lines
  • the other inside is a panel from the same patterned paper with a die cut flower from the same paper - this die is an old one from my stash


Hope the 2 cards give you some ideas for your 'card ideas file' as well as showing some of the die cuts in action

Bye for now
Meg

10 March, 2018

Ephemera elegance

Hello Bloggers,
I am popping in today with some more cards made from the gorgeous products from Meg's Garden.
Using the NEW Shabby Chic paper collection and the ephemera to cut & create.
I have made 3 cards using the same theme...
  
I used the light green background paper from the shabby chic collection, along with an organza ribbon .

I loved spending the time fussy cutting from the ephemera sheets.


Using the blue butterfly from the ephemera sheets, I mounted it on an embossed white cardstock and then on top of the blue background paper from the Shabby chic range. 


I have used lace and pearl trim to add to the dimension and elegance of this simple card.


This card, I created my own background using pearlescent water colours, trying to match the rouge as much as I could.


I used a thin satin ribbon from Meg's Garden to add a simple finishing touch.  The card is beautiful enough not to need a sentiment.

Hope you like what I have created today.

See you again soon

Bec
xxx


15 January, 2018

I would give you the stars ~ In the Watercolour Garden 04

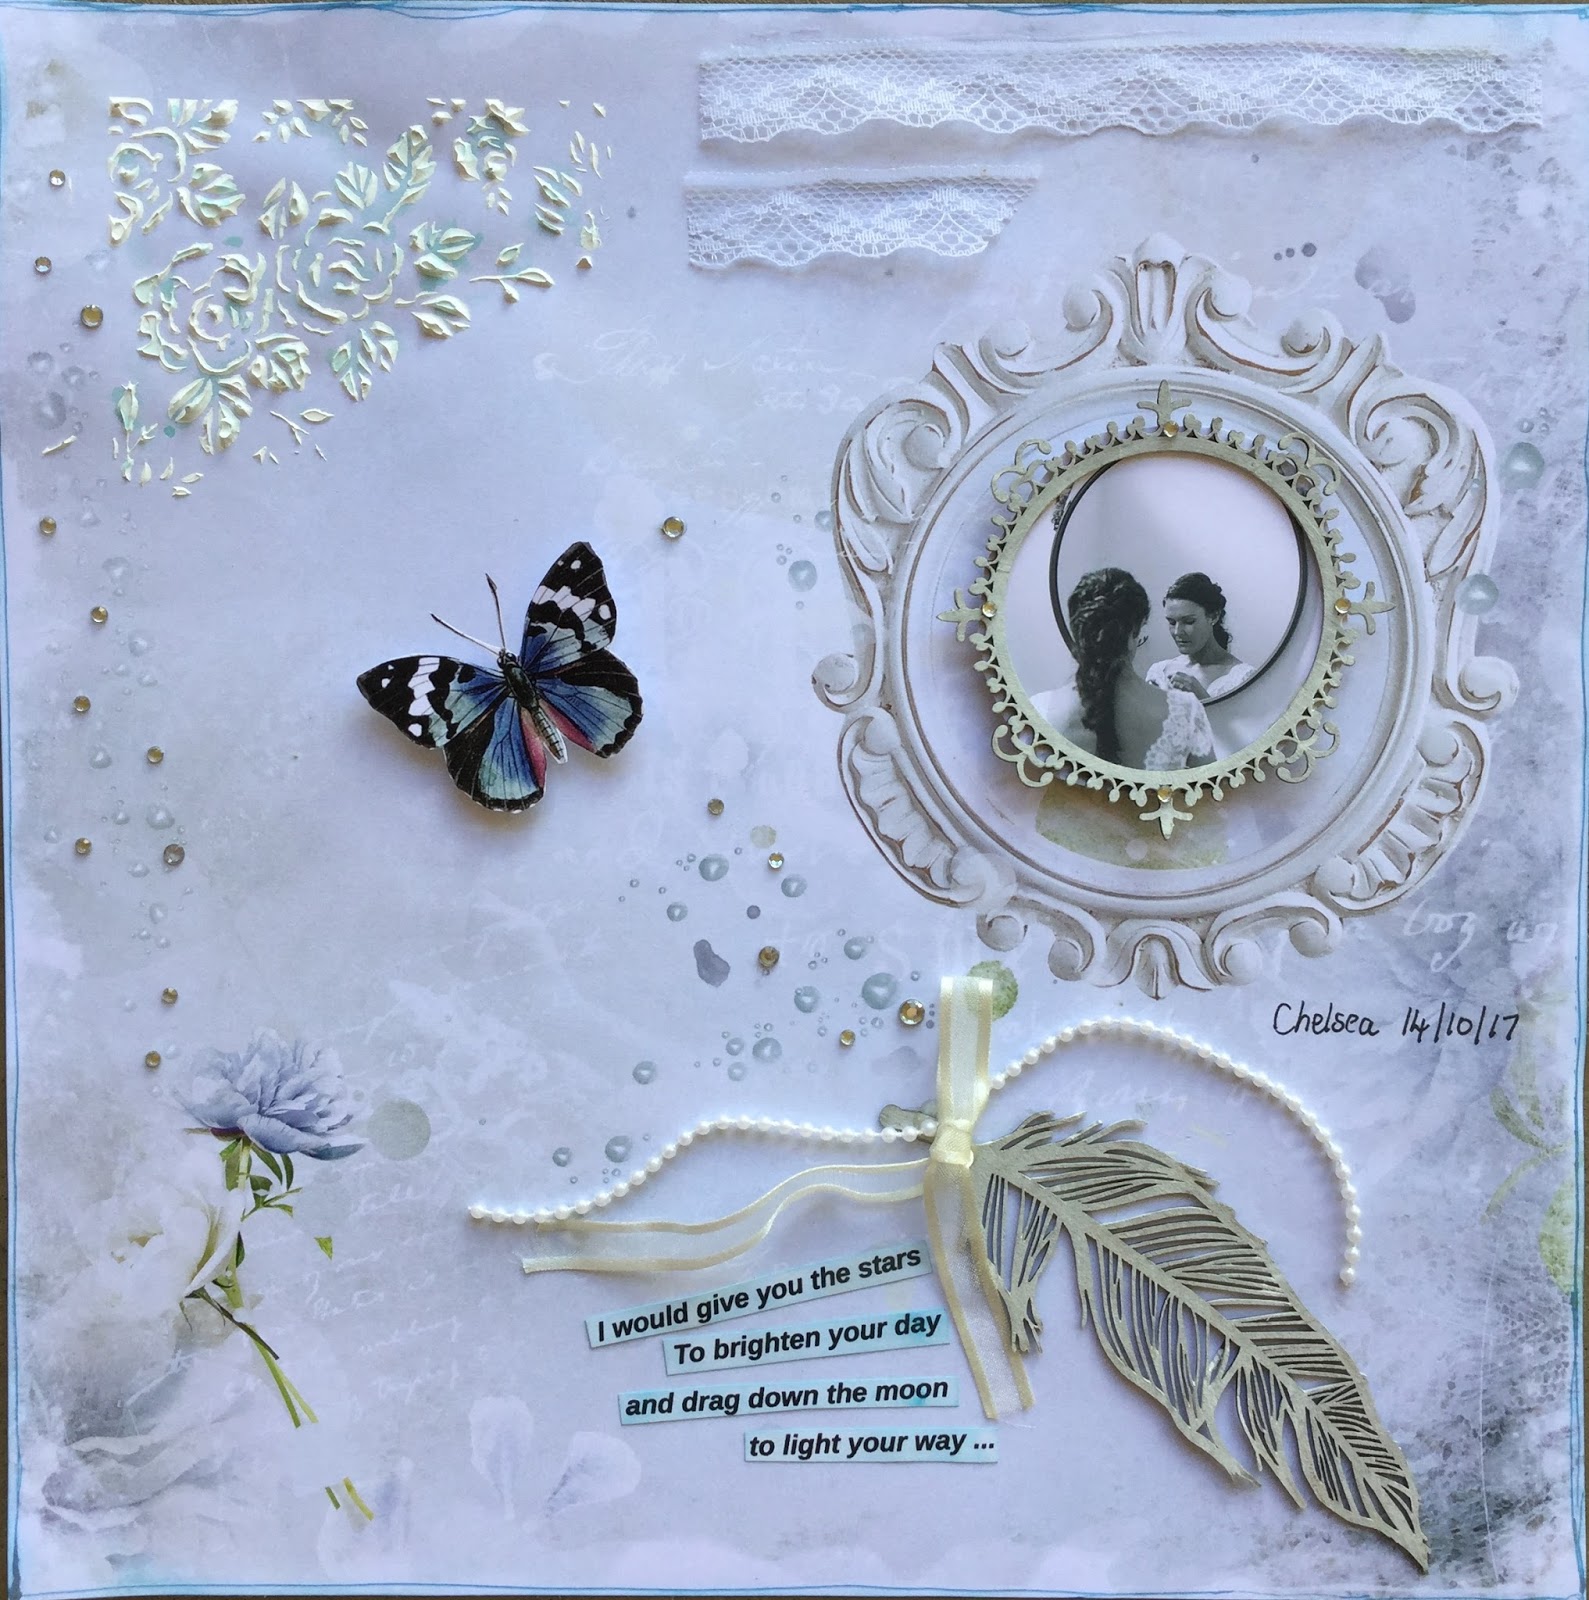
Hello Mary here to share a layout using the "In the Watercolour Garden Range" This range is so pretty and elegant, perfect for documenting my Daughters recent wedding

I Would Give you the Stars


I have kept the layout simple so as not to distract from the gorgeous paper


The chipboard pieces are from my stash , which I have just painted with gesso. I added Megs Satin edged organza ribbon and pearl trim on the feather. The butterfly I fussy cut from the Cut and Create Sheet.


I placed some gems randomly and a rose pattern with texture paste and stencil in the corner


Some lace from Megs store above my photo for some softness.
Simpliciy sometimes is the best.

Thank you for calling and I hope I have inspired you to visit Meg's Store for Gorgeous papers and embellishments to document your precious memories.
Happy Creating
Mary x


08 January, 2018

Memory Book ~ New Alchemy Range

Hello Mary here today to share with you pages from a memory book I created for my Brother for Christmas using the new Alchemy Range. I had intended to make the journal itself but ran out of time, so I used a A4 3 ring folder to keep the memorys in.


I have kept the first page quite simple so as my brother can add journalling if he wishes. I fussy cut the envelope image and created a tag with a quote to tuck inside along with photos. I also fussy cut the "Journal" image and the scroll and feather from the cut and create sheet .


I added pages of my Dad in my brothers Studio on Christmas Day 2005. I have used images from the cut and create sheet to embellish my page along with fibre and brass embellishments from Megs Store.


I fussy cut the ART image from the cut and create sheet and then made a little slit with a craft knife to add it to the clip board image.


I have added a tag with journalling at the side of the photo. Images from the cut and create sheet. My Dad's favourite place to sit and have a smoke at the wood tank.


I fussy cut the flower urn from the cut and create sheet,  placed it on foam squares and placed flowers in it from Megs Store.


for this page I ripped the side, added pp to the underside of the rip so there would be a pattern showing not just white and then I added the coffee stain paper image from the cut and create page . I used a frame from Megs Store and painted it with gesso for a whitewash effect to frame Dad with.


My Grandparents sitting on the steps of their home.Using layers of left over PP from Megs to use as a mat for my photo.


I have added a page of my Mothers handwriting telling the story of her Mother starting a bush school.


Two of my brothers and myself when we were young


I fussy cut the open book and placed it on foam dots to give dimentsion and used a PP from the Sherlock Holmes range , the ranges work well together.


Again I have left the last page simple with room for journalling and I fussy cut the envelope , cut a slit and packed it with old family photos for my brother.
I encourage you to visit Megs Store for beautiful papers and embellishments to create with

Thank you for calling by. I hope you all had a lovely Christmas and wishing everyone all good things for the New Year. 
Happy Creating 
Mary x