Showing posts with label gold butterfly. Show all posts

19 September, 2017

Butterfly Kisses ~ In the Watercolour Garden

Hello fellow scrappers, Mary here and today I would like to share a layout using the gorgeous "In The Watercolour Garden Range "
The Pattern reminded me of Lilac , Growing up the family home had heaps of Lilac bushes so when they were in flower we always had vases and jugs filled with Lilac in the home. So this reminded me of my Mother.
The layout is of my Mother and Granddaughter. I know this photo is a favourite of my Granddaughters so I thought it would be nice to document a special moment between them.

Butterfly Kisses


I have cut the Butterly Kisses sentiment  & the large Butterfly from the Cut and Create sheet. I used the lilac flowers from my Mum's craft stash and then added Ribbons , the gold  Butterfly charm and also added a couple of diamente pieces in the cluster  The flower edged organza ribbon is so delicate and pretty,  apart from the flowers from my Mothers stash everything else is from Megs Store.
In the bottom corner I have placed the large butterfly on the wide Organza ribbon and added some Pearl trim


a couple of close ups for you


I hope I have inspired you to document special moments with the gorgeous Papers and embellishments that Megs Store has to offer .
Until next time Happy Creating
Mary x


20 June, 2016

Rose Quartz Mini Book by Meredith Hilly

Hello everyone. I have made a mini book using 12x12 pages using the beautiful papers from Megs garden.


I cut out the smaller pictures which I then made into tags to slide into the pockets. I tied gold, brown and green ribbon on different ones.


I used the beautiful light rose lace to frame pictures.


Gold leaves and gold edging was glued into the book to make it pretty like the old photos of the ladies in the book.


The tiny roses from Megs garden are terrific small detail element to any picture.


I like the metal flower with the green flower beside it as they are both not what you would call a traditional colour of flowers.


Using double sided 12x12 paper this is how the mini book is made.


Fold the paper  in half.


Then fold it in half the other way.


As the below picture shows cut a 5mm strip out of the page.


Fold the page up then back on itself to form a pocket.


Stick it down. one side has a pocket and the other is a page.


Turn over and do the same again.


Now you will have another pocket and a page the other side.


Using this technique you can make as many pages as you like and thread a piece of ribbon and lace to bind it into a book. This book can be made into a lot of different page set ups. So experiment a little.

Thanks for taking the time to look at my latest project. Thanks Megs for such pretty papers and embellishments. Keep up the great work.


Megs Garden

From my stash
Gold trim stickers
Pink card stock


09 February, 2016

Chantilly Cream layout and Cards

Hello ! Mary here with my very first post as part of the DT for Meg's Garden , I am really happy to be part of the team and to create with Meg's beautiful products.
Today I would like to share a layout and two cards created with the gorgeous Chantilly Cream Range,
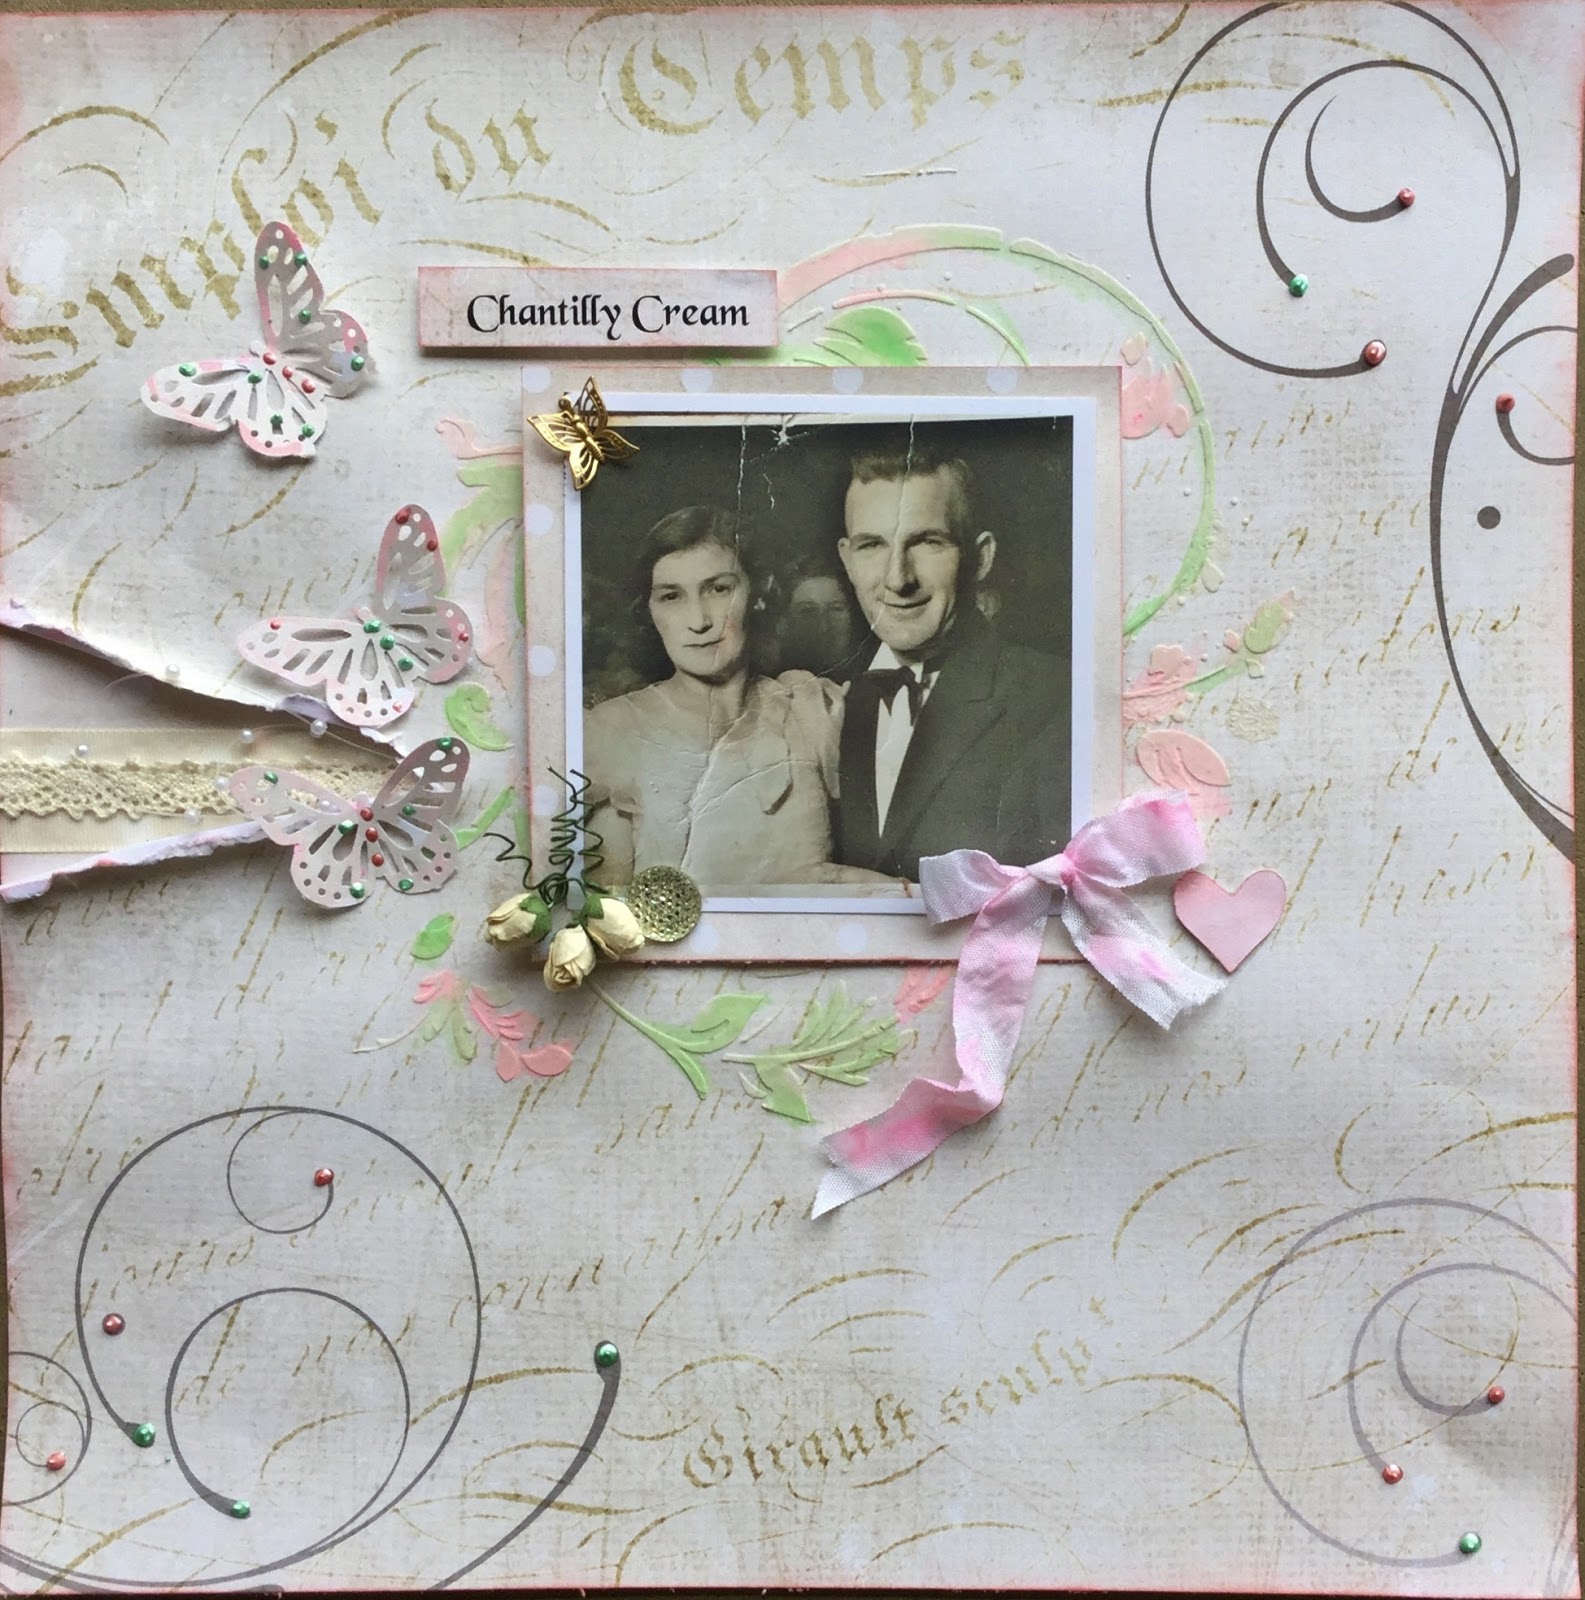
This range makes me think of Romance and softness, so with that in mind I chose a photo of my Aunt that I thought would be perfect.


I kept the layout quite simple


I tore the Chantilly Cream 05 PP at the side and added some Chantilly Cream 01 underneath. Then I placed some wide cream ribbon and on top of that some cream lace to this I added the pearl spray .I punched some butterflies from the Chantilly Lace 01 PP and added some perfect pearls and a touch of pink water paints for highlights. In the corner of the photo is the lovely little butterfly trinket. I also mounted my photo on the Chantilly Cream 05 PP


To add some romance I used a stencil and texture paste for the lovely vine pattern around my photo and then added the acrylic paints for a little colour. Satin Seam binding would be one of my favourite products, it is so soft and versatile and falls really nicely. The Satin seam binding was white, but I wet it, scrunched it and then just tipped my water brush into the paint and added some pink here and there for a little colour. I thought I would show you the page below before I decided to add the soft pink paint . I think it is subtle but makes a big difference. I have also added Perfect Pearls to the flourish Pattern on the paper.


Then I decided to make a couple of cards with the ephemera from the Cut and Create

Gorgeous vintage flower trinket , pearl spray, cream lace and cream cobwebbing , finished off with a big cream bow


Ephemera cuts make life so easy . I added a punched edge, a flower made form the Chantilly cream PP with a added cream , woven edge organza ribbon bow . I cut the butterfly from the ephemera cuts and used a Paris stamp
I hope I have given you some ideas to create with this lovely romantic range.
Until next time,
Mary

22 July, 2015

Marie Antoinette Photo Frames by Meredith Hilly


Marie Antoinette Photo Frames by Meredith Hilly.

Hello everyone. I hope you are keeping warm with such cold winter weather. A great time to scrap.
 My off the page project that I wish to show you is using photos of the beautiful Queen of France, Marie Antoinette, who became a symbol for the wanton extravagance of the 18th century monarchy. I wanted to capture her in these photo frames of the young and older Marie. The  "Forgotten Meadows Paper " and embellishments from Megs garden are so stunning and feminine they complement her indulgence of fine possessions.


 In the younger photo frame I used the beautiful blue from her dress to feature in the frame.
Blue ribbon and small blue roses brought the frame together. Lace and silver sequences gave it a classy look.


The white roses and frame were sprayed with a pearl shimmer mist that caught the sun light beautifully. I used a matt silver for the leaves and inked the edges to give it a aged look.


For the second frame I choose the chocolate and bronze colours from Maries dress to
 bring the photo frame together. This colour also, I feel ,gives Marie a more mature look.


This rose I attached is like the one in the photo she is holding. Using the bronze coloured lace to frame her photo really draws your eyes to her elegance. I finished the frame with a dark ink that matched the chocolate coloured leaves.


Thank you for looking at my latest project.

Megs garden-

From my own stash-
Photo frames
Peal Shimmer mist
Ink