Showing posts with label vintaj brass. Show all posts

22 April, 2018

SHADES OF GREEN COLLECTION LAYOUT WITH GATE FOLD CARD & BOOKMARK

Hello everyone,

Firstly, I am here to today to share with you how you can use the Shades of Green Collection 5x7 pack to form a special layout.

I have joined 4 pages, together with a bit of fussy cutting.


The cut and create sheets are fantastic with beautiful images.


And here is the final result.  I did 'tea soaked' the wording.  Meg's Garden paper is nice and strong for this procedure.

Next I was playing around with a 'Gate Fold' card and the Shades of Green Collection.  This collection has beautiful images to suit any type of card that you wish to make.
I tend not to throw anything out :) and used the Shades of Green leftover die cut to encircle the gorgeous flower and clock image.


I then used the cut and create lady image to form a Bookmark to insert in the little pocket that I made.

Back view, you can either  have it as a bookmark or a space to write your sentiment on.


Finally here is the closed card.

Thanks for taking the time to view and be sure to check out these beautiful papers HERE
Until next time.......Happy creating......Liz

30 March, 2018

NEW 'SHADES OF GREEN' COLLECTION - TEA CUP CARD WITH OTHERS

Hello fellow Creators,

Very excited to be showcasing Meg's Garden new Collection ' Shades of Green'. For these cards I used Meg's Garden Pack No. 1, together with the Cut & Create sheet.    This collection is amazing and I was inspired to  create something different for you today.

Firstly, I decided on this Tea Cup card which was a lot of fun putting together.  I altered the tag on the actual tea bag that is sitting in the cup, ideal for sending to a friend to share.

 Here is the card completely open.

and now it is closed and ready to send.

Next came a couple of cards using this lovely Collection ' Shades of Green'


Close ups for you showing the beautiful trims and metal embellishments.


Well that is all I have for you today.  I hope you have enjoyed our journey through Meg's Garden new Collection.   You can view more HERE.

Don't forget to check out the Labels, to see which items I have used.  Until next time....have fun creating and see you next month.....Regards Liz.


30 January, 2018

NEW SHABBY CHIC BACKGROUNDS

Good afternoon Crafters,

Liz here today showcasing a couple of the new Meg's Garden Shabby Chic Collection.  Beautiful soft colours in this range and perfect for your creative needs.

As it has been sometime since creating a  layout for you, this is what I have chosen this month. The circle backing is from Meg's Garden and is so lovely and soft.  Teamed with this Shabby Chic collection sets it all off beautifully.


A close up of Meg's flowers and brass element, add that little bit of flair to the any layout.
The butterfly and little lavender are from the Shabby chic cutouts and here is a close up.

You will notice, no title or pics as yet, but I am sure I will have some lovely pics of my grand girls to slot in shortly. :)

Thank you for taking the time to look today and you can check out more of this lovely collection HERE.

Until next month......happy creating.....Liz

30 November, 2017

SECRET MYSTERY BOX & MINI JOURNAL with new PARIS CHIC COLLECTION

Hello Everyone,

Liz here today showing you the new PARIS CHIC COLLECTION.   I was lucky enough to be given the new Journal pack in this wonderful collection.

But first let me tempt you with a 'Secret' mystery box that I created to hold the mini journal using Paris Chic.
And Meg's Garden new Box Handle Arch and decorative lock.  Stunning items don't you think?? Then I was inspired to do a little Decoupage on the lid, with papers from Paris Chic and Vintage Beauties.

Now for a little side view and inside peek.


I made the little Journal from a couple of 12x12 album page inserts, then set about decorating my Journal.
Some special brass corners and metal hearts.


Meg's Garden lace and ribbon really set the Journal off.


Meg's Garden heart shaped doily and beautiful floral ribbon.
 You will notice that I used a little 'Inca Gold' in gold to edge a few of the cutouts, which gives a real vintage look to the pictures.

Finally a little fussy cutting of the flowers and here is the end.

I hope you have enjoyed our little visit through Meg's new Paris Chic Collection and be sure to check out more HERE.

Thanks for taking the time to look and until next time........happy creating. ....Love Liz.

09 February, 2016

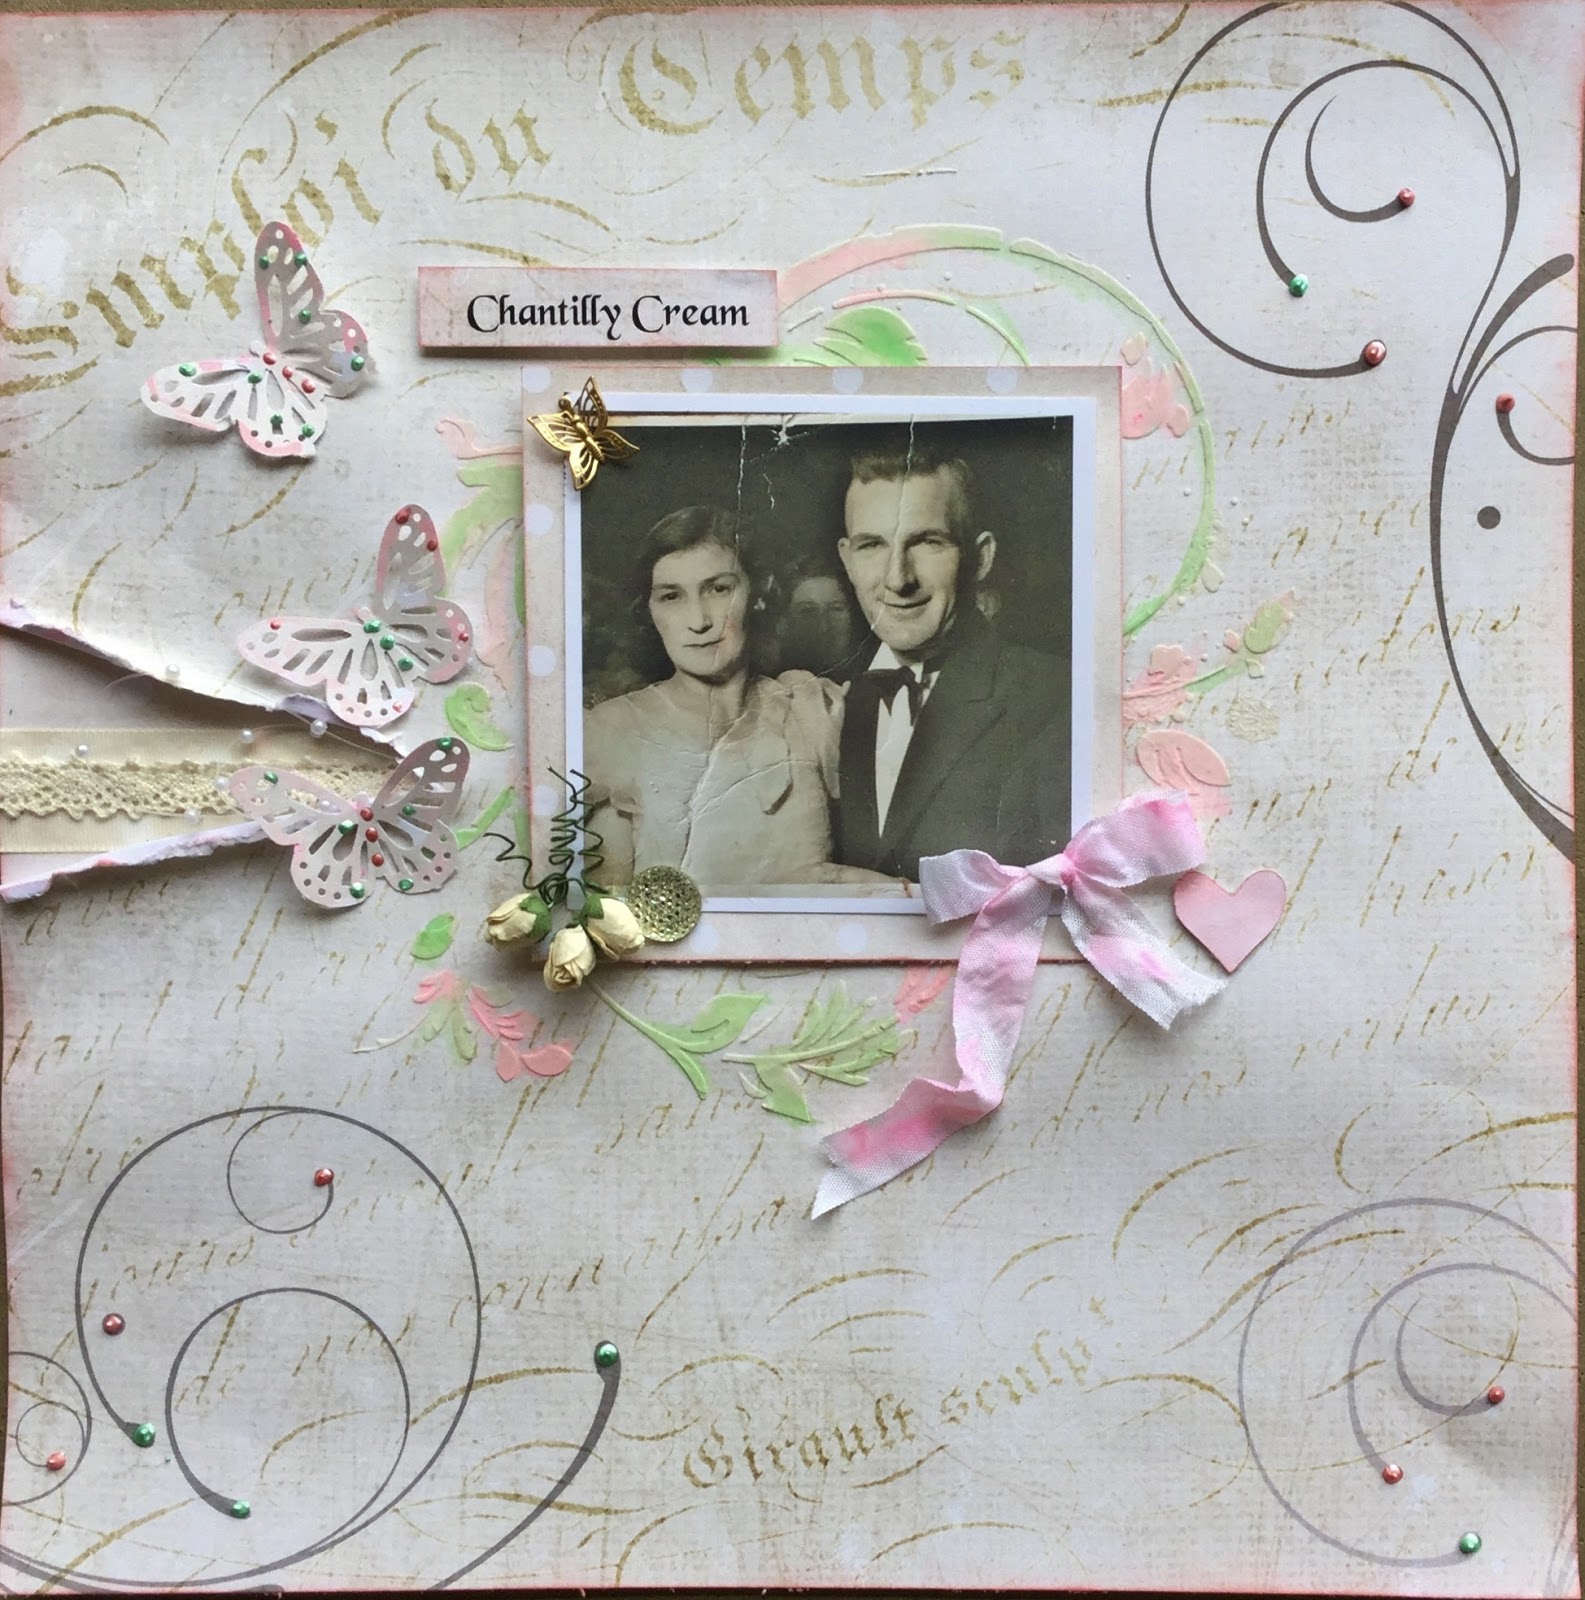
Chantilly Cream layout and Cards

Hello ! Mary here with my very first post as part of the DT for Meg's Garden , I am really happy to be part of the team and to create with Meg's beautiful products.
Today I would like to share a layout and two cards created with the gorgeous Chantilly Cream Range,
This range makes me think of Romance and softness, so with that in mind I chose a photo of my Aunt that I thought would be perfect.


I kept the layout quite simple


I tore the Chantilly Cream 05 PP at the side and added some Chantilly Cream 01 underneath. Then I placed some wide cream ribbon and on top of that some cream lace to this I added the pearl spray .I punched some butterflies from the Chantilly Lace 01 PP and added some perfect pearls and a touch of pink water paints for highlights. In the corner of the photo is the lovely little butterfly trinket. I also mounted my photo on the Chantilly Cream 05 PP


To add some romance I used a stencil and texture paste for the lovely vine pattern around my photo and then added the acrylic paints for a little colour. Satin Seam binding would be one of my favourite products, it is so soft and versatile and falls really nicely. The Satin seam binding was white, but I wet it, scrunched it and then just tipped my water brush into the paint and added some pink here and there for a little colour. I thought I would show you the page below before I decided to add the soft pink paint . I think it is subtle but makes a big difference. I have also added Perfect Pearls to the flourish Pattern on the paper.


Then I decided to make a couple of cards with the ephemera from the Cut and Create

Gorgeous vintage flower trinket , pearl spray, cream lace and cream cobwebbing , finished off with a big cream bow


Ephemera cuts make life so easy . I added a punched edge, a flower made form the Chantilly cream PP with a added cream , woven edge organza ribbon bow . I cut the butterfly from the ephemera cuts and used a Paris stamp
I hope I have given you some ideas to create with this lovely romantic range.
Until next time,
Mary

13 November, 2014

Sherlock's Travel Journal

Hi everyone, Patti here sharing my latest journal using The Sherlock Book kit desinged exclusively for Meg's Garden by Kerry-Jean Watson.  I decided this time I'd like to try stitching the spine once again and opted for a book to house travel photos and notes in.


This journal consists of six pages which are double thickness.  I glue two pages together to create this stronger page and stitched them down the middles to the spine of the cover. I'm finding I really like stitching the signatures (pages) to the spine to create the binding. This stitch technique is called Daisy Chain.


I followed tutorials from Pocket Full of  Vintage and Sea Lemon on YouTube to learn how to do this type of book binding.  I'll link below to both tutorials.  The cover is two layers of decorative paper with two layers of Tyvek and then bound with cardstock strips that I colored with Distress ink and coated with Collage Podge for strength.


Each two page spread give lots of opportunity to add photos and journaling recording memories for years to come.


I really like adding interactive elements like the accordion fold out above.  Don't you just love that ribbon?  It's available in the Meg's Garden store as well (links to all products are below).


Here's another interactive element, a flip out on the page so that you can journal on the back of the small flip out and place a large 5"x 7" photo on the page beneath.


There's so much to share with you, I hope you'll join me on the video for the walk through of each page.  I'll also explain in more detail how I designed the book and follow up with lots more photos to inspire you to create your own Sherlock Book.

Supplies from Meg's Garden


Thanks for sharing your time with me, I hope you'll stop by my and visit on  

Tutorials for Binding:
Pocket Full of Vintage - Daisy Stitch