Showing posts with label mini album kit. Show all posts

09 October, 2015

A Revisit to The Sherlock Book Kit


Hi Bloggers

A tidy up in a workroom reveals lots .... so I will not say more - I am sure you know what I mean.
This is my book using the Sherlock Book Kit - this kit was our first foray into that world which I am loving.


The front cover is fairly simple - some vintage trinkets, a handle, ephemera & a message in a bottle


Pages 1 & 2 feature a mini book with a pocket & more trinkets

Inside the mini book with pockets


Pages 3 & 4 - ephemera from the kit


Pages 5 & 6 - ephemera pocket


Pages 7 & 8 have a double page insert which creates more space for pics, journaling & fun


Page 8


Pages 9 & 10 also have an insert with lines for journaling


Pages 11 & 12 have more pockets, ephemera & vintage trinkets


Page 12 with epherema


Pages 13 & 14 with more space for creativity


Page 15 & 16 - pocket for photos


Back cover & spine

I used black cardstock on all inner pages & you will notice that it is larger than the pages - I cut them all the wrong size so I decided that I would hang the ephemera & tags over the edges so it would appear to be done on purpose.  Doing corners with paper is a chore for me so I just cut all the papers to fit the chip base of the covers & ink the edges.  Distress ink was vintage photo.

Hope this gives you some ideas for working with vintage papers

Bye for now
Meg
www.megsgarden.com

31 May, 2015

Butterfly Garden Collection Chipboard Mini

Hello everyone this is Patti here and today I'm sharing my latest mini using The Butterfly Garden Book Kit from Meg's Garden. This is such a gorgeous collection of papers and butterflies that just screams spring.  I used black 6" x 6" chipboard for my pages, something I rarely do.  On one side I used Tim Holtz On the Edge die, Plaque, to create a decorate edge, poked a couple of holes and wove a combination of Meg's ribbon and some black eyelash trim and ribbon from my stash for the spine.  The closure is a Tim Holtz doorknob latched with this gorgeous lavender ribbon from Meg's store.


On the front cover I went back and forth trying to decide if I wanted to add flowers and bling but in the end opted to leave the fairy take center stage by herself.  I fussy cut her out and then carefully added a thin black line around all the cut edges. She's applied to the book with a Semi-Gloss Podge (I also have several layers of podge under her on the matted cover). The metal elements, under the doorknob and the tied ribbons, have been changed up a bit from their natural metal state to black by the addition of some Stampendous black embossing powder and Versamark.  I love the look.


This book consists of 10 chipboard pages.  I used a combination of techniques to create pockets and slip ins for photos.


Each pair of pages consists of either flip outs, like the page on the right above. It has a magnet hidden under the tassel, and the tassel by the way, is also from Meg's store.  I snipped all the other tassels off this beige trim and left one remaining to act as the pull to open the page.


I had so much fun making these collage pockets. You simply start stacking bits and pieces from the collection to form an area large enough to become a pocket. To help the edges pop I used Tim Holtz Distress ink in Vintage Photo and Black Soot.


I also pulled out my dies to help make pockets or slip ins like the one on the left above. This die is from Marianne Designs called Vintage Decoration. This die cuts on all but the straight edge so I made sure I left up to an inch on this side to score, fold and tuck under the mat which in turns creates the black lacy top and bottom.  The flowers are fussy cut on the right, that creates the stopper for the tags that can be slipped into the pocket from the left hand edge.


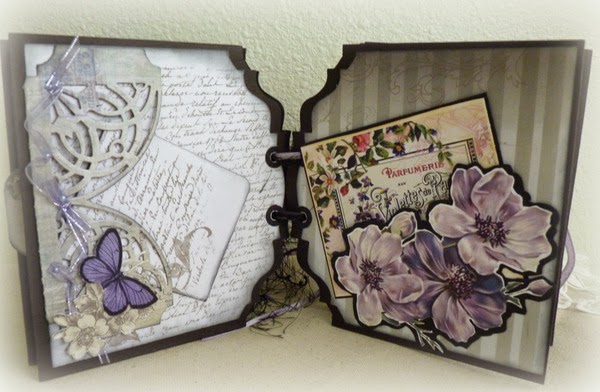
Here's another pocket (on the left above) using dies. This time I used Spellbinders Arched Elegance Pocket.  I laced some of Meg's fine ribbon through it, added the purple butterfly and some fussy cut flowers across the bottom.  On the right the pocket is also fussy cut flowers backed with black cardstock and fussy cut again (all black cardstock in this book is Core'dinations Black Cat 8.5" x 11").


Several times in this mini I cut the matted page to form a pocket, like you see on the right above.  It's often times hard to cover up something as gorgeous as the butterfly here. That's easily fixed by slitting the paper with your X-acto knife (I like to add an additional piece of cardstock behind for support) and gluing.  Make sure to leave the portion you want to act as a pocket free, with no glue.  Another example of this is two photos up, you'll see the bird flying atop the curved edge. Beneath him has been cut and glued the same way to form the pocket for my little booklet.


Belly bands work wonderfully for holding mini books and tags as shown on the left above. Another magnetized page is on the right.  The metal piece has been altered with Tim Holtz alcohol inks to change the silver to a golden blend.  When lifted  underneath reveals another page just ready for photos.


Isn't this paper just lovely?  Here again, as on the front cover, I took the gold dragonfly and added black embossing so he'd match the rest of the book.  Tucked inside is a tiny little book of six pages.  These were just end scraps left over from matting the pages.  To give them interest I corner rounded the outer edges.  Inside I used Kaisercraft's Windsor stamp very lightly on the pages.  I've used this same stamp in other spots throughout the mini where a blank page needed just a little pop here and there.


I have to tell you this pair of pages are my favorite.  Again I collaged elements together to create pockets.  It's amazing how the smallest bits can just give pockets like this the pop they need.  The little tuck ins are a fold-over to make a two page book on the left and an accordion pull out that have four sections on the right. 

Come join me on the video, we'll do a walk through of each page and I'll share any techniques I may have missed here.  Also there will be many more photos of all the pages, the mini booklets, and the flip outs. You'll find the supply list below for supplies I used from Meg's Garden store.

28 November, 2014

The French Garden Mini Album


Hello friends and bloggers! It's Cathy here today and I have another paper bag mini album to share with you. It's shabby chic and it uses The French Garden Book Kit. I have lots of photos to share with this project so a cuppa may be needed!

To compliment the flowers and the also the vintage photo, I added some vintage touches. I used a vintage stick pin and also used some diamante trim .

On my first two pages, I have some interaction. On the left, I have a tri-fold photo mat that is inside the top pocket which can fit a total of 6 photos. On the right, the photo place holder which is a Kathy Orta concept enables you to place photo mats so as not to cover the paper.

Tri-fold photo mat (above)

The photo place holder (above). I used some of the die cuts from the kit and added some Spellbinder dies to further enhance it. You can tuck in tags and photo mats behind it. 

Each of the pages has a large photo mat as well as shown. I used a background stamp from my stash that compliments the papers. The next two pages also have interaction. They have a large photomat (not shown) a flap, and a side pocket for smaller photomats and tags.


The next two pages have the same interaction again, a large photomat(not photographed) and a side pocket and a flap.


The final page includes the back cover. It has a side pocket and a photo frame that has a rectangular photomat.

 Supplies from Meg's Garden


Other:

Ink: Victorian Velvet distress ink, Memento Rich Cocoa and Angel Pink

Stamps: Impression Obsession Toile, My Favourite Things Notebook Paper Background, Prima Something Blue, Kaisercraft Clearstamp Perfume and Script, Hero Arts Dots 

Dies: Memory Box Belicate Butterfly Arch and Chesapeake Circle, Spellbinders Nestabilities Elegant Ovals, Lables Four and Decorative Labels Four, Sizzix Fancy Frame

Tim Holtz Chain Tassels, Pearls, Prima Flowers, Petaloo Forget Me Nots Pink, Green Tara Flowers, Martha Stewart Doily Lace Punch, Sullivans Corner Punch, White Paper Bags.


This kit is available in both a physical and digital format. It is very beautiful and I hope that you'll stop by Meg's Garden to see the papers soon. You can also purchase some Meg's Bundle of Goodies which are some embellishments that are selected to help you on your way in your designs.

Thanks for stopping by and have a great day!

Cathy


26 October, 2014

It's clear All about me

Hello my dear crafty friends!
Irit is here and this is my second project made with new Meg's Garden most gorgeous Sherlock new mini book kit.
This is the frist in Meg's Garden new poroduct line of exiting mini  book kits.
The papers are designed by Kerry-Jean Watson and it's available in download printable version and in printed version I used here.

As you may understand  from this collection's name it's mostly vintage and even masculine line of papers.
But then who says you can't  make a girly mini album with the very same papers?  Not me!
And as I already challenged  myself to make a girly mini album, I challenged myself  second time   to make it about myself.


As a fact: I am the most non photogenic person on the Earth.  I maybe have 5 good photos in the last 10 years. But then why not to give it a try? So I picked 5 pretty recent photos from our  trip to Cyprus and made 5 paged acrylic mini album ALL ABOUT ME.
Making acrylic album was the third self challenge: the papers are single sided  and you need to cover the ugly white with the same  size of paper on the back. Then you want to see something clear and maybe even to see layers of photos. And the best possible glue for acrylic pages is not the best " non seen" one.
So here is an overall look of my album:


I made some textured paste swirls over the clear spaces left after I made a cluster of Sherlock's tag on my cover. I added a flowers cluster on the corner, some metal trinkets and a chipboard title covered with red embossing powder.


The inside of the cover page has this envelope pocket that it good for anything you want to keep  inside:  ephemera  or just your thoughts.
I added the trim to cover the " ugly white" left from the cover  paper cluster and added a doily and a transparent clock just for the interest.


The first page has this very small photo glued from the back side of this page and covered with a small paper circle on the front.


Again, this is the back of this page and it was made to cover the white side of the previous paper. I made my only journalling over this page.


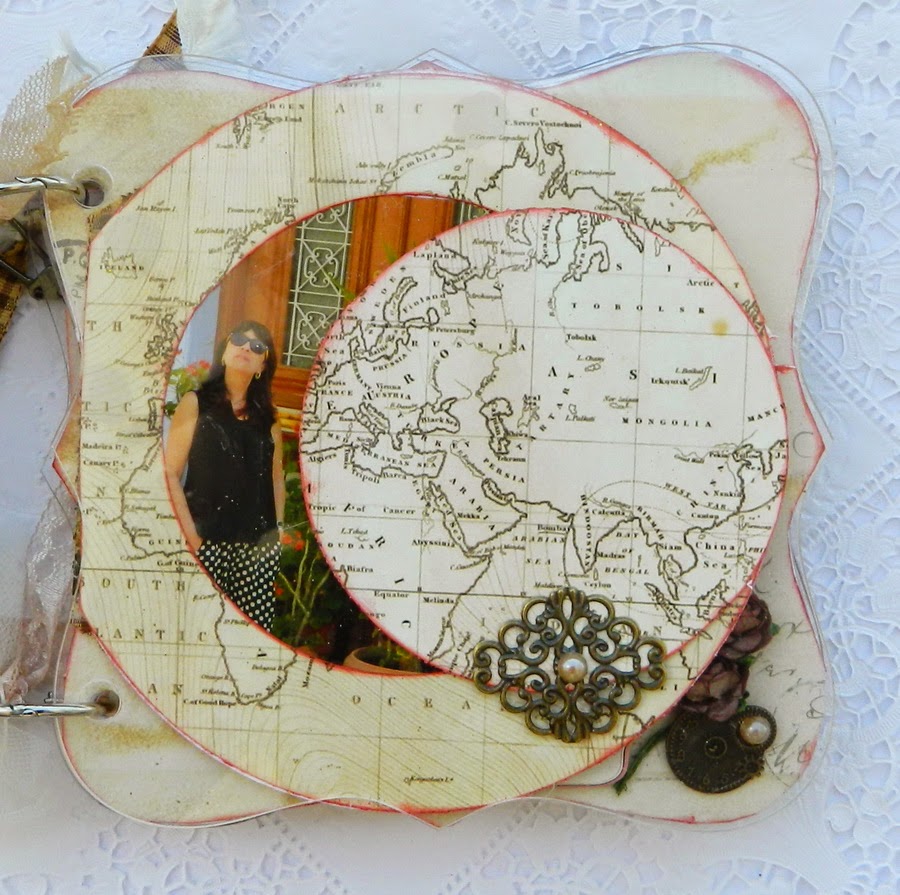
The next page has the back glued photo and the front paper frame .


The back of this third  page is a classic paper- border- photo- embellishment page.


This forth page is the most " clear" one and I wanted it to stay this way. And this is  how it looks with the next, fifth page on the back.


This is how the third, previous page, looks from the forth back...


Th last , fifth page , from the front side


The back cover has another envelope for more " memories" to keep.


Products used from  Meg's Garden
Meg's Garden products:
Sherlock mini book kit
Charm packs
Vintaj brass
Paper flowers
Fabric flower
 Doily
Transparency Butterflies
Transparency Clocks
 Chain Tim Holtz

Other:
Chipboard title- A2Z Scraplets
Ribbon with pearls, pearls- Prima
 Mask- Tando Creative
Ink- Ranger
Embossing powder, texture paste

29 September, 2014

Handmade " Life's Journey" with Irit


Hello my dear crafty friends!
Irit is here and this is my first project made with new Meg's Garden most gorgeous Sherlock  new mini book kit.
This is the first in Meg's Garden new product line of exciting mini book kits.
The papers are designed by Kerry- Jean Watson and it's available in download printable  version and in printed version I used here.
Each of us, DT members, made a totally different project with the very same products. Each of us had her own vision about the purpose of this kit and here is mine.
I made a handmade journal cover using a piece of up cycled corrugated cardboard, a piece of old trash found chipboard as a back cover and a lot of imagination...


The spine was made with a piece of a grunge board painted with copper acrylic paint. The corrugated front was torn here and there, painted with a mix of inks, acrylics and even some texture paste masking over.
I made the front title panel with Sherlock collection postcard and an envelope and added a heat embossed chipboard title.
The corners were embellished with inked white chipboard pieces. I made an embellishment cluster with  Meg's Garden vintage trinket piece that were in my embellishment bag. The golden lace trim was added over the spine and was a perfect match to the copper color of this piece.
I also added some misted into gold cherry blossom flowers.


As my final cover touch added a piece of pearl gold swirl and some more metal embellishments, such as a key, beads and a couple of chipboard arrows.


 And now for the inner album, made with brown paper bags as a tag album. I didn't add any photos or other goodies inside the pockets as this is pretty much an art piece, also it can be used as a real memory keeping album. All 5 paper bags were connected  with Bind- It- All tool (maybe my second time to use it, but I like it more than the binding rings).
For the first page I made a collaged stamped scene made with a couple of stamps, a couple of masks, texture paste, mists and inks , some Tim Holtz tickets and a chipboard title.


 Each  page of this album was heavy stamped with a collection of my vintage stamps with mostly brown permanent ink and one single quote stamp was added to be the main  title of this page.


And another page here:


One more with another quote:


This is the only page that is full of color, but it was a must if you read the quote:


 Some more pages here:


So as you can see each page has one outer pocket where I added some tags  inside and one big inside pocket as each page is a paper bag. This is a right place to add you memories of any kind.
Make your own paper bag album with your own stamps and your own inspiration, but  use our new Sherlock kit and it will make the most  unique project !

Products used for this project
Meg's Garden products

Much more from the grab bag I got!
Other products:
Stamps: Rubber Dance
Inks, mists, gesso: Ranger
 Paints: Plaid, Faber Castell DMC
Bind it All tool and spiral
 Chipboards: Wycinanka
 Masks: Sweet Stamps, Memory box
 Bling: Flourish with a Bling
Other: chipboard, corrugated cardboard