Showing posts with label burlap ribbon. Show all posts

19 December, 2017

Art Journal Album

Hello everyone,
Leanne here to share my latest project an Art Journal Album. I have created this Album from scratch using Alchemy 101 patterned papers & black cardstock. I have kept this project fairly simple. Each page is also a large pocket allowing me to tuck away photos or art project pieces. My album measures 22 x 28.5cm. I have also left a couple of the pages blank, so I can add photos at a later date.


Until next time.
Thanks so much for stopping by.
Have a wonderful day & happy creating.
Leanne

16 October, 2014

Margaret Mifsud - The Sherlock Book by Watson!

Hello everyone and welcome to the Garden.  So pleased you came for a visit.
Margaret back with you to show what I have created with Kerry-Jean Watson's awesome Sherlock Book Kit.  This fabulous Kit is available from Meg's Garden as either a printed version or a digital download that you can print for yourself.  HERE is the link to see the video of the Book Kit.

I am basically a card maker and I was in need of a Crafting Diary to keep track of Birthdays and Anniversaries, etc. and also Design Team Deadlines, and so that is what I decided to make with my Kit.   Yes, I do have all that information on my computer but there is nothing like having it all on hand in a pretty little book is there?? 


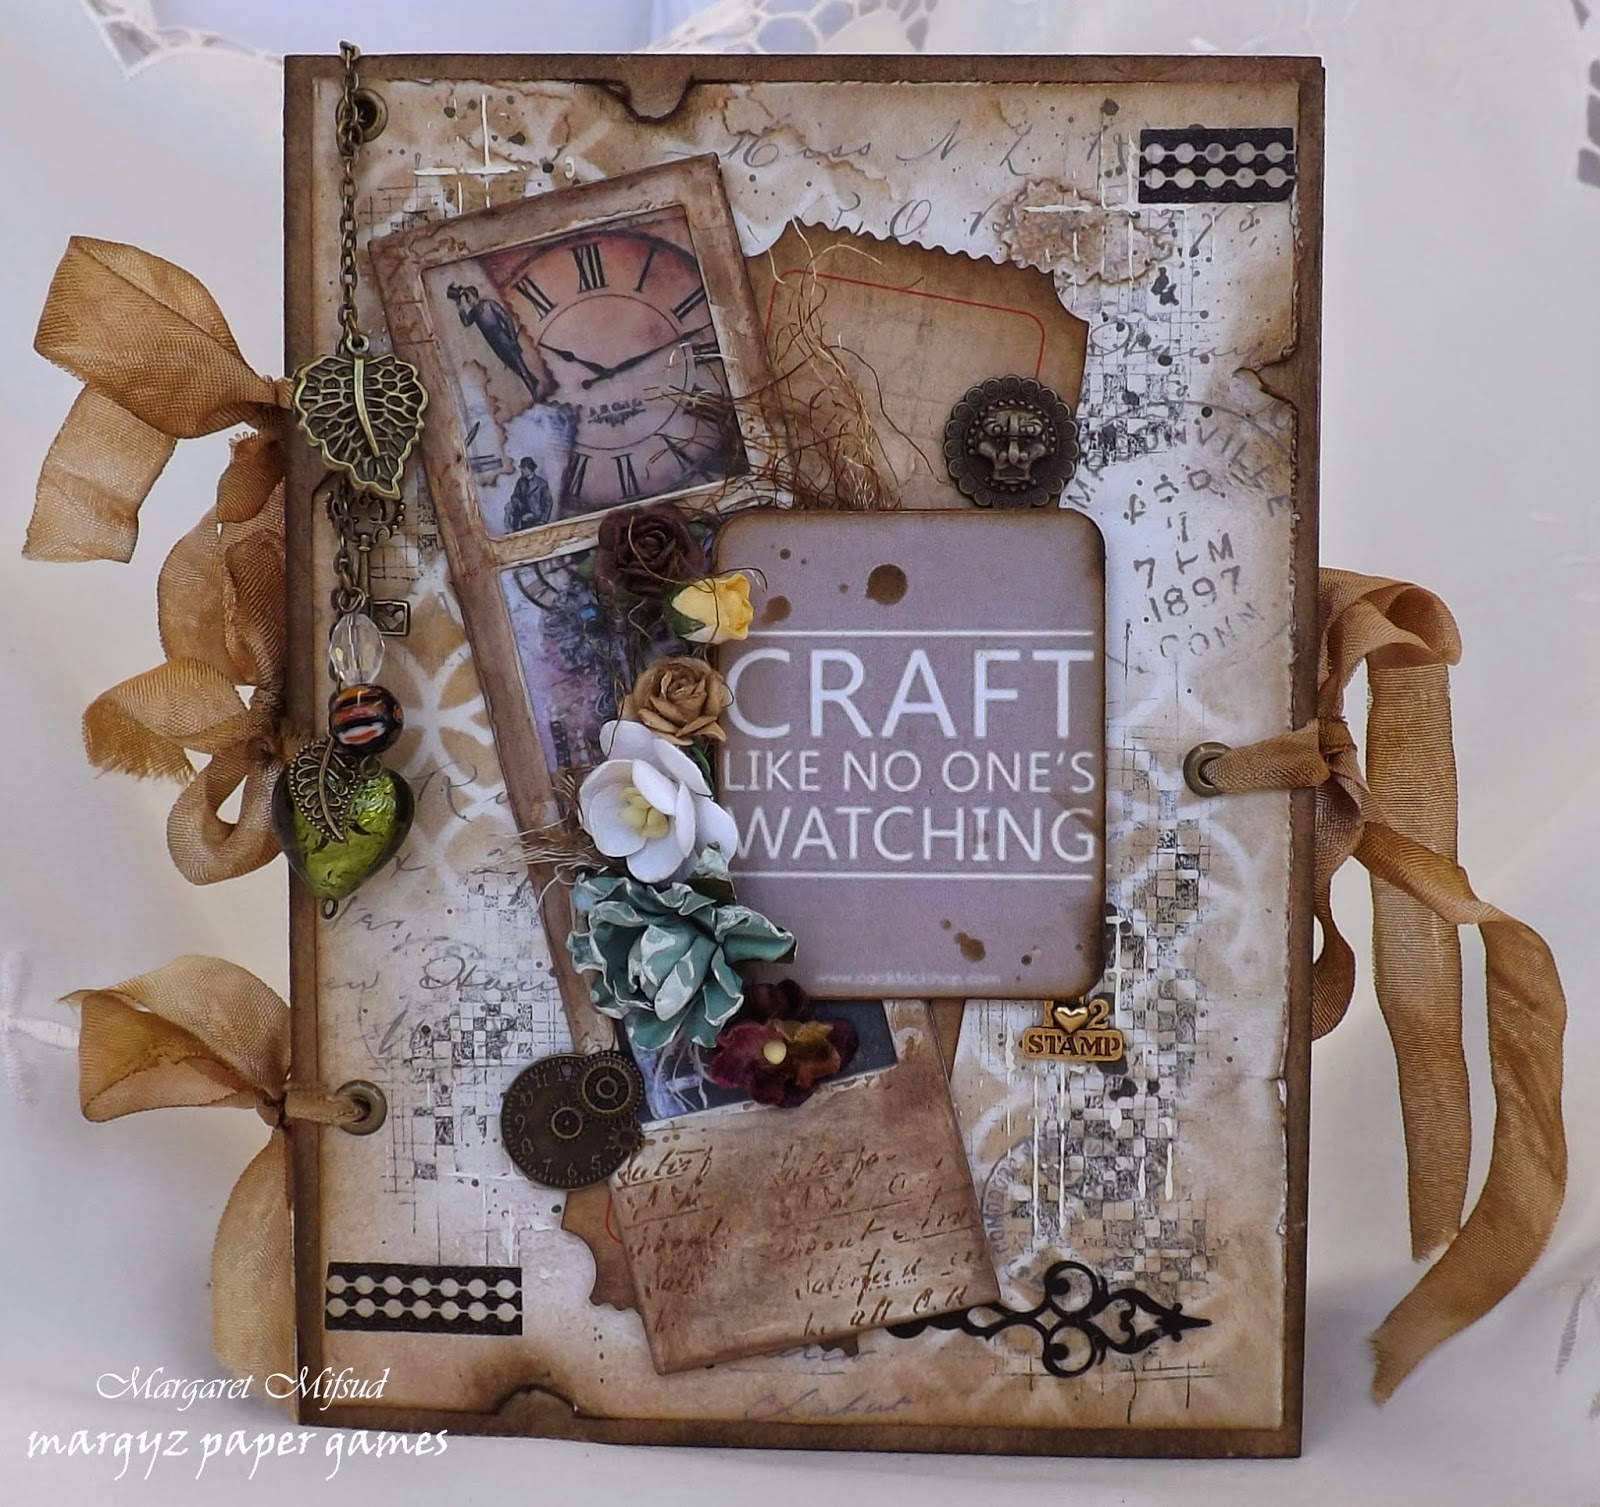
For the front cover I did some stamping and stenciling and splashed a little paint around as well before adding the embellies.
Most of the embellishments you can see came from Meg's Garden.  You can purchase some fantastic 'bundles' that include  beads, ribbons, metal embellies ... everything you could possibly need to beautifully embellish your Kit, and they come in an assortment of colours too!!
The film strip frame came from my stash and the photos inside it are actually photos of some of my past projects for Meg's Garden. The quote was found on the net.  I wanted to incorporate some craft quotes into this book so you will see the odd one or two scattered around on different pages.  


The tabs you can see peeking out from the side of the book are part of the Kit.  I simply wrote the months on by hand and then glued them to the edge of the journal pages.


The book measures 5.75" x 7.75" and all the pages were distressed and inked with Gathered Twigs Distress Ink and then glued to sheets of Kraft Cardstock.  Punched some holes with my Crop-adile and bound it together with seam binding.  The binding  was also coloured with Distress Ink in Gathered Twigs and Walnut Stain.  
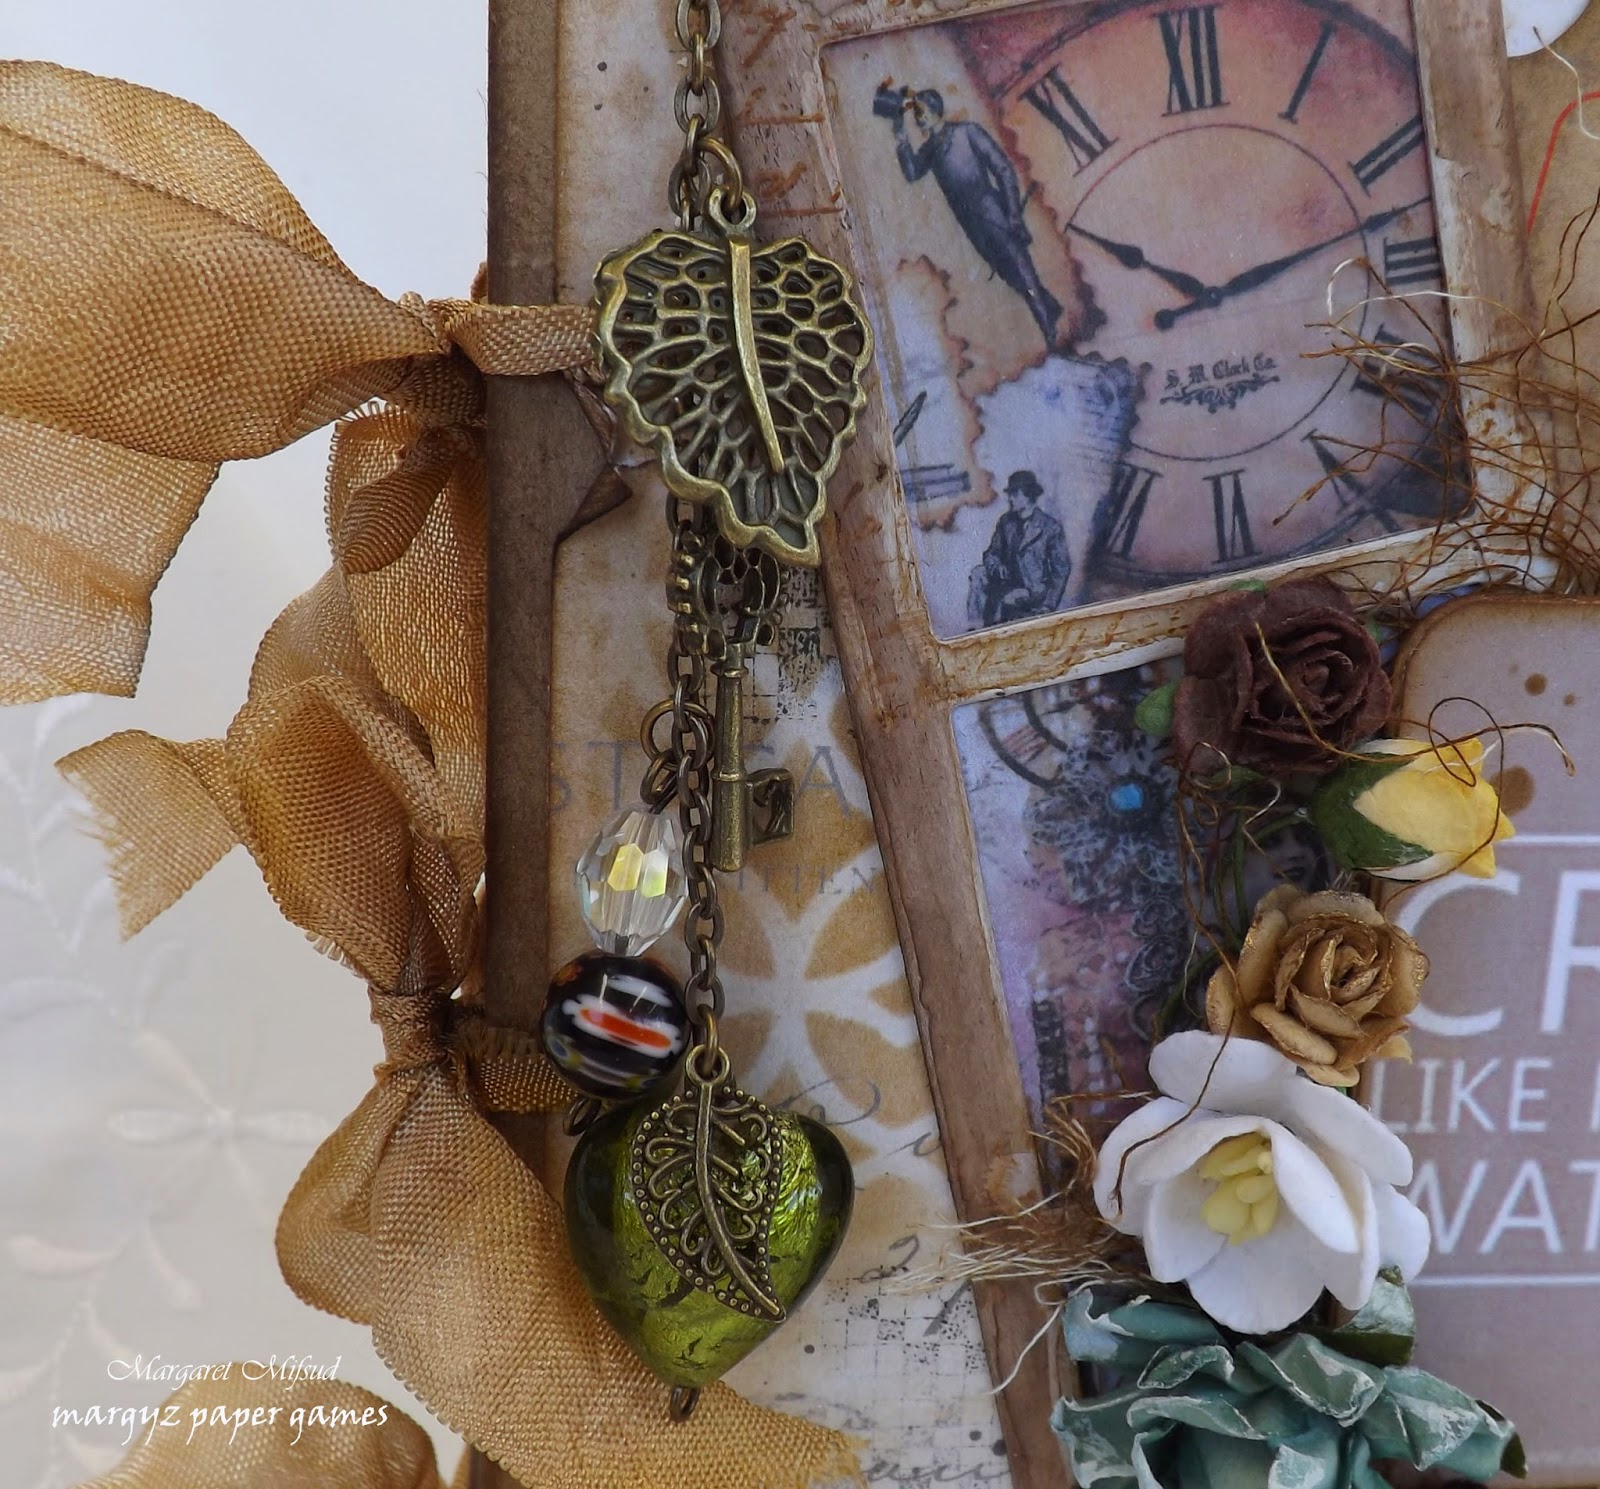
Here's a closie of the charms ...


... and another of the quote and the flower cluster.


I wanted this book to be more than just a Diary.  I also want to use it as an ideas journal so I made a couple of small booklets and some tags in order to record things like interesting sketches, color palettes and great techniques.
Making the booklet was very simple.   I just cut some kraft cardstock and some  plain sheets of paper to the size I wanted, folded them in half and then simply punched two holes in the crease and pulled some twine through and tied it with a bow.   I then covered the front of each booklet with some of the paper and used a fancy paper clip to keep them closed.

Following are some shots of the embellished pages or you can go straight to the end of this post for a walk through video which was made by Kerry-Jean Watson the creator of this awesome Kit.  I don't make videos as I don't have the equipment and I am so pleased that Kerry-Jean offered to do one for me.  Thank you KJ ... you rock!!  


... and this is the back of the book.  The gorgeous stains you can see are actually on the paper itself.  The only changes I made here was to distress and ink the edges ... Looooovee  those stains!!


I hope you like my little Diary and that I have inspired you to try the Sherlock Book Kit for yourself.  Why not scroll on down to take a look at the other books created with the same Kit by my Teamies and you can see the many different ways this Kit can be used.  It is Awesome!!!

Meg's Garden Products used:
The Sherlock Book by Watson
Camel Bundle
Sage Burlap Ribbon
Seam Binding

Thank you so much for visiting, hope to see you here again soon!
Take care and God Bless.
oxox Marg

27 September, 2014

Mini Accordion Book by Miriam

Hi everyone, Miriam here. This is my first project for Meg's Garden, and I am so happy to have been invited to become a member of her Design team. This is a new adventure for me and I am still finding my way. This book was inspired by Charlotte Costain from a class I did with her when I first started card making .All the items I have used will be listed below. I hope you like it.


Meg's Garden Products


Other products used from my stash

Velvet flower
Pearl Brad
Victorian Velvet Distress Ink
Ribbon
Stampin Up tab  punches
Spell Binders Die
Metal Key and brads
Memory Box Die
 .

03 September, 2014

Adriana Bolzon creates with Art 1 papers


Hi there everyone, Adriana here today sharing a layout that I have created with the papers from Meg's Garden collection, this collection is called -

This layout is featured in the special
issue of "Scrapbooking Memories" issue Vol 17 no 1
This issue is showcasing some amazing
talented creatives in Australia and New Zealand.


These are the papers that I have used to create this layout
all available from Megs Garden Website


The story behind the layout
"Narnu Farm" is situated on Hindmarsh Island 
in South Australia, near Goolwa. It is a cabin style farm which you can book accommodation to stay overnight and also feed the animals and look at life on a working farm.
My daughter went there for her school camp and
had a wonderful time with her teachers and 
friends from school. 
A very rustic truck sits at the entrance of farm for people to see as they enter the farm gate.

I created a corrugated rustic fence with the "Corrugated Iron" papers, but I cut them up and place brads at each end.I also
placed some "Burlap" paper under the matted photo, just for
an added rustic touch.


I created a cluster of flowers on the bottom of the photo, I handmade 2 flowers from some old vintage book paper.

I then added some Velvet Viola Posy flowers, Oatmeal flowers & Paper leaves, a touch of Burlap trim and also
added some Skeleton Mesh to the ends of the of flowers. 


List of materials available from Meg's Garden


Please check out all the wonderful products 
and see all the design team members inspirational work at

Thanks for looking, Adriana 

"What a collection of ideas - well done Adriana.  Have driven by Narnu Farm many times & not paid any attention to it until today.  Love the way you have combined the Art Papers with the different papers, flowers & leaves.  The velvet violas look totally at ease amongst all the rustic elements."

Bye for now

Meg
www.megsgarden.com


14 April, 2014

Damask Garden card from Kerry-Jean

Hello Bloggers

Kerry-Jean continues with our  The Damask Garden Collection promotion.  


'This has to be one of my favorite cards so far this year.

for my patterned paper and cut out the one of the pretty labels on the one paper in the collection. I also incorporated a piece of  French Writing Ephemera 3377 and More Butterflies Tr004 in the card.

I painted one of the Butterfly oval laser frame fr003 cream and inked the edges to age the frame a little bit. I also cut a pretty frame design on my Silhouette Cameo to put behind the frame.

Small Latte Paper Roses latte roses are a basic addition to the composition but I highlighted the with the Green paper leaves - sm gr leaves sm and added those very pretty Vintaj Woodland Leaf Charm p275 for a little bit of exquisite. 

I added the Coffee Burlap/Jute 38mm burco to break up with intense green in the background.


Beautiful card Kerry-Jean - well done.  Love all the layers, the 2  frames and the embellishments used.  The butterflies flittering on the card give it an ethereal effect; the woodland charms add another texture as does the burlap ribbon.  The dodo vine curls enhance the paper flower posies nicely with the gorgeous distressing around the edge.

Bye for now
Meg
www.megsgarden.com

25 February, 2014

Adriana Bolzon - Damask Garden layout

Hello Bloggers

Adriana starts our Design Team using the new papers with her beautiful LO:

'Hi there everyone, 
Adriana here today, on the Meg's Garden blog sharing a layout with you all using the latest paper collection "Damask Garden"
designed by Denise Boddey.

The photo in my layout is a very 
old photo of my Grandmother with her sister, 
father and mother.
It is a very special photo of our family history.


The papers I used are;
"Damask Birds & Bees"
"Damask shades of Green"
"Damask Blue Belle Jardeniere"

I Punched a side border on each of these papers and added lace and flower
clusters on the bottom of the layout, 
with touches of diamante bling and pearls.

All the flowers, laces and ribbons are all
available from Meg's Garden website.


I could not resist to fuzzy cutting the little busy bees from the Birds and Bees paper, embossing some honeycomb chipboard from "Imagarium Designs" 


Materials used from Meg's Garden website
here are the links to all the products...have a look!!!!
Lace trims Organza lace trims
Burlap trim for the little nest.

Please check out all the wonderful products 
and see all the design team members inspirational work at

Thanks for looking, till next time :)
Cheers Adriana XX'

Love the LO - well done Adriana.  What a gorgeous heritage photograph & memories.  The flowers, the little nest of pearls as well as the fuzzy cut bees make a beautiful accent; the framing of the photograph is perfect with the lace doily, cardstock & photo corners; the skeleton mesh & honeycomb chip make it eeven more special.

Bye for now
Meg
www.megsgarden.com


24 December, 2013

Annette has been creating up a storm for Christmas

Hello Bloggers

and she explains her projects:

'Waiting'
'Christmas Cherries (P6363) paper just perfect as my favourite fruit of
 all time  - at Christmas is cherries.

Fussy cut around a few bunches of the cherries to use on my floral trim.

trimmed, inked & distressed the edge of the paper
inked the chipboard frame(fr007)added a few gems for Christmas sparkle.
trimmed with coffee burlap (burco) to give it a country look.
Red ribbon, gold bells, green & gold leaves with a beautiful red open rose completes the layout'


 'the 'Tis Christmas Time Collection is perfect for all your upcoming Christmas photos. enjoy.

Merry Christmas & Best Wishes from Annette' 


 'Seasons Greetings'

'Trimmed inked & distressed Christmas Greetings(P6361).
Added paper lace doiley(bond20) slightly off centre, 
Cut the music sheet from Christmas Cherries(P6363),
Triple mounted angel by the tree & Christmas lanterns
from Christmas Angels(P6366),
Fussy cut roses & wreath from Christmas Roses(P6364)

Trimmings include:
lace, lace doilies, roses, red ribbon with the luscious olive green vine(2800)
title Season's Greetings & December 25th are from Christmas Day (P6367)
Pop along to the Christmas Shop on Megs Garden to see these scrumptious papers sure to suit any Christmas project you have in mind' 


'Noel'

'The easel has been sitting in my cupboard for a few years & I thought the laser cut chipboard frame(fr007) was perfect addition to create a free standing Christmas decoration. I embossed the frame with 3 times to give it a beautiful high shine. after I had painted the easel with gesso I rubbed with gold ink to give it a slightly greeny gold patina. Cut Christmas Decorations (P6360)as background behind the 3D mounted Christmas Angels (P6366). I adhered beaded frill to inside ledge of the easel. Glued the frame added silver  trim(RBY36)fussy cut roses, wired gems, red roses, green leaves, a sheer silver bow & the title. Noel P6366 completed the project.
Tis Christmas Time collection is a lovely range of papers to play with.
bye for now Annette xx' 


What a fabulous group of Christmas projects - well done Annette.  Love them all - great ideas not only for Christmas but also for other times of the year.
Your fussy cutting & embellishing ideas are really inspiring.

Bye for now
Meg
www.megsgarden.com