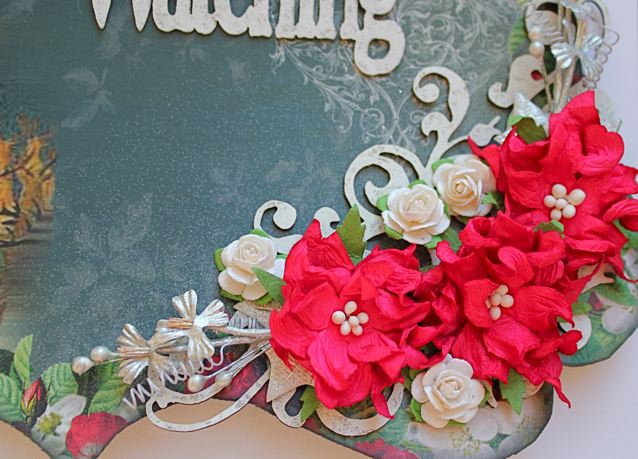
29 December, 2012

Ulrika confesses she is 'a summer girl'

 
Hi
 
We have been featuring Christmas projects & leaving the DT non-Christmas projects.
 
This beautiful layout is from Ulrika & she explains:
 
'I´m so very honored to have this opportunity to work with Meg´s Garden products.When I start a project the papers always set the mood and theme for me. I get my inspiration from the prints and colors. I wanted to start my period as a designer with a page about myself. The gorgeous flower prints on my background paper remind me of the summer who passed. I´m a really summer girl and I don´t like the winter so much at all. I wanted to create a bright and soft page with lots of greenery on. My background paper are from the Antoinette Collection and I used both Rambling Rose and Red Rose. For the border and frame in beautiful green I used papers from 
The Spring Paislee Collection and they are called Spring Green Toile and Green Eau de Lavande. From these papers I also cut out leaf vines and flowers. The Butterflies in red I cut out from the paper Butterflies & Blue Forget Me Nots. The large flowers are from the shop too and they are called Ivory Poppy and they are absolutely gorgeous!
Hope you liked my first page and see you in December! Hugs from Ulrika!'


This is a very beautiful summery layout & it is nice to see such a happy face - well done Ulrika.  Sorry we had to wait to see it but it us such a beutiful use of the papers, flowers & butterflies.  Totally love it.

Bye for now

Meg
www.megsgarden.com
 

28 December, 2012

WE ARE BACK

Hi

What a gruesome 2 weeks - never ever have a computer problem at Christmas time but thanks to those who listened to my english explanation of the problem & translated it into techie.  Designs Galore is still down but that will be worked on over the weekend

Thanks also to Telstra lady who restored my internet speed - I used up my monthly allowance in 3 days trying to upload all my goodies - the internet went back to 256k - yikes that is slow

Had to go to plan C to finally get it fixed & nobody knows what was wrong - amazing. Plans A&B failed.

But to celebrate being back we are having a 'YIPPEE SALE' on Christmas goods - 50% off until all current stock is sold

My blogging posts are backed up & I promise I will get those done ASAP

Bye for now

Meg
back with www.megsgarden.com - I am a very happy camper!! 

25 December, 2012

Adriana's Vintage Beauties

Hi

Adriana loves doing vintage work & she shows us her latest projects - 2 centre step cards & explains:

'Hi there everyone, Today I have created 2 cards using two different paper collections from Meg’s Garden. Both of these base cards are created on cardstock which have been scored and cut to create a different shape of card. These cards are called Centre Step Cards, they are available from all leading scrapbooking shops.'


My first card is a “Happy Birthday” card.

I created this card from the Forget-Me-Not paper collection


Materials used from Meg’s Garden are
Forget me not - papers from the Cardpack
Rose pink large and small Voilet paper flowers,
Mini rose buds – white
German border foil scrap white
Vintage Beauty image from Meg’s Garden (new item)
Square small paper Doily
Stamens for centre of butterflies
Butterflies from Forget me not paper
Transparency

Other materials used
Imaginairum designs mini word “Happy Birthday”
Glitter, foam tape, punch, gold paint.


The 2nd card is a “Thank You” card. Using papers from the Pink Paisley paper collection.


Materials used from Meg’s Garden are
Vintage Beauty small image
Large and small paper flowers,
Papers used are all from Meg’s Garden
Paisley Labels P6323
Spring Paisley collage P6320
Mini small paper doily,  German scrap border

Other materials used
Imaginairum designs chipboard word “Thank You”
Diecuts, foam tape, gold paint.
 

I hope that I have inspired you all to create a special card for those special people in your lives.  Something made from the heart. Cheers Adriana XX'


Gorgeous cards Adriana - well done.  You & the Vintage Beauties certainly get along well.  The embellishments are really well done; the German Scrap & the doilies really highlight the papers & papers roses.  The cards are very elegant.


Bye for now
Meg
www.megsgarden.com
 

23 December, 2012

Vicky's hard drive crashed

Hi
 
A word to the wise - please have an automatic backup system.  Vicky's computer hard drive fried & she has lost everything on the drive BUT she has a backup drive so all she needs now is another computer to access her hard drive.  It does happen - hard drives give up & they keep all their files - nasty drives.
 
She was able to send 2 pics of Christmas projects that lucily were still on her camera.
 
They are extremely elegant & require no words


Well done - Vicky

Love the way you have picked up the violets - unusual for Christmas but very rich & elegant

Bye for now
Meg with no web site & Vicky with no hard drive

22 December, 2012

Sylvie shows us how she does Christmas in France


Hi

Two great projects that have so much creativity:


 'I used wonderful papers from the vintage christmas collection . I'm really impressed by the beauty of these papers.. they are so beautiful they can be used alone, without embellishment..so i made first, an altered window without  embellishment.. i bought this item in a decoration shop a few years ago but i didn't like the background so i recovered it with Santa's Garden paper.. i 'll send you another photo this evening because they are lights...
I made then a matching mini album, I painted pieces of cardboard and sanded in order to have the same vintage effect as there is on the window and I used vintage distress,  grey, red and white flowers to embellish more these papers.. you can see also heart silver trim and daisy silver trim from meg's garden..
I hope you will like my creations, and I wish you a merry christmas hugs


                                        Sylvie'


How fabulous are these 2 projects - I am totally amazed - well done Sylvie
So much work & so many elements to take in & be inspired. Love them

Bye for now
Meg
no web site

21 December, 2012

Silver Tree by Stephanie

Hi

Not too late to add some decorations to the table or mantle & Stephanie shows us her version:


Silver Tree

 'I have seen a few of these paper trees around the internet and I thought I’d try making one of these myself. I was going to make this with one of those foam cones you can buy. But, go figure, when I want one I couldn’t find a single one. So I decided to make my own cone out of cardstock.

It’s not beautiful but it worked for what I wanted it for, lol.

 I used the “Forget Me Not Toile” paper from Meg’s Garden, it has nice shiny silver look to it. I cut 1 ½” strips of the paper and then cut that strip into ½” strips. Take your ½” strips of paper and curl one end of the paper around a wooden skewer (or thin paint brush) so when you remove it the one end of the paper curls up as shown in the picture. Starting at the bottom of the cone start gluing the paper strips down. When you get to the second row stagger the paper strips from the row below. Do this for each row and continue all the way to the top of the cone.
 
You can see in this one picture that my cone did not go right into a point at the top. So I cut a 1 inch circle and made a tiny cone to fit over the top of the tree. Then I took a tiny red star that I had in my stash and glued that onto the cap of the tree. I did spray some shimmering mist onto my tree but you can’t really tell in this photo.

 
Materials used from Meg’s Garden:

Paper   - P6305  Forget Me Not Toile

Other items used:
Paper or Styrofoam Cone  (approximately 9 ½”)
Aleene’s fast grab tacky glue (or glue of your choice)
Small star for the top of the tree'


Text for “Banner”

'I’ve being wanting to make my granddaughter a name banner for at least 6 months to go in her new bedroom. I just hadn’t found the right papers for it until I received my DT members’ package from Meg’s Garden. These beautiful floral papers from Meg’s Garden are perfect for making “pretties” for a young girl’s bedroom!

 I made the banner pieces from canvas but you could use papers for the banner pieces. I happened to find these 12 x 12 canvas sheets from one of the dollar stores which worked out great as you could get 2 banner triangles from each sheet. The banner is 6 inches at the top and is 9 inches long. I took one of my flourish stamps and pink ink pad and stamped the banner pieces. I then took 2 paper doilies and glued them down so that one is just slightly higher than the other and each hang over the edge about 1”.

 I made the larger fan flower from the “Ma Fleur Rose” papers. I cut the paper 1 ¾” wide and 10” long and then punched one side with one of my Martha Stewart punches. The smaller fan flower is made using the “A French Bouquet” papers. For this one I cut the paper 1” wide by 10” long. When making my folds on the fans I made them each ¼” wide and I added a pearl brad, which I had cut the prongs off of, to the center of the flowers.

I cut my letters out on my Cricut machine at 4” and glued them down on top of my fan flowers.  I then took  some of my handmade roses as well as the 3 layer white gardenias, Pink/Cream Open Paper Roses and the French white open paper roses and glued them down as shown. The dark pink roses you see are actually the French white open paper roses that I painted with some of my pink ink as well as painting the center of the White Gardenia with pink ink.  I then punched my holes, added the eyelets and tied them together with the pink ribbon.
 

Materials used from Meg’s Garden:
Paper - P6296 Ma Fleur Rose
- 3400 A French Bouquet
gar wh 3 layer White Gardenias
Pink/Cream Open Paper Roses
French White Open Paper Rose
da810 Green Leaves

Other items used:
Double sided tape, Ribbon, Handmade paper roses
Edge punch, Eyelets, Paper doilies 4 ½”
Pearl brads for flower centers, Canvas, Flourish stamp

These 2 projects are so different it is hard to believe they came from the same lady - well done Stephanie. Lots of inspiration here

Bye for now
Meg
still no web site

19 December, 2012

Web site is down

Hi

I have just had the most distressing 6 days - web site down & it is still continuing.
My hosting server transferred my websites to a new 'beta site' & problems started

First I could not update my files because there was a problem in the transfer; they fixed that & 'forgot' to tell me I had new update data - guess what, it did not work!

I set up another hosting platform but the original hosting site will not allow the pointers to update - so this is not an option.

I requested a hosting transfer which 'should happen' on 22nd December

The current hosting support (24/7) does not answer their phones

So I am stuck

If you know what you want to purchase, call me at 08 8388 1282. Christmas sales are now 50%

Bye for now

Meg
no website due to www.mydomain.com
 

18 December, 2012

'Noel' Layout by Chantal

Hi

Chantal features one of her beautiful daughters in this fabulous LO & she explains her project:


'I've played along with the fab challenge site, "Once Upon A... Sketch", and the challenge this month to use the theme "It's December" and the lovely sketch provided by the talented Nadia.
 
Here's my layout, called "Noel"...


Here I've used the lovely new range of Christmas Papers, "A Musical Christmas" by Meg's Garden.  I was actually inspired by the mini pictures of each page which is part of the packaging from the Musical Christmas Mini Paper pack.  So inspired by these cute little images that I actually used them on my layout, along with other pages in the same pack, cut to the same size.

I have overlaid an entire Meg's Garden A4 Collage Transparency in landscape format across my layout and used lots of little bits of transparencies along the frame of my photo to make an interesting photo border.

 
The border around the edges of my layout has been cut from Meg's Garden's "Christmas Music" sheet and I've layered a doily strip around the edges of my framed photo just for a bit more of that Christmas magic. ;)  There is a huge range of paper doilies available, including these ones, in store here.

Those lovely chipboard Christmas trees are by 2Crafty, and they are called "Retro Xmas Trees".  I have covered these in gesso, then once dried, I rubbed chalk onto the gessoed surface.  I used a sponge applicator to apply the chalk, which is much like a make-up applicator for eyeshadow.  I then wrapped a little bit of baker's twine around them and topped them off with some bling...  I used FWAB Adhesive Rhinestones in Black as baubles.  :)


With 2Crafty's Flourish Ornament Border, I did the same aforementioned technique, and topped them off with left-over pieces from FWAB Chloe Pearl Flourish.  I cut the bow from the middle of the flourish and arranged each half on either side of the photo, layering the bow on top of the left piece.

I have also used FWAB Kate's Corner Flourish in Black to frame my layout and photo.

Well, that's all from me for now!  I hope you have a wonderful and safe Christmas and new year! :D
Cheers,
Chantal :)'

Another fabulous LO from Chantal - well done.  Love all the layering, the transparencies pieces really look fab & the embellished chippies are totally awesome

Bye for now
Meg
www.megsgarden.com

17 December, 2012

'Instead of a Wreath'

Hi

Vicky decided she wanted to be different this year & shows us her project:


' SANTA'S WATCHING - DOOR HANGER

With Remembrance day past, I am now in full Christmas swing! Here is a bracket shaped display I made that I will hang with a ribbon on the inside of one of my doors (instead of a wreath this year). I used an older paper line from Meg's Garden - A Vintage Christmas (specifically the sheet of paper "Santa's Garden").

Using Helmar decoupage paste, I adhered the beautiful paper to a cardboard bracket shape that I had traced. I wanted to let this pretty paper shine without covering it up too much. It is truly my favorite paper from the "A Vintage Christmas" paper line!

Next, I added a 2Crafty chipboard baroque corner and some flowers and sprays using Helmar 450 quick dry glue. Meg's Garden also carries a variety of gorgeous embellishment products for the holiday season so be sure to check out the store.


Thanks for joining me on the blog today!

Vicky Alberto'
 
Fantastic idea Vicky - well done.  Love the shape & the embellishing & a great idea for anywhere in the Yuletide party
 
Bye for now
Meg


15 December, 2012

Heather's Layout

Hi

Heather explains her project:

'Hello, Heather here today sharing one of my creations  with the stunning Christmas papers .
I used a base of bazzill brown cardstock , stamped with black ink using a Prima stamp .
Next I Added to the background by randomly placing the crafters workshop mask on the page, and inking with Grape  Versa color.
This paper offers such rich velvety colors  which  match perfectly with the deep velvet antique flowers. 
I mounted the photo in layers with the Christmas  papers and  I clustered the rich velvet flowers, die cut leaves and the stunning organza flower around my photo .
The keys are altered with gesso and ink and stitched to the page .
I distressed  the papers by rubbing lightly with an emery board .
These papers take on a different feel and look with a light distressing , it brings out the design  and amplifies the border punch pattern .
Denise has designed these beautiful papers with such  amazing diversity .
The leaves are all from the one design and yet they look so individual in a cluster , all blending together .
All the different tones and hues add to the magic .'


keys close up

velvet foliage close up


Meg’s Garden materials
A Musical Christmas papers
P6326 - Christmas Music
P6329 - Christmas Berry Stripes
P6330 - plum Pudding
S116   -  A Musical Christmas pack
92822 -  Tim Holtz Locket keys
Fn035 -  Velvet flowers forget me not Antique purple Fn035
Gt212iv- Green Tara Ivory poppy organza flower

Other items
Bazzill card
Gesso
Die cuts/ cottage cuts /foliage
Tim Holtz die cuts/ hearts
Cotton
Prima / light globe/acrylic trellis stamp
Versa Color ink / grape ,  Martha Stewart border punch

Thanks for popping by and have a look on the website at these delightful papers , they are just divine to work with .

May Christmas bring you lots of joy and good health ..

Hugz to each of you x'
 
It is certainly a magical layout Heather - well done. I find it incredible to believe that this LO has been done with Christmas papers - I keep on looking at it.  Fantastic & very beautifully done.  Love all the layers behind the little girl;  the leaves are gorgeous & the flowers in ivory & purple finish the LO beautifully. 
 
Bye for now
Meg


14 December, 2012

Elena's Christmas Shadowbox

Hi

Elena shows us how she creates a Christmas shadow box:

'I am in love with Christmas Papers Mini pack. They are perfect for your holidays project. The tiny pictures are so wonderful that I decided to find a special frame for them. So the shadow box is a good decision for this purpose.

I took the chipboard shadow box and dabbed the edges with paint, then I cut some pictures from the Vintage Christmas Patterned Papers, distressed them and adhered to the chipboard.

After that I start playing with embellishments:


I decorated 2Crafty chipboard pieces


I added bells - Metal hammer, cut the sentiment and the wreath from the paper and glued them on a pad and added some Manor House Creations flowers


and added a Christmas bauble to finish

 
this shadow box is going to be placed on my daughter's room. She has already started her Christmas preparations and is very happy with these tiny treasures.
    I am sure you have already started thinking of your home decorations, so I hope this will inspire you to create something special too.
regards,
Elena'

Fabulous shadow box Elena - well done.  Love all the little spaces & how you have embellished them.  The use of the mini papers is wonderful & shows us how they are not only used for cards.

A very creative & inspiring project

Bye for now

Meg
www.megsgarden.com
 

11 December, 2012

Christmas Products Sale


30% discount on all papers & embellishments
 
20% discount on La Blanche Christmas stamps
 
 
stock up while you can
 
Meg

10 December, 2012

A Christmas Postcard Project by Elena

 
Hi
Elena has been very busy preparing this Christmas project for us & has taken pics of the steps &  explains her project in detail:
 
'When I was I child I strongly believed in Santa and when I went to school I realized that I could write him a letter asking to make me a gift. Now I have 2 kids and my daughter just started to go to school, but we have been writing a letter to Santa with her annually. This year she is going to make it herself. So I decided to make a Christmas Card for Santa and a beautiful envelope in case he would be pleased to receive it and hope he is going to make what she wants.

So I want to share with you some tips how to make simple envelope and a postcard for Santa. I suppose your children will love that idea, but the most funniest thing when they read about their wishes in 20 years. So let's keep them today.


Back of  card
 
 on the backside I used the paper from the Vintage Mini Christmas 1 collection, cut out some flower border and adhered it on the bottom to stretch the flower print. And stamped the post stamp.

Finished bag


close up of finished bag
 
 
Pic Envelope_tutorial_1


I took the wooden postcards by Kaisercraft but you can use just a cardstock.  Dabb the edges with the ink.


Cut the rectangle from the Patterned Paper, distress with the ink and adhere on your base.
I used Vintage Christmas 2 Mini Pack for this postcard.
 I adhere the background, then I took some leftovers from the previous projects and arranged them into a card.

Just a little tip I cut out the picture of Santa and a girl, but saved the leftovers and padded the picture on some other cut outs. I distressed all the leftovers with the chalk ink.
Then I added the silver thread, added some flowers and a lace which I turned over the post card.

Instructions for the bag:
for the envelope I took the paper bag envelop and folded the top of it.
I stamped it with some postcard themed stamps over it.
then I stamped with clear ink using Small Script La Blanche Stamp and embossed with distress embossing powder.
 I used some leftovers again for making some padding for the picture.

 at this step you should make the holes for the ribbon.  So make the first hole under the fold.
make the second hole on the fold.

Then  pull the folded ribbon through the first hole and adhere the center of it with the tape on the inner part of your envelope.

Pull one part of the ribbon trough the second hole, add the twine or some fibers, and the bells . I used Bells hammered gold.

  I stamped the image of Santa using Singing Santa La Blanche Stamp. I combined 3 colors of ink and at the end just colored the image with the olive one.

Adhere it to the envelop and add  your embellishments.
 
I cut the Seasons Greeting from Vintage Christmas 1 mini pack and put it into the frame and added the pearls.
  I hope I have inspired you to make something with your kids or just a little surprise for them.'

Beautiful project Elena - well done & thank you so much for the details on how to make it

Bye for now
Meg
www.megsgarden.com