30 September, 2014

Vintage Mini Album ~ Timeless ~


Hello friends! It's Cathy here and I hope that you are all well. Today I would like to share with you my very first mini album, created using a mini book kit from Meg's Garden which is designed by Kerry-Jean Watson. The Sherlock Book is available in a physical format as well as a digital download. These papers have everything you need.

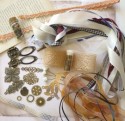
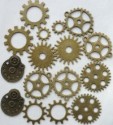
The style is vintage, and the papers are so versatile that you can adapt them to suit any occassion. You can also embellish with metal trinkets, cogs and other vintage embellishments, also available from Meg's Garden to suit the theme of your album. I have also used chipboard pieces and altered them to suit the vintage nature of my album.

I inked all of my chipboard pieces with a dark chalk ink, then randomly applied distressed metallic paint over them. Once dry I then applied a medium layer of crackle medium over the entire piece and let it air dry which left a fine crack all over.

Here are some close ups ...


I have a video tutorial showing how I constructed my album and my initial planning process. As it was my first album, I had looked at many tutorials on the internet and found that this particular method worked for me. I also share my finished album and go through each page.


Supplies:
Latte Heirloom Flower
Oatmeal Coloured Flowers


Other:  Chipboard 0.6mm, Sizzix Fancy Frame Rectangle, Scrapmatts hinges, clock faces, assorted words and ornate frame, Bobunny Midnight Frost Clear Stamp, Martha Stewart Doily Edge Punch, Kaisercraft Printed Tape Timeless, Spellbinders A2 Scalloped Borders One, Floral Ovals and class ovals large, Magnolia Rose Leaf Die, Lace, Memento tuxedo black, Prima Dark Bark, Distress ink walnut stain, Distress paint antiques bronze, Jo Sonjas crackle medium, Platinum Stickles, Doily, Jute, Pearls, Die-namics pierced traditional tag stax.


I hope that you enjoyed the video tutorial and have a go at creating an album using these fabulous papers. Thanks for stopping by and have a great day!

Cathy


29 September, 2014

Handmade " Life's Journey" with Irit


Hello my dear crafty friends!
Irit is here and this is my first project made with new Meg's Garden most gorgeous Sherlock  new mini book kit.
This is the first in Meg's Garden new product line of exciting mini book kits.
The papers are designed by Kerry- Jean Watson and it's available in download printable  version and in printed version I used here.
Each of us, DT members, made a totally different project with the very same products. Each of us had her own vision about the purpose of this kit and here is mine.
I made a handmade journal cover using a piece of up cycled corrugated cardboard, a piece of old trash found chipboard as a back cover and a lot of imagination...


The spine was made with a piece of a grunge board painted with copper acrylic paint. The corrugated front was torn here and there, painted with a mix of inks, acrylics and even some texture paste masking over.
I made the front title panel with Sherlock collection postcard and an envelope and added a heat embossed chipboard title.
The corners were embellished with inked white chipboard pieces. I made an embellishment cluster with  Meg's Garden vintage trinket piece that were in my embellishment bag. The golden lace trim was added over the spine and was a perfect match to the copper color of this piece.
I also added some misted into gold cherry blossom flowers.


As my final cover touch added a piece of pearl gold swirl and some more metal embellishments, such as a key, beads and a couple of chipboard arrows.


 And now for the inner album, made with brown paper bags as a tag album. I didn't add any photos or other goodies inside the pockets as this is pretty much an art piece, also it can be used as a real memory keeping album. All 5 paper bags were connected  with Bind- It- All tool (maybe my second time to use it, but I like it more than the binding rings).
For the first page I made a collaged stamped scene made with a couple of stamps, a couple of masks, texture paste, mists and inks , some Tim Holtz tickets and a chipboard title.


 Each  page of this album was heavy stamped with a collection of my vintage stamps with mostly brown permanent ink and one single quote stamp was added to be the main  title of this page.


And another page here:


One more with another quote:


This is the only page that is full of color, but it was a must if you read the quote:


 Some more pages here:


So as you can see each page has one outer pocket where I added some tags  inside and one big inside pocket as each page is a paper bag. This is a right place to add you memories of any kind.
Make your own paper bag album with your own stamps and your own inspiration, but  use our new Sherlock kit and it will make the most  unique project !

Products used for this project
Meg's Garden products

Much more from the grab bag I got!
Other products:
Stamps: Rubber Dance
Inks, mists, gesso: Ranger
 Paints: Plaid, Faber Castell DMC
Bind it All tool and spiral
 Chipboards: Wycinanka
 Masks: Sweet Stamps, Memory box
 Bling: Flourish with a Bling
Other: chipboard, corrugated cardboard


28 September, 2014

Victorian Easel Card by Sue Smyth


Victorian Easel Card 
By Sue Smyth 


Hi Crafters 
Today I am sharing a card with you, it is an Easel card and has 
a Victorian theme. I have used a chipboard frame and altered it,
along with Toile Paradise paper and a paper doily.


This time I have fussy cut flowers from left over papers.
I have raised them up with 3 D foam tape.
Add some punched leaves to soften and you have yourself a
Victorian style Easel card

How To
To alter the chip frame, apply swirls and flourishes with 
liquid pearls and allow to dry.
Then paint with gold paint and dry with heat gun to 
blister and bubble the paint.
Rub over with a little gesso to age the frame and 
use as desired.

Materials 


Happy Crafting 


27 September, 2014

Mini Accordion Book by Miriam

Hi everyone, Miriam here. This is my first project for Meg's Garden, and I am so happy to have been invited to become a member of her Design team. This is a new adventure for me and I am still finding my way. This book was inspired by Charlotte Costain from a class I did with her when I first started card making .All the items I have used will be listed below. I hope you like it.


Meg's Garden Products


Other products used from my stash

Velvet flower
Pearl Brad
Victorian Velvet Distress Ink
Ribbon
Stampin Up tab  punches
Spell Binders Die
Metal Key and brads
Memory Box Die
 .

25 September, 2014

Sherlock's Journal

It is with complete pleasure I share my Sherlock Journal with you, designed with Kerry-Jean Watson's newest collection exclusively found at Meg's Garden - The Sherlock Book.  This collection can either be bought as a paper collection or downloaded in digital.


This was a first for me, the first time I've put together a journal with pre-printed pages like this and the first time to hand stitch a journal.  It was such a fun experience learning how to do both!


You can purchase what's called a Temptations package which is hand picked items from Meg that correspond perfectly with the Sherlock Book mini kit.  I used several metal embellishments (the links to everything will be included below) to embellish the outside of my journal.  I didn't add much, wanting to keep the emphasis on the looks of an old worldly journal.  


As I said I followed a tutorial from Sea Lemon for a binding method called 'Long Stitch'. I was so concerned it would be difficult but it wasn't at all and the end result I'm in love with.  I can guarantee this will NOT be my last hand stitched book. The tutorial is so easy to follow, I  hope you'll give this method a try, it lends itself beautifully to this type of journal. The fabric for the book itself was found at JoAnn fabrics and is actually a piece of upholstery material which I sprayed the reverse side (which was Gold) with a couple of Lindy's sprays to give it that rich brown look. 

The pages of the journal are a combination of Kerry-Jean's designs from the Sherlock Book (as shown on the right in these two photos.  And, cardstock that I distressed to give that old world look.  I backed each paper from the collection with one of my own to stretch the paper further.  If you are downloading a digital kit this won't matter, you simply print as many papers as you need and if you run short you print more.


I've used elements that are included in the kit for the pockets, tags and mats.  There are lots of blank pages, which was something of a challenge for me but I wanted to let the recipient of the book choose whether they wanted to add photos or journaling to these spots, and there will be lots of room for both which is the sole purpose of a journal.

I hope you'll check out my video below, I'll include a complete walk through of the journal, a short glance at how my pages and the cover looked before assembly and a host of additional photos to inspire you to create your own Sherlock Book.


~~~Supplies~~~

23 September, 2014

The Sherlock Planner 2015 by Watson

Hello creative creatures. I have my official first project for The Sherlock Book by Watson to show you. 
I wanted to make a planner for 2015 and I thought The Sherlock Book would be a great thing to use. I wanted a sturdy cover so I bought a file folder and cut it down to size. This was then covered with a strong craft paper and covered with the kit's cover and then sealed with a varnish. From there I added some Tim Holtz Corners and a bookplate and also one of Meg's lovely Lions Head door knocker charms


The inside of the book was a bit tricky as I wanted a lot of pages for the planner.  I ended up having double the pages. This gave me around 36 pages to have in my planner. 12 were turned into a calendar and the rest were added the the divided sections. The back of the pages (because this was a printed kit rather than the download) I inked misted and splodge to add some distressing. 

The ephemera I added here and there to the sections of the planner to later use which they are held in with paper clips. I also used some extra ephemera from the Vintage Ephemera Packs

The closure of the book is really simple, two islet holes on the front and back cover and some twine attached which just get tied together when the planner is in my bag. 

Here is a video of a flick through of the planner. 


22 September, 2014

Meg's Garden on Facebook


The Meg's Garden facebook pages has relocated.

You can now keep up with all the Design Team projects and new releases over at
https://www.facebook.com/megsgardencraftsupplies.

So, come over and Like our new page so you can keep up anything new and inspiring you have to offer. We will also be posting videos from our Youtube Channel which you can also subscribe too.

We also want to see what you make with supplies you get from Meg's Garden, so please make sure you post a photo on the facebook page.