29 October, 2012

Gayle 'Plays with Tags'

Hi

I think 'play' is a serious understatement & I know you will agree....
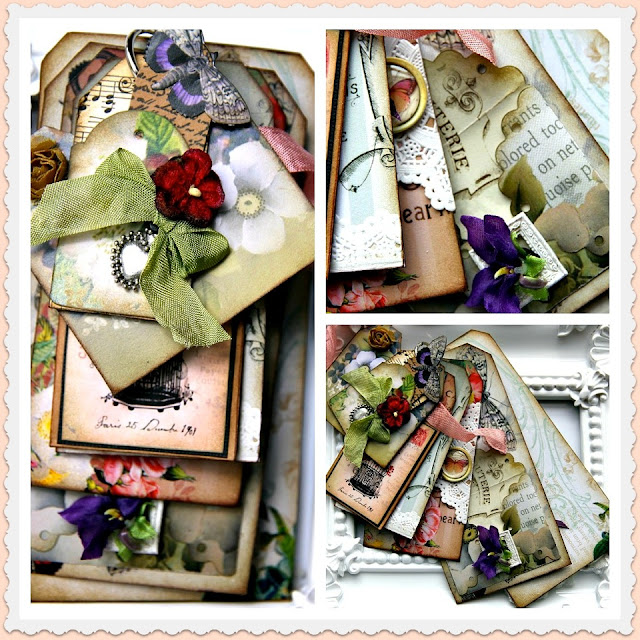
Look at the following fantasy on what you can create with a 'Pack of Tags'


'Hi, Gayle here. Earlier this year I asked Meg for a few tags.........she sent me a whole pack of all sorts of different sizes. Now, I also had lots of scraps of Meg's paper left over from other projects so thought I would combine the two. That's one of the great things about these beautiful papers, they are so heavily patterned and detailed that even the tiniest scraps can be used up on other projects. Ther's room in this little book to add a couple of tiny photos, as well as little envelopes to tuck some journalling 
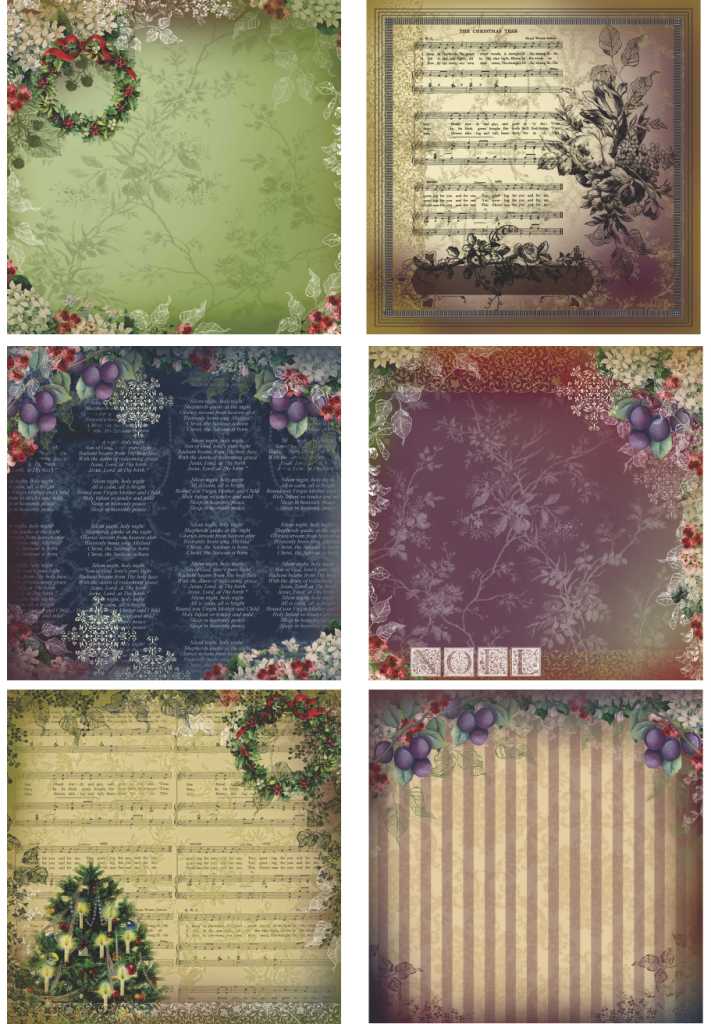
into. All papers are from....THE COUTURE COLLECTION and THE FORGET ME NOT COLLECTIONS 1 & 2. All the TAGS, the little HAND and HEART CHARMS, VELVET FLOWERS and PAPER DOILY are also from Meg's Garden. A tag book is a pretty and fun way to use up tiny scraps of beautiful paper.'
The above 2 pics are what Gayle calls 'collage of the tag book'.  She asked me if I wanted pics of the individual tags - I said yes please - I wanted more of this awesome little book.
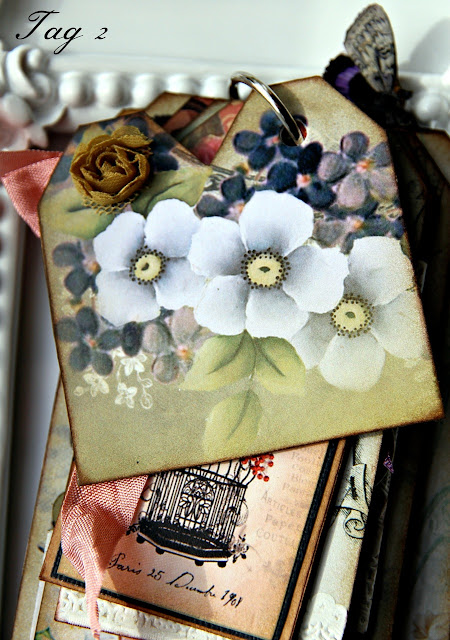
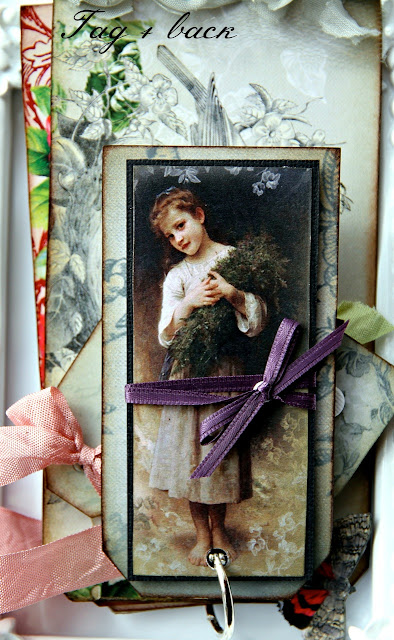
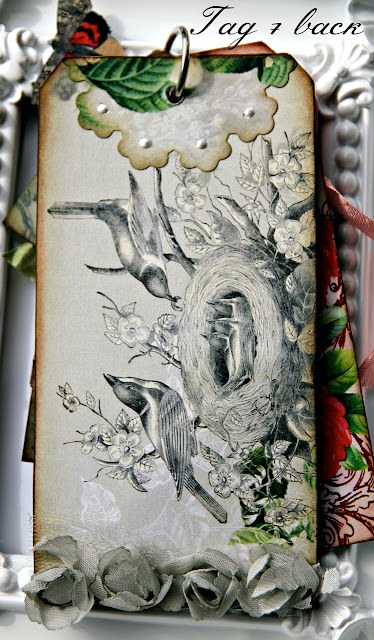
Following are the pics:  7 tags = 14 pics


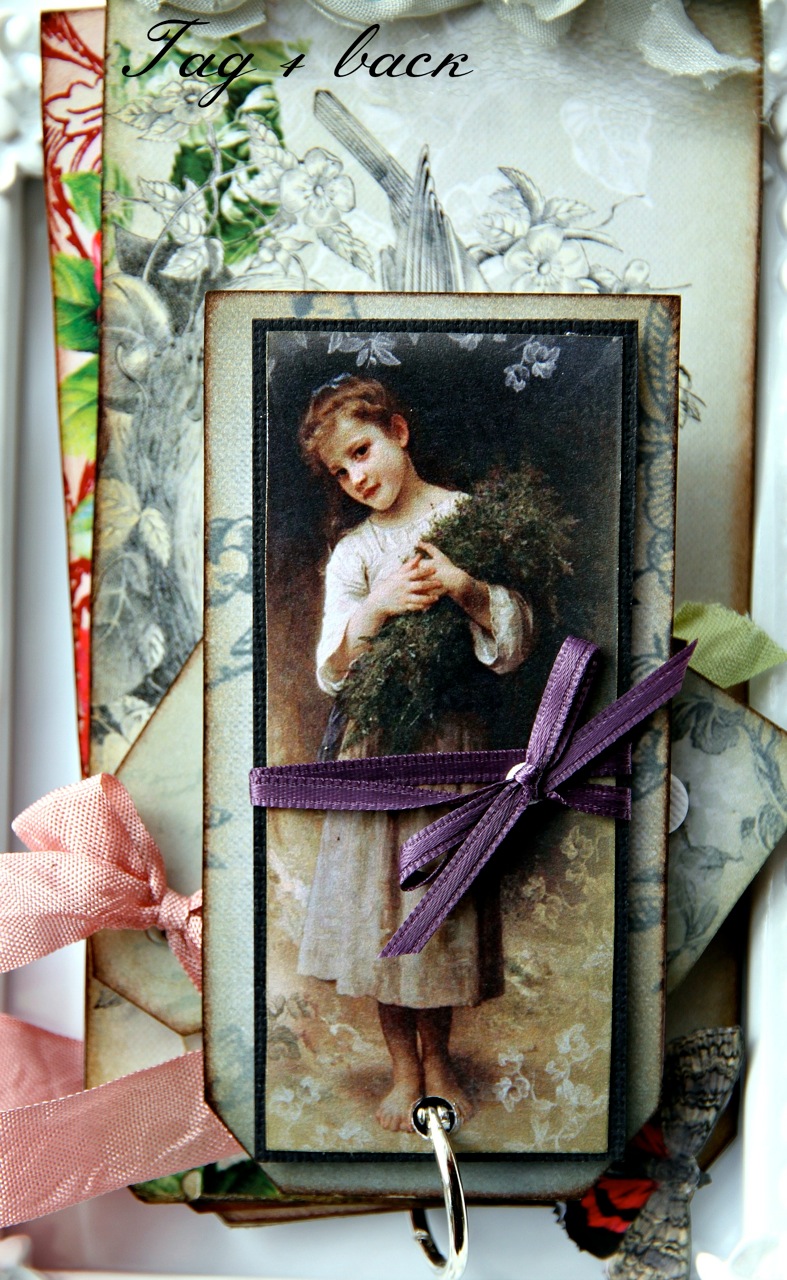
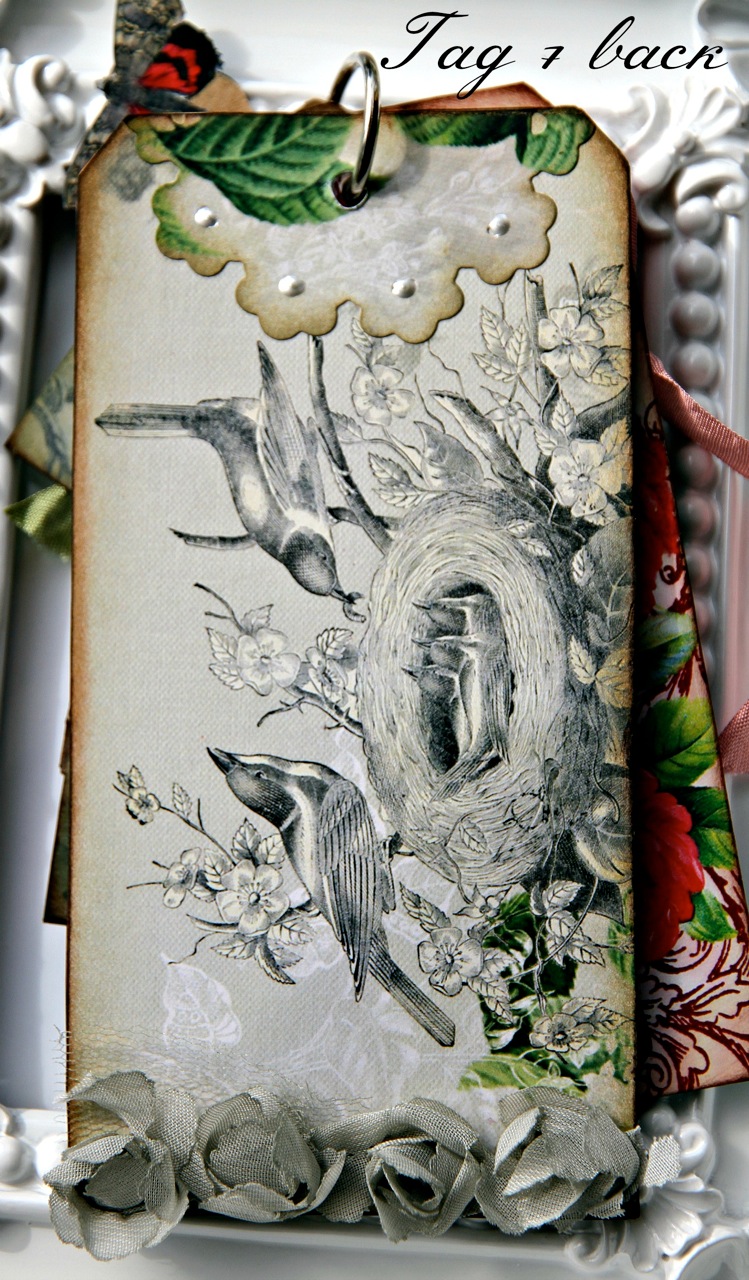
The lowly tag is no longer lowly ....
Well done Gayle - totally awesome - love all the elements & especially how you combined many collections of Denise Ann'e papers -fabulous

To purchase  the Pack of Tags

Bye for now
Meg

21 October, 2012

Winner of Design Team competition

Hello

Wow - I was inundated with emails, comment, followers - I was totally amazed at your response.

The lucky winner, chosen by random selection, is Dorthe

The prize is 2 mini packs of 'A Musical Christmas' Collection of papers.


Packs of papers 144mm x 144mm - designed specially for cards but there are no rules - use them in scrapbooking, off the page projects & more ....

Each pack also includes a piece with pics of the papers in the pack 47mm square - theese are fabulous on any project - also the inside of a card


Dorthe:  I need your address so that I can send them to you


We will do this again - lots of fun!

Bye for now

Meg
www.megsgarden.com
 

Vintage Christmas Tags

Hi

Adriana has done 2 exquisite tags to inspire you.

'I created two vintage tags with the new papers “A Musical Christmas”.

Decorated some crepe paper at the end of the tags and applied Glass Glitter to the end with

Glue. Glass glitter is much thicker than other glitters so it add textures to any project.'


Silver Vintage Tag


Gold Vintage Tag

Vintage Christmas Silver tag
Meg's Garden materials:
Musical Christmas paper
Candy stripe Ribbon
Velvet flowers
Diamante lace trim (centre of snowflake)
German scrap
Silver Glass Glitter
Vintage Collage Image

Vintage Christmas Gold tag
Meg's Garden materials are
Musical Christmas paper
Paper Doily
Candy stripe Ribbon
Velvet flowers and leaves
Duchess Jewel top pin
German scrap
Gold Glass Glitter
Ornate Chipboard frame - covered with glass glitter
Vintage Christmas Collage Image'

Fabulous tags Adriana - well done - will inspire the bloggers to start thinking of  Vintage projects.
 
 
Love the effect glass glitter has; the diamante centre of the snowflake is stunning - just the right touch.


Velvet flowers & pins of jewels are always the perfect additions to a vintage art piece.
The Vintage pics & th Pins of Jewels can be found in the Christmas Shop at www.megsgarden.com
 
Bye for now
Meg


17 October, 2012

'Merry and Bright' by Vicky

Hi

Vicky continues with a fabulous LO using one of the papers from 'A Musical Christmas Collection'

'It feels a bit strange to be designing for Christmas before Halloween but I couldn't resist when I received the beautiful new "A Musical Christmas" collection from Meg's Garden. The glorious colors, the detailed graphics  - OH MY! I think I say it every time but these papers have such a beautiful hand stamped quality to them that you don't need to do much other than add fun embellishments. Look at that beautiful hand stamped feel of the papers!


This is a picture of my boys a few years ago posing in front the of the Christmas tree. The funny thing is that my own tree is decorated in a similar style as the graphics on this paper - dark red, white and gold (and a touch of pink). I instantly wanted to design with this particular paper. I actually used mini papers from the older "A Vintage Christmas" line for the photo mats since the collections blend so seamlessly.

 
I added some gorgeous 2Crafty chipboard (title and santa sleigh) and limited the flowers since it is a boy layout. Here is a close-up of the music notes on the paper behind the chipboard. On the chippies I dabbed texture paste to give it a snowy effect and then added some diamond dust (glitter glass is very similar and would work wonders too - available in Meg's shop).


Before you go, don't forget to enter Meg's Blog Candy Giveaway at the end of the new DT announcement and good luck!
Vicky Albertohttp://simplypaperandcreativity.blogspot.ca'

Remember while you are here to 'follow' our blog & also visit us over on Facebook too.  You do not want to miss anything.

Fabulous LO Vicky - love the way you have distressed the papers & the matting of the pics - well done.

Bye for now
Meg
www.megsgarden.com
 

15 October, 2012

Chantal's cards

Hi

What excitement & disappointment in the last few weeks.

A very warm welcome to the new members of the DT; a sad farewell to those leaving us; also an apology to those who did not make the DT. Thank you so much to all those who applied - it was an extremely difficult few weeks in the decision making.

 Sandie & Eila have promised that they are only leaving on a full time basis but will be back as Guest designers & we welcome that opportunity. I already have 3 projects from them.

Back to blogging and some beautiful cards from Chantal


'Hello!
 Just a quick share today - something a little bit different - I thought I'd share these cards that I made the other day using Meg's Garden's delightful "Spring Paisley Collection" of papers.

 I whipped these up fairly quickly for different occasions over the weekend.  So I don't have them anymore... just the photo... Lol!

It's very satisfying making your own cards... and it's really so much more convenient to do a few at a time using similar materials and designs. :)


These Paisley Labels are such a breeze to use for cards, and they really make the card, I think!  I love them!!!  Especially when used with paper doilies... so pretty!

I have used Spring Pink Toile patterned paper on my left and right cards (I used decorative scissors on the right one and cut around the paper slightly larger than the white doily).

The middle card uses Pale Green Paisley patterned paper, and all my cards are on a matching green (to the aforementioned paper) Bazzil cardstock.  I really love this shade of green and I have no idea why my stash has sooo much of it!  So I'm glad to make a tiny dent in my green overload of cardstock haha! ;D

I've used some Flourish with a Bling to add a splash of glamour.  All three cards are using FWAB Adhesive Pearls... did you know there is a total of sixteen gorgeous colours to choose from?  Ah, sweet sixteen!

The middle card uses FWAB Jasmine Laser Flourish Pearl... that one need just a little bit extra because it's a blankety-black card. ;)

Each card has a little ribbon tied around it (great for those scraps) and those delightful resin birds you see are from D-lish Scraps.  I love how where the birds are positioned, the flowers appear to trail behind them... pretty!

Many thanks!

Chantal'

Beautiful cards Chantal - well done - fabulous use of the Spring Paisley label paper

Off  to brew up a fabulooooouuusss blog hop - had input from the Adelaide section of the DT last Thursday at lunch & they had some awesome suggestions - they just love to give away Meg's Garden products.  News in a few days & we will also have a winner soon in the DT announcement race - see!! I told you they laove to give away the products.

Bye for now
Mg
www.megsgarden.com


14 October, 2012

Design Team Announcement


Thank you to everyone who submitted to

Meg’s Garden Design Team Call!

The response was overwhelming and

I am very excited to introduce you to the new

Design Team for Meg’s Garden:


Elena Olinevich - Belarus


Evgenia Petzer – South Africa


Jenny   Burns - Australia


Lill Blomman  Sweden   


Sandrine Dawes - Australia


Shell Carmen - Australia


Stephanie Dinnell - Canada


Sylvie Peixoto  - France


Also continuing with the Design Team are


Denise Boddey - Australia


Adriana Bolzon - Australia


Chantal VanDenberg - Australia


Gayle Price - Australia


Heather Jacob - Australia


Vicky Alberto
 
 
Please give them a warm welcome!


To celebrate I am giving the opportunity for one lucky follower to win an awesome package of Meg’s Garden papers and embellishments.

 To win all you have to do is


1.    Be a follower of Meg’s Garden Blog,

 
            http://megsgardenblog.blogspot.com/

              if you are already a follower, thankyou

 
2.    Be a follower of Meg’s Garden Facebook page,


3.    Leave a comment below, it is that easy.


Bye for now, Meg
http://www.megsgarden.com


12 October, 2012

'The Magic of You x 2'

Hi
 
Chantal has created this layout with fabulous details & introduces her 2 girls to us.

'Please find below my write up about what products I used and a bit about how I created my layout. :)'


'I've used the delightful Spring Paisley collection by Meg's Garden on my layout. 

I really love the deep richness and bold pattern of the Burgundy Paisley Stripe patterned paper that I've used here.  I have used two full pages of this paper;  I cut around (fairly roughly - not fussy) the gorgeous white floral corner that covers the bottom and left sides of the paper.  Once this was done I turned this cut-out corner upside down and adhered it onto another of the same patterned paper - so now the whole layout is "framed" with these delicate floral illustrations.  So pretty!


I then proceeded to fussy cut from the extra strips that are supplied with the full 12" x 12" papers and added these around my photo to frame it, as well as popping foam tape underneath some to embellish the gorgeous FWAB Flourish & Flowers as well as some FWAB black Jack Vine & some adhesive pearls.
I have used four different 2 Crafty chipboard items on my layout;
Firstly, if you look to the above close-up, you can see how I've layered two pieces of the Fencing Wire Panel on top of that rockin' Old Fence.  I had super fun with this fence, I manipulated it to make it curve downwards on my layout, then once I was happy with it's new "form", I adhered it into place with glue.

 
There is Ariel's Spray on the top left corner - used as a frame/corner.  I've painted it in brown acrylic paint and I've added some lighter brown highlights here and there with my finger. ;)  Isn't it so delicate and lovely?!  I also used up the last of the Fencing Wire Panel that I mentioned previously.  This Fencing has been ace to work with, the pieces used on this layout are actually left-overs from a previous layout, "Arkham Asylum". :)


The final piece of 2 Crafty is the lovely title "The Magic of You", which makes up most of my layout title; "The Magic of You x 2"... 2 cute! ;)

I have done a stipple effect with heavy body acrylic paint on this title.  This is the first time I have used this particular technique on chipboard and I like it... a lot! 

Basically, take an old worn artist paintbrush, or better yet, a flat stipple brush (used mostly for stencilling, I believe - well that's what I've used them for in the past) and using non-diluted heavy body acrylic paint, tap the brush all over the title until fully covered.  Once dried, repeat.  That's it!  I then outlined around the title to give it an extra bit of "pop!" and also to tie in with the black and white letter stickers that form part of the full title. 
 

These stunning Carved Resin Hearts are from D-lish Scraps.  I have used Vintage Pink and White, and layered them on top of each other... love 'em!  I've also used two Key Charms  on the top of my photo border.


Okay that's all from me for now!

Cheers,

Chantal

xo'
 
Well done Chantal & thank you so much for giving us the details on how you created this awesome layout. Love all the details & absolutely love how you have combined flowers, flourishes, embellishments & your family with such a fabulous old building
 
Bye for now
Meg


09 October, 2012

Heather turns things on their side

Hi

Heather decided that turning the paper on its side so that the stripes were horizontal was
 'I turned the paper on its side for a different effect - very excited'.

Write a comment & let Heather know whether you are excited.  I am excited - love it!!


Then she decided that a tissue box needed covering with a paper from the Spring Paisley Collection & then lightly painted with Gesso.  The effect here is totally exciting.


Love both of the projects Heather - well done.

The paper turned on its side is very exciting & adds a different dimension - love the deep & rich colours added to the LO.

The tissue box is so feminine & pretty.

Bye for now
Meg
www.megsgarden.com
 

08 October, 2012

The Day after the Fair

Hi

Hope you had a great day yesterday & stopped & met Denise & collected some of the papers from 'A Musical Christmas' Collection. 

If you could not make the Fair or the papers were sold out, please visit www.megsgarden.com where you can purchase.

These are the last of the projects Denise Ann made for the  Fair:


Add a tag to a candle


Favours for a table

Any of these ideas can be adapted to any kind of project - whether it be a card, an OTP, a layout or more ....
 
 
Always remember to think outside the box ...
 
 
Bye for now
 
Meg
 
 
 PS  Heather's project using these papers is scheduled for Wednesday