30 May, 2017

A Card Option

Hello Bloggers

On occasion I go through my large basket of items pulled from magazines, ideas scribbled on scraps of papers etc. & try to make some sense of them; sort them somehow & toss those that are no longer relevant.

Found this template that I had downloaded from Stampington mag in 2002
(I told you I had lots - been collecting for a while) & this basket has been moved from Sydney to Crafers & then to Hahndorf


Entire length is 11.5", widest part is 5.5". I added a gusset but ended up not using it.  Length from widest part to base is 4.5".  Middle section is also 4.5". Top section is 2.5" by 3.5"
The easiest way to create is to cut a rectangle 5.5" x 11.5"; measure up the centre of it; scoring between the sections & then cut out the 6 triangles.

Green Cardstock cut from A4. Used White Flowers on Green paper to decorate


2cm white rose, green leaves. 2 white rosebuds, pearl sprays,  bead, cream 4mm double sided satin ribbon for the handle & cream organza & sating ribbon for the bow


I cut 2 triangles to fit the front & inside from White Flowers on green. The purse is closed by agnet with a sliver of paper to cover & give strength to the opening


The inside of the purse is decorated with foam mounted ephemera to act as pockets; the tags are also foam mounted & tucked into the ephemera pockets.


Pic of entire inside of the purse showing the 3 sections - top, middle & bottom.
I did not use the folding pocket shown in the template below.


You could  use double sided patterned paper as shown in the template pic.

Other options:  
use in a mini album
make the sides straight
decorate in whatever style would suit the recipient -
male, female or child
use as an invitation with RSVP inside

many ideas:

If you have an idea for the template, please add a comment to this post.

Bye for now
Meg
www.megsgarden.com

28 May, 2017

Heritage Journal ~ Sherlock Journal Vol 11

Hello Mary here today to share a project with you using the Sherlock Journal Vol. 11 Range.
When I received this range I knew exactly what I wanted to create with it. I take photo's of my family vintage photo's with props that belonged to my family, a friend said I should make a book of them for future generations, so some of those photos make an appearance in the book and some are the originals. Sherlock Journal Vol. 11 is perfect for such a project.
Because I did quite a few pages I thought I would show a few in pictures and also made a little film of the book completed. I will start with my front cover


I created a pocket with the postcard and have slipped family paper clippings etc inside as well as a tag documenting my Great Grandparents For the Pages I made from cardstock I have used a thick tissue paper that has fibres in it and I inked, misted and stamped it to give a old appearance and scrunched it as I glued it on , I have used this technique on most of the pages that I used cardstock as my base for the page. I also heavily inked the pages with Tim Holts Vintage paper Ink. The other half of the journal I adhered Sherlock Journal Vol 11 pages back to back.


The photo on the right opens back


To reveal some family photos tucked in the envelope from the cut and create sheet. I fussy cut the envelope to create the opening in the envelope. I then made a pocket from a image on the cut and create to slip the tag with journalling in opposite the photos.


I added the bead to the end of the string to act as a page book mark. A tag slides down behind the photo with journalling.


To read the journalling I just need to pull the tag from the side of the photo with the ribbon.


I will finish with this page of my Grandparents, as I don't think the video showed the whole page. Loved the filigrees for embellishing the page of my journalling.
You can find  the products ( only a small few are from my stash ) and the gorgeous Sherlock Journal Vol 11 at Megs Store .
I hope You enjoyed my project as much as I enjoyed creating it ,and my first attempt of a video.
Happy Creating
Mary x


23 May, 2017

Gift tags by Meredith Hilly

Hello everyone.
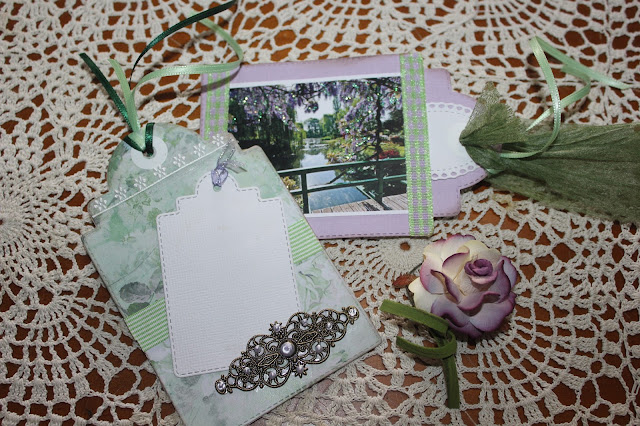
I had a few birthdays this month and wanted to add a personal gift tag to there presents.
Megs garden pictures where perfect to fussy cut and glue to the tags.


To give the pictures a real pop I added glitter and liquid pearls.


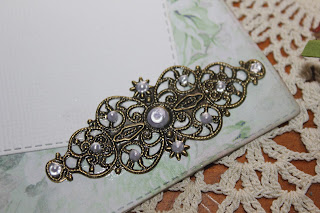
 I find the beautiful metal embellishment great to add liquid pearls to .


Thanks for having a look at my gift tags.
Have a lovely day.

Megs garden

My stash
Glitter
Liquid pearls


21 May, 2017

Guest designer Heather Jacob - Vintage/Rustic mini book

Hello everyone
a very warm welcome to Megs Garden blog.

My name is Heather Jacob and I am absolutely thrilled to be a Guest Designer
showcasing the Sherlock Vol 11 Collection
here on Megs Garden Blog.

These  papers are just perfect for my Vintage mini book 

I decided to create a book using black and brown cardstock. 
embellishing each page with the Sherlock vol 11 papers using 
 layering, stitching, distressing, inking and stamping . 

The cover is embellished with the emphera .
I had so much fun with this project and I truly hope you like it .

VINTAGE MINI BOOK 
created by Heather Jacob 

My Vintage mini Book Cover .
lots of layering, distressing and stamping .
tied up with string and I also added some tiny pewter jewels .

I love the look of tags poking out from within the book
adding both mystery and interest to the viewer .

 vintage post cards are wonderful to use in mini books .


a pocket oozing with journaling on tags .


a small pocket full of tags and stamping.


 mood boards take me out of my comfort zone .
using different colors and hues .
WINTER ...
Autumn


loving these soft pastels and texture .


to finalise my album
I decided to add a post card on the back of my vintage book .

This Sherlock Volume 11.
collection is such a delight to work with,
both inspiring and magical.

 Slide Video of Book

The book contains little pockets and Tags where
I added journaling to keep memories alive for future generations.
thanks so much for looking at my work .
hugz from Heather J.
my blog
www.heatherartandlife.blogspot.com.au  

19 May, 2017

White Flowers on Green Leftovers to Cards

Hello, it's Patti here finishing up my Guest Spot on the Design Team with my leftovers share.  You've probably already seen my Mini Album made with Meg's White Flowers on Green.  With the bits I had leftover I made six greeting cards I'll be sharing with you.


I always like the challenge of what to do with the leftovers.  Lately they've been used to fill up my empty greeting card coffers.  I had enough to make the six 4" x 5 1/2" cards and was happy with how they all turned out.  I found it amazing that I was able to emphasize not only the white flowers on green, as the collection name implies, but also pink, purple and blues.  

You can see on the card above  I used this darling fussy cut girl as the focal point with one of those Dollar Store heart stick ons my friend Paula had sent me, what a find.  Roughing up some scraps of the paper creates the perfect background for the ticket and girl.  (The flourish of leaves wasn't cut from the paper but sure blended in perfectly didn't it?)


A couple of the cards I let the image pretty much speak for itself, like this gorgeous rose.  I always want to add more and more and more instead of just letting simplicity shine.


So for both the cards above I tried to let the paper speak for itself and only add a few elements.  The ribbon in the top card is dyed seam binding which I scrunched and let dry.  I love doing this it gives it that real wrinkled oldy look.  I simply added the purple flower on the second card popping some of the petals higher to let it lift from the card base and give some dimension, but not so  much I can't pop it in the post with basic postage (something I rarely find I'm able to do).  I used Wink of Stella in clear to accent to butterflies.


By changing the direction of the card from landscape to portrait you get a much different feel.  The hearts that were included in the collection make perfect greeting card embellishments.  I edged this one with Tattered Angels Glimmer Glam in Rust then covered the entire surface with Versamark and clear embossing powder.  


Here's the other fussy cut heart, in blues this time.  See how different the card looks when you rotate it 90 degrees into landscape?  I added a border punched with an EK Success punch called Graceful Heart, added Glossy Accents to the Cherish, poked a hole in the heart for the seam binding bow. This isn't one of Meg's gorgeous acetate butterflies (although I used a lot of hers on my mini) but instead one I was gifted by a crafty friend,


The last of my cards showcases this wonderful word art Meg created and one of her acetate butterflies (you must check the butterfly transparency sheet out in the store, it's a must have for your crafty stash).  Again the leaves are not part of the collection but some I had stuck back.  I like to cut up a bunch of die cuts and just have them available to tuck in here and there when making cards.


I'm a card maker that always likes the insides to have something so I'll give you just a snippet of the insides and share the rest of the detail of this and the backs on the video. Today's video will include lots of information on techniques and products.  Thanks so much for sharing your time with me and please check out the wonderful items Meg has in her store.

Patti's Video:
 https://youtu.be/WqhHNdoj658


Meg's Garden
Collection - White Flowers on Green 

Visit me at A Soul's Heartbeat on