30 July, 2013

Sandra's Mini Album

Hello Bloggers

Sandra presents & explains her very gorgeous mini album:

'I first cut four pieces of corrugated cardboard into 5.5inch X 4.5 inch (or approx. 14cm X 11.5cm)
I then painted the edges and slightly onto the card itself with black acrylic paint for a better finish than plain brown card. 
I chose a Stampi’ Up! paper to use on the opposite sides in the album to the gorgeous A Day in the Meadows vintage scene.
If you don’t have the smaller photos that were used in years gone by just print your own into a wallet size or the size you would like.
Choose your elements and then decorate as you wish.  I’ve left most of the beautiful scenes to showcase the lovely paper but you could change to suit your own style.
I used the piece of leftover paper for a pocket on the back of my mini album and I included some metal corners to the front and back of the album.

Cut as many ribbons as you like and tie them around the ring binder for presentation as this mini would make a gorgeous gift.'


Meg’s Garden Products:
Dreaming in Mulberry - P6348, A Day in the Meadows - P6345  both papers from the Dreaming in the Meadows Collection of papers
Vintage Beauty Pack VB pack, including the gold trinkets and words from:
Laces used:Lace - 3cm white - L2853 & Lace – 1cm off white - L28970

Other Products Used: 
Corrugated Cardboard for album base
Black and Old Road Ink, Metal Corners
Mauve Rose, White Flower
Flourish with a Bling Pink Pearls
Fine lace, Wooden Camera


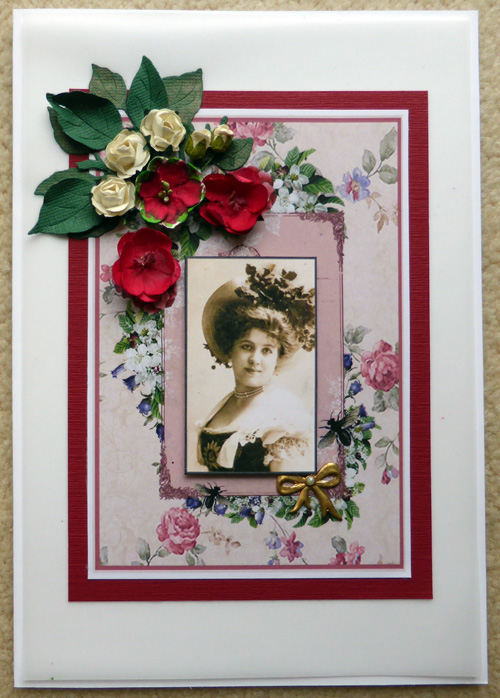
Thank you Sandra - a beautiful mini album that really showcases the papers used - well done.  What a fabulous present to receive.

Bye for now
Meg
www.megsgarden.com

27 July, 2013

Sandra's Such Charm Layout

Hello Bloggers

Sandra is in a creative wave


'Such Charm Layout

I used white cardstock and stamped it with light colour ink and a Kaisercraft script stamp.  I fussy cut the border of the Dreaming in Mulberry and used the centre, that I’d cut out, as a mat for my photo which is a gorgeous portrait picture from the Vintage Beauty Pack.  I also stamped the Leaves stamp onto white cardstock before applying Distress Ink to use as a tag.  The Leafy Foliage die was cut with three different colours of green cardstock which were either doodled on or inked with Distress Ink.  The Daisy Silver Trim was treated with some gesso, then Versa Mark before having the Perfect Pearls dusted over the top to blend in with the colours of the paper.
I used the 1cm lace tucked under the frame, yet over the cute stamps from the sheet of A Day in the Meadows, perfect for those little added embellishments.
The Organza flowers were added to two corners of the layout and I think they added another beautiful softness to the overall look, along with the Vintage Rose Blooms.  I couldn’t resist using that gorgeous umbrella trinket from the Vintage Beauty Pack VB pack.


Meg’s Garden Products:
Dreaming in Mulberry - P6348 
A Day in the Meadows -P6345 
Vintage Beauty Pack VB pack -Umbrella Trinket
Lace – 1cm off white - L28970
Organza lace flower dusty peach & green Organza lace flowers

Other Products Used: 
 White Cardstock and Script Stamp
Prima Ingvild Bolme Dry Sand Ink
Ranger Tim Holtz Distress Ink


23 July, 2013

Denise Ann uses Dreaming for her Layout

Hello Bloggers


Denise explains her layout:  

I had so much fun creating this page of myself and my husband - lots of cutting out.  The border is hand embossed and pierced, using parchment tools. 
The Chipboard scroll has been heat embossed for the words & I have used a heat and stick powder then dipped in glitter.  It is very important to secure any glitter on a scrappy page. 
I have used from our New Collection 'Dreaming in the Meadows'  - Dreaming in Duck Eggs Blue and Dreaming in Willows.'


Papers used:
 Dreaming in Duck Eggs Blue P6346 & Dreaming in Willows P6349

Love the Layout Denise - beautifully done.  The white gardenias are the perfect touch on these beautiful pastel papers.  The blue flowers peeping around the top layer are a gorgeous accent as well.  Fabulous work on the border with embossing & piercing - totally awesome in its effect.

Bye for now
Meg
www.megsgarden.com

For those who do not know - Denise Ann Boddey is the Designer of these papers

20 July, 2013

Sandra's - cards for the Ladies

Hello Bloggers

This is Sandra's first post as a DT member & she explain her gorgeous cards:


'I was thrilled to receive my first delivery of gorgeous products from Meg’s Garden & decided to use pictures from the ‘Labels for Dreaming’ to make three beautiful cards suitable for the ladies.  I have to admit I love the designs so much I didn’t want to cover them up, hence the decision to showcase them front and centre of a card.
There are three layers on the front of the cards -  firstly vellum then cardstock and finishing with the beautiful pictures.  These are also suitable for cards or journal tags and embellishments on a layout.
I am so in love with the leafy die that I’ve used it on all three cards, as branches of leaves and for tucking behind flowers.

To adhere the vellum so no glue showed I firstly glued the other two layers then used double sided tape on the back of the vellum in the same spot as the previous layer of cardstock, voila no sign of glue or tape.'


Meg’ Garden Products:
 Vintage Beauties Pack(a great pack with lots of goodies included)
Lace - 3cm white   L2853 
Mini roses

Other Products Used:
Cardstock in White, Black, Maroon Textured
Vellum or Translucent Paper
Prima Ingvild Bolme Black Ink, Versa Color Silver Ink
Ranger Dylusions Cherry Pie and Grass Green Ink
Ranger Dylusions Capucchino Pearl Spray


Gorgeous cards Sandra - well done.  Love your use of the Labels for Dreaming paper - these labels are great for cards but they also fit the new 'Project Life' sleeves.
The cards are a great start to your term on the Dt - keep up the great work.

Bye for now
Meg
www.megsgarden.com

18 July, 2013

A Card from Sylvie

Hello Bloggers

It is always a pleasure the receive a project from Sylvie with her French touches & these 2 cards are no exception.

'I would like  to show you also 2 cards created for my other DT since I used Meg's Garden papers!! '


Just beautiful - well done Sylvie - your fussy cutting is fabulous & the embellishments used are simple but perfect

Bye for now
Meg
www.megsgarden.com

16 July, 2013

Sandrine's Cowboy

Hello Bloggers

Even though Sandrine has gone, she left us one more project - her Cowboy:

'Hello to all Meg’s Garden’s friends!

Today you are with Sandrine with a grungy layout using “Elements” with Kraft and Black Bazzill, a very nice combination.


I created a background with some black Glimmermist splatter, and then a collage of Elements Papers for behind the photo.

I used one of the fabulous clock face as an accent. All the papers were distressed/torn/inked.

And I created fun banner:


So that’s it for my grungy layout, I hope you liked it!

Meg’s Garden Papers used:
- Elements - Vintage Tags 1031
- Elements - Vintage Map 1035
- Elements - The French Cinema 1038
- Elements – Old Wold Time 1037


What a great layout - well done Sandrine - totally agree with your choice of black & kraft bazzill - perfect combinations. The banner is a great embellishment

Bye for now
Meg
www.megsgarden.com

12 July, 2013

'The Romantic Garden' - exciting NEWS


  • Hello Bloggers

  • We are so excited this month to be featured on Simply Cards Issue #57.


  • We have a CoverMount paper stack on the front of the magazine as a freebie with the magazine & even more exciting is that Denise Ann has 5 very beautiful & elegant cards with directions on the inside.


  • Out other piece of exciting news on the Romantic Garden is that we have prepared a kit that will allow you to make the cards featured in the magazine


These are the 5 cards - aren't they beautiful?

The Romantic Garden set of papers were pulled from several of the past Collections. For those who want more of the paper stack, we will be printing a pack & this is now available.

The Romantic Garden paper pack


We have several new kits on the drawing board that we are sure you are going to love.  Suggestions are very welcome.

Bye for now
Meg
www.megsgarden.com


11 July, 2013

Sylvie plays with Shabby Steampunk

Hello Bloggers

Sylvie explains her card with matching envelope:


'This is a card and matching envelope in a shabby steampunk style.  I used couture collection embossed silk and satin, couture collection birdie fly across the ocean, elements old world time, and  french garden collection mini squares of sneak peak packaging for the word "friends"

 the clock hands were glued to thin cardboard to stiffen.
I hope you'll like this project...'


Card with envelope

Envelope


Front of card

Inside of Card

Back of card

Card in front of pink envelope

You have really combined the shabby with steampunk - well done Sylvie.
Love both the envelope & the card - the theme travels well across card & onto the envelope.

Products used:
The Couture Collection
Elements Collection

Bye for now
Meg
www.megsgarden.com


07 July, 2013

Fabulous news for Bloggers from Spain

Hello Bloggers from Spain

You can now purchase a great collection of Meg's Garden papers at:

Tienda Santamaria
calle La Rosa n. 16
Sabadell, Barcelona

Maria Teresa has chosen from the scrapbook papers as well as the Cardmaker mini packs

Make sure you go to her shop to purchase

Bye for now

Meg
www.megsgarden.com

04 July, 2013

Vintage Chocolate Box by Adriana


Hi everyone, 
Adriana show us her project for Meg's Garden this month.

Adriana explains,"Today I have covered a chocolate box 
with the Elements papers from Meg's Garden and 
New paper collection Dreaming in the Meadows


Firstly, I ate the chocolates.....yummy.....
then I covered the top and bottom of the box with 
dusty pink coloured card stock, 
which I embossed with a Couture Creations embossing folder.
I applied white Distress Paints on the embossed cardstock. 
It looks and feels like velvet.


On the top of the box I decorated it with
German Scrap border on the each edge. 
Then I glued some German scrap border on the each end.
I apply glossy accents to the chipboard frames and placed
some German Glass Glitter and tea stained fragments. 
I placed a paper Doily and a Vintage Beauty Image
inside the glittery frame.

I adhered two Organza Lace in dusty pink and green 
at each end and a 
transparent Butterfly for an extra touch.


Around the edges I covered with the newest paper collection
Dreaming in Rose paper , some German Scrap
To finish and close this 
box with a Striped satin Ribbon - Brown and latte colour 


Inside the box I covered it with
French Cinema Elements paper from the
Elements Packs available also from 
Meg's garden website. 
Then I decorated on the edges with small
 paper Doily and German Scrap


Inside the box is a Vintage Beauty tag and a little note book
and matching pen. These are made from the new papers 
Dreaming in the Meadows paper - Dreaming in Mulberry & Dreaming in Lavendar


The materials I have used on the tag are 
Striped satin Ribbon - Brown and latte colour 
5cm white lace

The notebook and covered pen is made with the
Dreaming in Mulberry paper
Cornsilk flower
Elements for the Paris cover

Thanks for looking
Cheers Adriana XX

What a gorgeous box Adriana - well done & thank you so much for your instructions - very clear.
Bye for now
Meg
www.megsgarden.com