31 August, 2016

Water Colours In Blue Mini Album

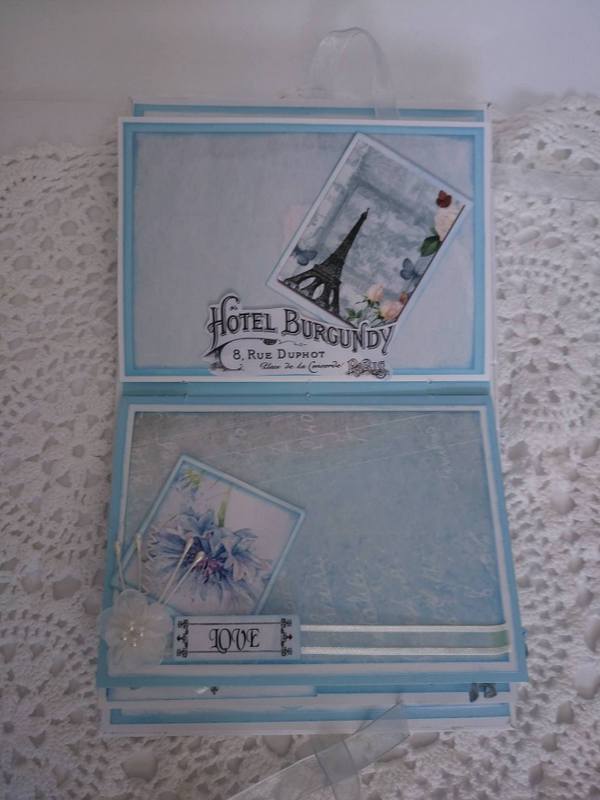
Hello crafters, I hope you have all been enjoying all the fabulous projects from the team.  Today I have a little mini album made from the Watercolours in Blue paper collection.


To create this album I first covered some chipboard with white cardstock 


 and then matted it with some blue.


I have used a mix of white and blue cardstock from stash to create three alternating signatures

 I then sewed these to my spine using some crochet cotton.  

Once my pages were attached to the cardstock.

  I adhered the spine to my little book. 

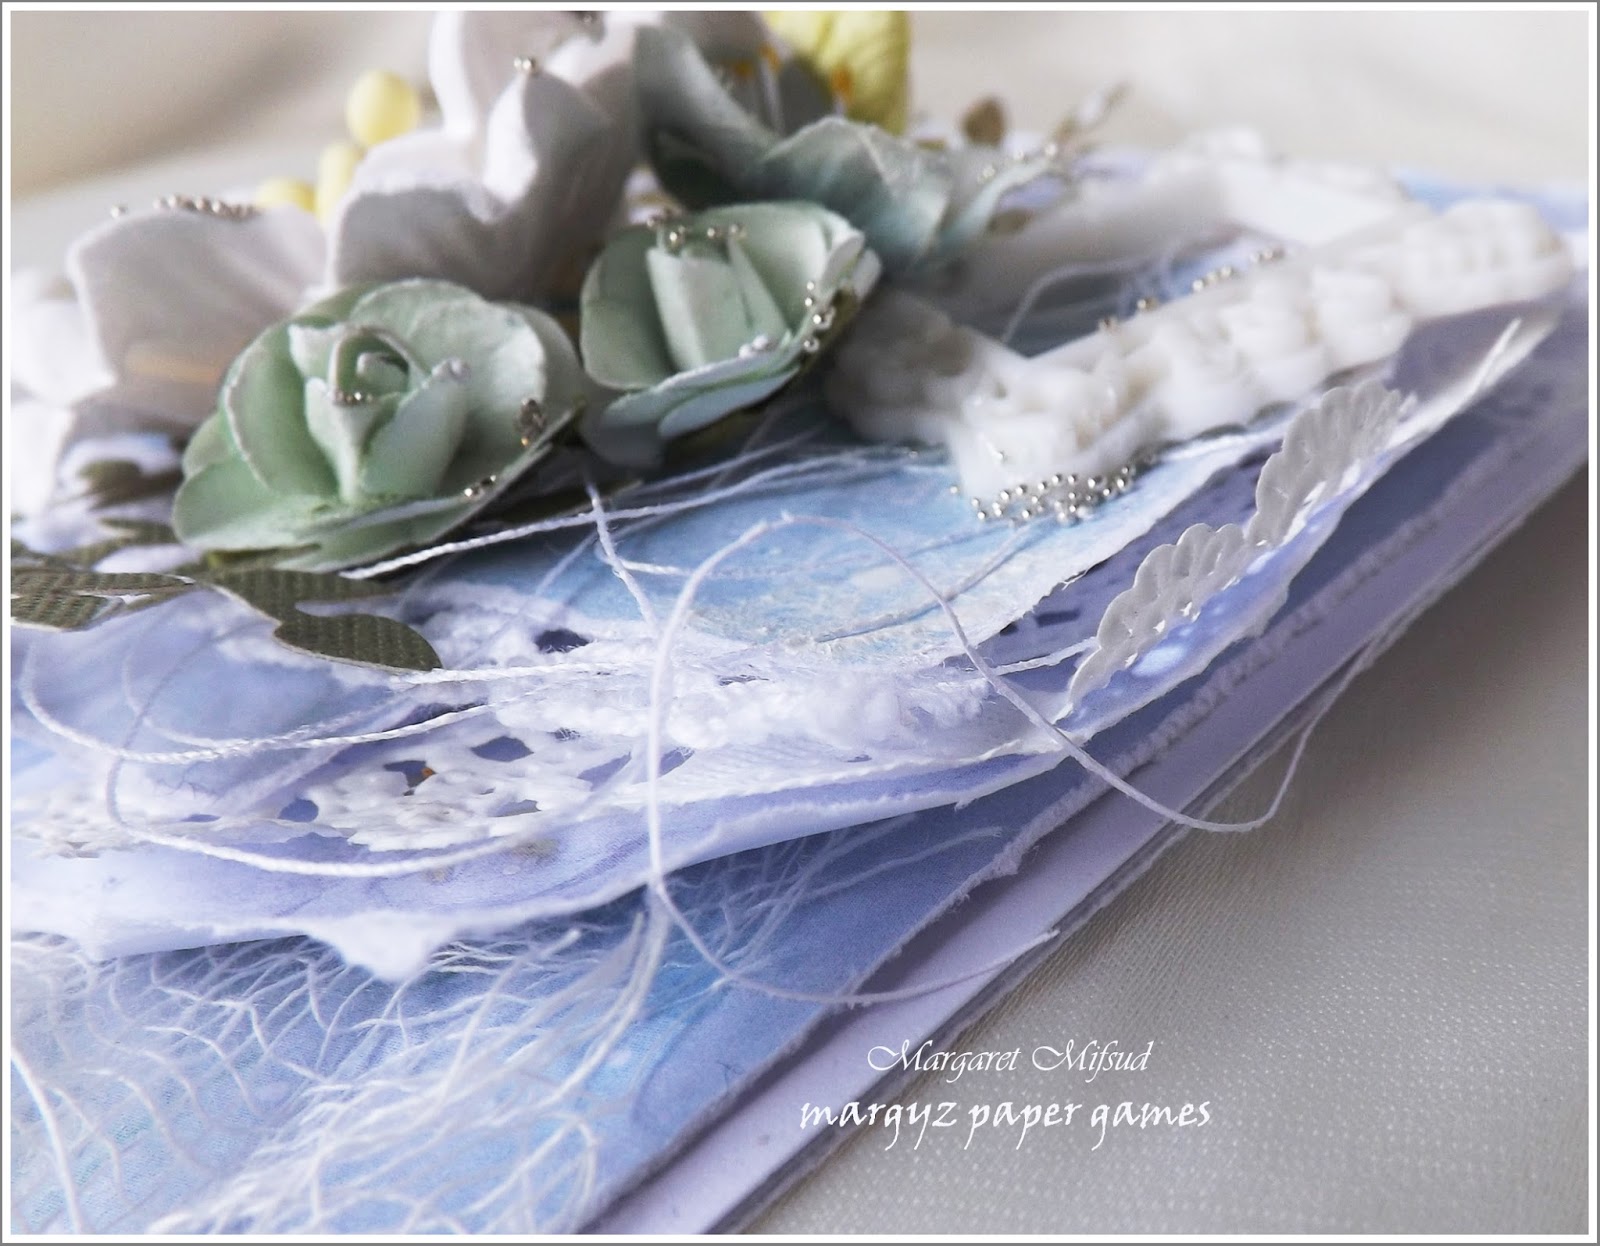
I then began doing all the fun stuff!! Embellishing!!  Here is my finished mini album.


I hope you have enjoyed my mini album today.  Please be sure to stop by Meg's Garden to see her latest products.

Thank you for joining me today.  
....till next time
remember to live your bliss......
✿ღ.~♥  Much Love ♥~ღ.✿

26 August, 2016

CREATING WITH THE NEW VINTAGE JOURNAL PAPERS

Hello and Welcome to Meg's Garden Blog.
 Mary here to share with you the layout I created with the gorgeous new range of papers "Vintage Journal". I have to say that I am never disappointed when I open my box of goodies from Meg's Garden. 
I couldn't wait to get started as I love creating Vintage Pages.

Uncle Sam looking mighty dandy


I have used Vintage Journal Collection 02 for my layout, how gorgeous is this paper ! The photo is of a Uncle of mine,
I cut the image from The Vintage Journal Cut and Create Paper of the gentleman standing with his umbrella , how perfect, they are almost standing identical .

A bit of a close up below for you.


 At the left hand corner of my photo I have added a beautiful copper coloured organza ribbon that was in the kit Meg sent me,  it adds a softness to the layout and is the perfect colour to pick up the vintage colours in the paper.
I also added another two of images from the Vintage Journal Cut And Create under my photo mat to add layers and colour ~ check out the images below  ~ divine.


I made a base for my photo from old packaging and treating it with gesso and dried tea leaves. A technique I saw on Marta's YouTube. Gives lovely texture. I rubbed Vintage Photo distress ink over it and around the edges.I then placed a Squibble die cut on top and then my photo. I really like the dimension this gives also.


I embossed some chippies I had in my stash and added some thread and stamping to my page.
I hope I have inspired you to pop over to Megs Shop and get yourself this beautiful range to create with.
Until next time
Happy creating
Mary

23 August, 2016

Floating on a palette of Watercolours in Blues

Hello and Welcome To Megs Garden , Mary here with a layout created with the beautiful range Watercolours in Blues Range of Papers.


Firstly I cut the 4 x 12 " strip you receive with the corresponding  12x 12 " Pattern paper into strips and placed it as the base for my photo. I then dragged gesso over these strips to give the strips definition. I painted some texture paste through a mask , that I think looks like swan feathers.
A close up for you.


To me this beautiful paper looked like a lovely lake for my photo I took of a Swan in  Zurich to float on. To the right of the photo I punched a decorative border from one of the strips I cut, and then added a small doily I had cut in halve and layered it.Two bows in the gorgeous soft satin seam binding ribbons one in  blue and one in white and added the soft organza flower with pearls.I also added a couple of soft white feathers in the cluster. I took the London Image from the Cut and Create sheet and added on the right of my photo for some more layers . To add a contrasting colour I used Black Card Stock and a  Die, also adds another layer.
Pop over to Megs Garden Shop to find the products I have listed .

You will be so happy to create with this beautiful range .
Until next time
Mary

21 August, 2016

Watercolour in Blues - Cards by Margaret Mifsud

Hello sweet visitors and welcome to the Megs Garden Blog.  
Hope you are having a wonderful day.

I'd like to share two cards with you today created with the beautiful Watercolour in Blues Paper Collection. 
I have to say, one thing I really love about the Megs Garden papers is that they come in so many different sizes.  There's the Mini Paper Pack (which is what I've used here), the Papercrafter Mini Packs, the A4 papers, the 12" x 12" Scrapbooking papers and also the Mini Book Papers.   On top of that you also have the matching ephemera papers and they all come in either a printed version or a digital downloadable version.  So, whatever you choose to create, you will find a Megs Garden Collection which is eminently suitable for your project.  I think that is awesome don't you??

For my first card I used the Watercolour in Blues 03 paper.


Added a touch of stenciling with texture paste and also did a little stamping.


The flowers used are all from Megs Garden. (I will pop a list of all Megs' products used at the end of this post)  I just added some colour to the puffy paper flowers to match in with the papers.  The frame was made with a mould and some hot glue and then painted with acrylic paint.  
I was asked by a couple of people to do a tutorial on these frames but there's not really very much to it.  You simply need a mould and then just squirt the hot glue into it.  One little tip I can give you though is, make sure you place the nozzle right down into the mould so the glue can run into all the little details before it cools.  It took me a couple of tries before I realised this, so my first few frames had a few bubbles and missed detail.     Also, make sure you don't overfill the mould as you want to keep the back nice and flat.


The doily is also from Megs Garden.


The small lock came from my stash.


Watercolour in BLues 04 is what I used to create two pockets on the inside.  One is for a Gift Voucher and the other for a tag with a personal message to the recipient.


My second card was created with Watercolour in Blues 01. 


In between the papers I layered some gauze, some lace and a doily cut in half.


The large bloom is from Megs Garden and I have again added another small frame.  To make the frame this time I used some Mod Podge Melts.  I have discovered that they are much easier than hot glue to fill the moulds with.  Once heated they are a thinner consistency than the glue and they fill the moulds better.  Plus the sticks come in different colours so may not need to be painted.


I added a few micro beads and some die cut leaves ..


.. and some cotton for more interest and texture.


As I prefer to add my personal message on a tag or journaling card I usually create at least one pocket for the inside of my cards.  Here I have used Watercolour in BLues 06 and Martha Stewart's Floral Vine Deep Edge Punch.


Thank you so much for dropping by and taking a look at my little creations.  While you're here why not take a further stroll through the Garden and see what the rest of the Team have created.

Megs Garden Products used
Watercolour in Blues Mini  Cardmakers Pack
Puffy Paper Flowers
Azaleas
10 cm Doily
1.2cm White Lace

Take care and God Bless.
Marg xoxo

19 August, 2016

Blue Ladies mini book

Hello Bloggers

I love doing mini books & had started one several weeks ago using the Watercolours in Blue Book papers but was then stopped in my tracks when my website failed to publish;  I then had 2 weeks of computer dramas that stopped my design brain totally.

Finally got back to my mini book but all my original ideas were lost - the only thing I had done was to cut everything & make my pages etc. from pale blue cardstock - Bazzil Petalsoft.


On my list of 'To Dos' was to learn videos so that I could upload projects to YouTube - it was way down on my list but I decided it was time & pushed it to the top; I said sorry to facebook & blog postings & tried out my mini book pics in the software.

Here it is:


Not sure how the music got into it & still do not know how to add commentary
 but we are in the baby steps phase.

Products Used:


Laces - Lace 42 & L2976 on cover, spine & middle pages, L6899W on almost all pages

Pins of Jewels  on front cover

Vintage Trinkets  on front & back covers
 - handle (al 121), corners (al 128) & filigree (al 104)

Flowers & Leaves - throughout the book 
 Celestial White pack (da800) & Organza w pearl (org pearl)

Art prints by Monet -Ladies in White  S131 

All others in the book papers pack

Other notes:
Distress Ink - frayed burlap, Spine was done with the Petalsoft cardstock with the edges torn & distressed, the cabinet cards were made into little books, the laces on each page were designed as pockets for pics.


I have the new book papers Vintage Journal on my craft making desk & I am 
looking forward to making it.

 - lots of papers to cut & ideas to churn through, what colours will I use with it, what embellishments - rough or smooth & textures to investigate.  There will be no laces, flowers or frillies on this one.

Hope you enjoy my little book which I have called 'Blue Ladies' after the Monet ladies & the Ladies in hats by Harrison Fisher .

Bye for now
Meg
www.megsgarden.com


17 August, 2016

TeaTray Water Colour in Blue by Meredith Hilly


Hello everyone. Hope everyone is enjoying Megs "Water Colour in Blue" collection.
My mum enjoys having me and my kids to tea parties. She cooks up a storm and we use tea cups and saucers. When the weather is warmer we go outside to enjoy her garden. The new paper collection gave me a great idea to make a tea tray for her to carry the cakes and cups.
First I found a photo frame which had a nice big border and was about 500mmx400mm.


I then bought two decorative handles. So there was no chance of me breaking the glass while drilling and screwing the handles in I took the frame apart and put the glass aside.


I decorated the black cardboard which came with the frame and then put the glass back in. Using liquid nails I glued the back together and taped over this with a heavy duty material tape to give it strength.


To finish the tray of I decorated one corner with flowers and ivy leaves. I added glitter to the flowers to give them depth of colour.


I was very happy how this tray turned out. The glass makes it easy to wipe any spills.
Have a go at making your own tray. There are many colour papers at Megs Garden to choose from.

Megs garden

My stash
Frame
Handles


15 August, 2016

'Flirt' envelope mini album

Hello Bloggers

Alena has a video to show us of her latest project using Pink Quartz Collection................


Beautiful project


video 'Flirt'

13 August, 2016

Love You Card with Rose Quartz......

Today I want to show you a love card with a wooden heart on top of it....For this 
card I used Meg's Garden Rose Quartz paper collection, Bazzill white cardstock, 
Golden Tulle, Pink Ribbon, Vintage Brad and some flowers and leaves.
The base of this card is 14.5 x 14.5 cm after that I used two layers of design paper
14 x 14 cm and 11.5 x 11.5 cm, the second design paper layer I raised with cardboard / chipboard.....and distressed it with Tim Holtz distress ink - Tattered Rose...
On top of the last layer I put a wooden heart that I decorated first. 
I used for the pink flower pink ribbon en made this flower my own....for the heart of this 
flower I used a vintage brad....
 I hope I have given a little inspiration for you to try Meg's Garden papers and
embellishments for your self. If you want to see more  hop over to
Meg's Garden blog and see what all the girls made!! 

If you are interested to buy one of those gorgeous paper collections hop over

Thank you so much for visiting and enjoy the rest of the day,
take care......