30 November, 2020

Card Papers 5x5" sq used

 Hello Paper Artists

Two cards using the card paper collection again as well as the

 Cut & Creates on the insides of the cards


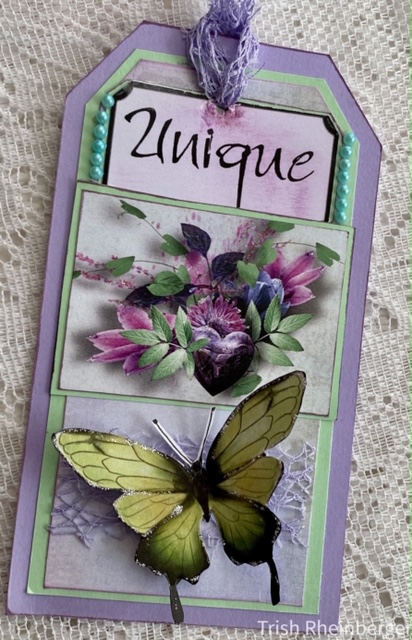
The white flower is embellished with gold foil; holly berries & leaves are added & a burgundy organza ribbon with satin edges is tied in a bow & the ties are glued & looped to add depth.


This is the inside of the card.
Belly bands in burgundy with gold sparkle ribbon are added to each side. Word Art printed on vellum is added on each band.  The Santa image is from the Cut & Creates, the burgundy tag is from the side of a card paper & the cream tag is from the collection.

The 2nd card also uses the Card Paper collection.
This cover really needed no embellishment.
I tied a cream organza ribbon around the centre of the card & had a fluffy bow

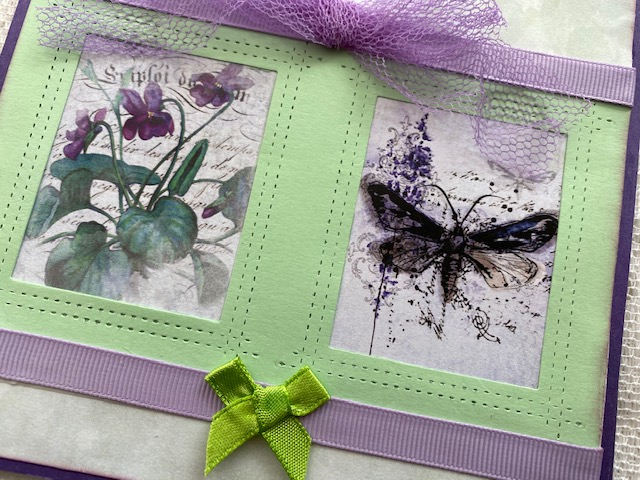
On the inside of the card, I did 'some' embellishing - maybe too much. I think I had started a mini album & then changed my mind.


Both sides used a frilly die which I cut on burgundy cardstock & added pearls

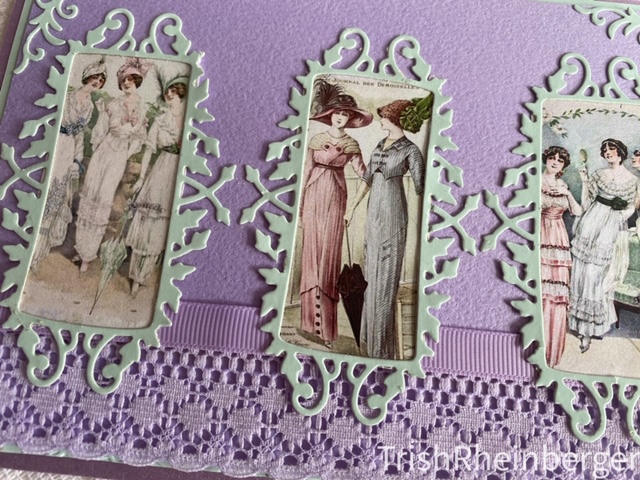
The left side of the card used 2 images from the Cut & Create collection; the word art is foam mounted; holly berries & leaves are tucked under the word art.

The right side of the card has a piece from the side of the card paper foam mounted to allow a burgundy tag to insert.


There is a 1/4" spine on the card to allow the foam mounting

Coming up next - some mini books - you know I had to do some of these.

Bye for now

Meg

Shop for Papers

26 November, 2020

Christmas Gift Tags in Burgundy with Cream

 Hello, everyone!
It's Nancy back with a new project share!

This is another fun idea for using the new Christmas Collection:

 Burgundy with Cream

This time I have made an assortment of Christmas gift tags:


Aren't they pretty?
This is such a beautiful collection of papers and elements!
The tag base in the top center of the photo, is one of the printable elements.
I simply cut it out, and layered a Santa image on top of it. 

This collection has lovely touches of gold throughout.
To bring out the gold, I have added a layer of Rinea Gold/Gold Glossy Foiled Paper.
To finish the tags off, I punched a hole and added a piece of gold cording.
They've all been left blank on the back,
offering a place to add names and messages.

Below is my favorite image! 
The finished tag measures 4"x 4".
That will give you a good idea of the size of all in the photo. 

Any of these tags would certainly dress up a Christmas gift!


Meg's Garden Products Used:

 Burgundy with Cream

* * * * *
Thanks so much for stopping in today!
I'll have another project to share very soon!

* * * * *

 Thanks for stopping in today!

Don't forget to visit Meg's Shop and take a look at all the other beautiful items!
 
Also, don't forget to sign up for her newsletter HERE.
That way you won't miss any news!

* * * * *

25 November, 2020

A recycled biscuit tin made with the Burgundy with Cream images


Hello and welcome

A step card  with some glitter paper to highlight the candles in this 

the pretty image in the card papers pack 


Santa must have eaten lots of shortbreads last year ...

   all I could find was an empty tin so I put it to good use

                                 
I had some German scrap in my stash which was easy to decorate 

   my lid, along with paper I used from the collection

       Plus a Poinsettia I made 

                   Don’t forget to check             


                                       https://www.etsy.com/au/shop/MegsGardenPapercraft


                                                                  Cheers Trish

24 November, 2020

Burgundy with Cream 2 Double sided Tags and a simple card

                                                Its time to start thinking about Christmas Cards 

                                               The man in the red Suit will be around Shortly


                                 I added some lace from my stash plus some fussy cut Trims

                                                                  Cheers Trish

Are you ready for Christmas!

  Hello everyone & welcome!

Leanne here with you today & I have some Christmas projects to share with you.

I have created two simple but affective gift giving project ideas using the very latest digital papers from Meg's Garden Papercraft Etsy Store. 
These delightful patterned papers are called: Christmas in Burgundy with Cream.

A simple box, from this.....


To this!

 
To decorate my box I have fussy cut images and wording from ephemera sheets. I have inked the edges using distress ink: vintage photo. I then arranged all of the pieces before fixing in place.
Red coloured rhinestone were then added to finish.


I have added a plant a lovely gift that keeps on giving. 


A simple paper gift bag. From this to.....


This!


I have cut out the wording and image from a sheet of patterned paper. The edges were distressed using a distressing tool then I have inked the edges using distress ink: vintage photo before adhering the paper pieces in place.
I have also added die cut gold stars, a tag and self-adhesive pearls to finish.


Simple and easy projects that make into decorative items that you can add a gift too!

Until next time.
Thank you so much for stopping by.
I hope you have a wonderful day & happy creating.
Leanne

20 November, 2020


Hello Paper Artists

 Introducing two new Cut & Create collections designed specifically for card makers, tag artists & shabby chic journalers. Perfect for creating during a cold winter, a gorgeous summer, or anytime you want some very pretty ephemera to start or finish a project with a vintage floral influence.

 1. Vintage Ladies with Flowers

High-quality 300dpi, JPG format, 8.3x11" papers

Each paper has 7 Images 2.5x4" + words. 6 papers total

https://www.etsy.com/au/listing/893449070


2.  Watercolour Flowers

High-quality 300dpi, JPG format, 8.3x11" papers

Each paper has 6-8 images approx 2.5x4". 6 papers total

https://www.etsy.com/au/listing/907434397


Preview Video:  https://youtu.be/fKEGzsKSQco

Designed for cardmakers - add laces, ribbons & more flowers. Layer with beautiful backgrounds & foam mount with matching cardstock, or pick up one of the colours in the image.

Also wonderful for shabby chic journals & junk journals.

Create fabulous tags - use an image of your choice & mount with foam tape, add a selection of ribbons, lace & flowers as well as some die cuts & finish with a mounted word

Enjoy creating with these new images

Bye for now

Meg

megsgarden@outlook.com

My Shop at Etsy
 Subscribe to Newsletter:


19 November, 2020

It's Beginning To Look A Lot Like Christmas

  Hello everyone,

Leanne here with you today and I would love to share a Christmas project with you. 

I have created a Christmas wall hanging using the latest digital patterned papers from Meg's Garden Papercraft Etsy Store. 

The papers are called Christmas in Burgundy with cream. 


My wall hanging is constructed from heavy cardstock as the base. I then selected a sheet of digital patterned paper from the Burgundy with cream collection. This deep rich burgundy sheet was adhered to the base. 
To decorate I chose lots of ephemera pieces from the cut and create sheets. I have fussy cut the pieces then inked the edges with vintage photo distress ink before arranging each piece and fixing them in place. 

 
I added lots & lots & lots of embellishments - after all it is for Christmas. 
Layers of lace were added for that feminine touch. I then decorated a stick from the garden, this is used to hang my creation.


All in all I am very happy with how my project has turned out, it's now ready to display for Christmas.


So why not try your hand at creating your very own Christmas wall hanging this year; a wonderful project to display each year. 
Be sure to stop by Meg's Etsy Store for these papers and to check out all of the varieties of digital papers on offer.  

Wishing everyone a safe and Joyous Christmas.

18 November, 2020

Lavender with Mint Cards

What a pretty collection of papers
very Spring like


                                                       Card one is quite simple


                                                               My tag is made using cut and create 

                                                                         images


                                                    another easy simple card made with 

                                               background papers from the 8x11 papers

                                                            plus cut and create mages


                                                Thanks for visiting Megs Garden 

                                       and don't forget to check out other DT members Creations


                                                                   Cheers Trish

14 November, 2020

Birthday, Engagement or Wedding Card

  Hello everyone & welcome!

Leanne, back with you today and I am sharing another card that I have created using the "Lavender & Mint collection". 

These gorgeous digital patterned papers are available from Meg's Garden Papercraft Etsy store. 

I have made a large card; it measures 11.5 x 21 cm when folded. This card would be wonderful as a Birthday, Engagement or as a Wedding card.

Simply make:

For the card base you will need a piece of white cardstock that measures 29.5 cm wide x 21 cm high. 
I have scored along the wide section at 9 cm, then at 20.5 cm, fold then burnish each score line.

Front panel:

Cut a piece of green cardstock to 8.5 x 20.5 cm, distress the edges of the paper with a distressing tool,
ink using distress ink: old paper, then adhere to front panel as shown.

Cut patterned paper to 7.5 x 19.5 cm, distress, ink using distress ink: milled lavender, then adhere to green cardstock.


Cut image from the cut & create sheet. Add a strip of gold & purple papers to the image as shown before adhering this whole piece to the centre of the front panel.

Inside panel:

Cut a strip of green cardstock 2.5 x 20.5 cm, distress, ink and adhere as shown. Add a length of lace to green cardstock.

Cut a strip from the patterned paper 6 x 20.5 cm, distress, ink and adhere to card. 


To embellish the front of my card I have fussy cut my butterflies from an ephemera piece, then fix each butterfly in place with glue. Next add some lace and string of pearls as shown.

I have punched out 6 small flowers from some patterned paper. The flowers were shaped, inked then fixed in place.

To finish my card I have added some stickles glitter glue to the rose image & small flowers.

Until next time.
Thank you so much for stopping by.
I hope you have a wonderful day & happy creating.  
Leanne

10 November, 2020

Lavender with Mint Digital Paper Collection

                                             Hello Bloggers   

                                                 For my first card I used this very beautiful 

                                                             cut and create image

                                                                  fussy cut my butterflies

                                               My 3 beautiful ladies are tiny images 
                                                from the A4 cut and create papers
                                                                       closeup
                                                           for my 3rd card I used the A4 page
                                                         embossed and inked plus fussy cut
                                                                              images
                                                                       closeup
                             I hope you enjoyed visiting Megs Garden and enjoyed these pretty
                                                                       digital papers
                          
                                                                       Cheers Trish

                                                                       Meg's Shop 
                                                                    Newsletter signup

07 November, 2020

Happy Birthday to You

Hello everyone & welcome!

Today, I Leanne want to share with you this Special Occasions card.
It was made with the delightful digital paper set "Lavender & Mint #MG501."


I have created a Centre step card.  


My card base was created using plain Lavender coloured cardstock.
I then cut a piece from one of the digital patterned papers, this has adhered to the centre panel. I have inked my papers with Tim Holtz's distress ink called Milled Lavender. 
Next, I die cut a piece of green cardstock, raised this with some cardboard before adhering it in place. 
I then die cut a piece of patterned paper, cardboard was added, before fixing to the die-cut green piece.
I have fussy cut the image from one of the cut & create sheets, this was adhered using 3D foam tape.


My butterflies have been punched out of some offcut pieces from the patterned papers.  
I don't like to throw any paper away as the scrap pieces are ideal for die cut & punched out shapes.


My card has been embellished with die-cut & punched out shapes, jute twine, lace, decorative trim and self-adhesive pearls.

Stop by Meg's Garden Papercraft Etsy Store for these digital papers & to see all of the wonderful paper collections on offer.
Please keep stopping by to see all of the Design Teams creations & inspirational projects.
We would love to hear from you also.

So until next time,
Thank you so much for stopping by.
I hope you have a wonderful day & happy creating.

04 November, 2020

I Just Made This Especially For You

 Hello everyone & welcome!

Leanne here with you today & I have a card that I would like to share.

The papers I have used are from the digital paper collection called Lavender & Mint. They are available from Meg's Garden Papercraft Etsy Store.


I have created a shaker card.

Simply Make:

You will need a piece of white cardstock 28 x 14 cm, fold in half to create a 14cm square card base.
 

Cut a piece of green cardstock to 13.5 x 13.5cm, paper distress the edges then adhere to card base.
Trim digital patterned paper to 13 x 13cm, distress the edges then adhere to green cardstock.
Add lace trim to left hand side then fix in place as shown.
Trim patterned paper to 5 x 12.5cm,  distress the edges then adhere with 3D foam tape.


To create the shaker you will need:
An oval die cut frame in green cardstock
An oval die cut ephemera piece
An oval die cut piece of plastic or acetate
Seed beads & 3D foam tape


Create shaker piece then fix to card with 3D foam tape as shown. 

To finish card fix in place some paper roses, self - adhesive pearls and a fussy cut butterfly.

Until next time.
Thank you so much for stopping by.
I hope you have a wonderful day & happy creating
Leanne

03 November, 2020

Oh So Pretty, Gift & Birthday Cards

  Hello everyone & welcome!

Leanne here, I have a Gift card and a Birthday card to share with you today.

The digital patterned papers are called Lavender with Mint, they are available from 
Meg's Garden Papercraft Etsy Store.

Just love this beautiful and feminine image. So I decided to use it to create a gift card.

Simply make:

Cut white cardstock to 14 x 10.5cm, fold in half to create card base.
Trim digital patterned paper to 6.3 x 10cm, ink the edges with distress ink: old paper, then adhere to card base. Add lace as shown.
Trim white cardstock to 5.5 x 8cm, ink, then adhere to patterned paper with 3D foam tape.
Cut out ephemera image from the cut & create sheet, ink then adhere as shown.
To finish gift card add self-adhesive pearls.

A Birthday card.

Simply make:

Cut white cardstock to 21 x 14.8cm, fold in half to create a card base.
Trim digital patterned paper to 10 x 14.2cm, ink edges with distress ink: milled lavender, then adhere to card base. Add lace and gold washi tape as shown.
Die-cut oval shape in white cardstock, ink then adhere to patterned paper.
Die-cut oval shape in green cardstock then adheres with 3D foam tape as shown.
Die-cut image in an oval shape, ink then adhere to green oval shape.

Next fussy cut image from the cut & create sheet, ink then fix in place as shown.


To finish add self-adhesive pearls.

Until next time.
Thank you so much for stopping by.
I hope you have a wonderful day & happy creating.
Leanne