30 March, 2018

Green with Delight

Hi Everyone,

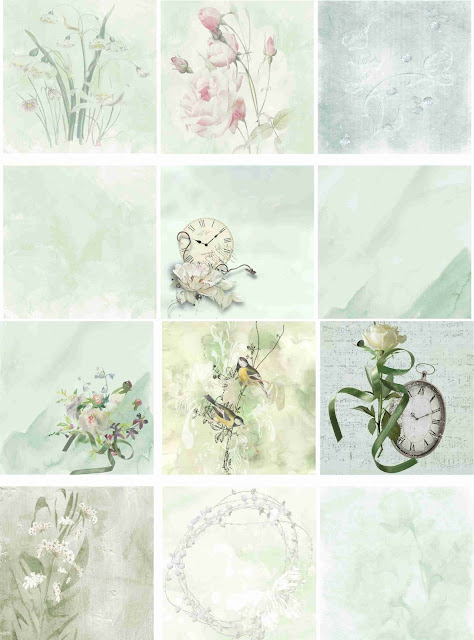
Thank you all for your lovely comments on my previous cards! Today I have three more to share, using the new Shades of Green Card Artists Packs and Ephemera Pages.


The muted tones and floral imagery throughout this collection are wonderful to work with. Paired then with the ephemera pages, and you are in for a delight.


The lovely dancing couple, sheet music and sentiment are cut straight from the ephemera pages. I have used various thicknesses of mounting tape to create layers with the cutouts and set off the couple, having them dance the night away. Using ribbon and flowers, I gave the card extra height.


Pinks and greens in the Shades of Green collection work so well together. This floral paper from Pack 1 I used for the background here would have to be one of my favourites. I used a complimenting die cut design and layered another two ephemera cutouts, one behind the die cut, and the other on top of. I also hand sewed on green beads for added detail and dimension on the dress.


There is plenty of space in and around the designs on the ephemera pages, so I was able to die cut around this stunning design. Using a complimenting cardstock colour, I mounted the paper and die cut, adding a tear for effortless embellishment and an eye-catching element. This is another instance where the paper and ephemera work so well together.


I like distressing the edges of the card base, I think it adds to the shabby chic look, and also texture.
I finished off by inking around the distressed edges.


Take a stroll into the Garden today and have a look at the new collection!

Happy Creating,
Julia

NEW 'SHADES OF GREEN' COLLECTION - TEA CUP CARD WITH OTHERS

Hello fellow Creators,

Very excited to be showcasing Meg's Garden new Collection ' Shades of Green'. For these cards I used Meg's Garden Pack No. 1, together with the Cut & Create sheet.    This collection is amazing and I was inspired to  create something different for you today.

Firstly, I decided on this Tea Cup card which was a lot of fun putting together.  I altered the tag on the actual tea bag that is sitting in the cup, ideal for sending to a friend to share.

 Here is the card completely open.

and now it is closed and ready to send.

Next came a couple of cards using this lovely Collection ' Shades of Green'


Close ups for you showing the beautiful trims and metal embellishments.


Well that is all I have for you today.  I hope you have enjoyed our journey through Meg's Garden new Collection.   You can view more HERE.

Don't forget to check out the Labels, to see which items I have used.  Until next time....have fun creating and see you next month.....Regards Liz.


28 March, 2018

Shades of Green Collection

Hello Bloggers

This Paper Collection started out as being a Watercolour one but as you can see it changed.

Reasons for using Green as a colour in April:


  • St. Patrick's Day - my paternal Grandfather was born in Dublin on St Patrick's Day
  • in the Southern hemisphere, we are starting to see the leaves fall and/or change in colour & have to memorize how beautiful the trees are through an Autumn & Winter Season
  • we are also thankful for the trees which keep their leaves
  • the grass stays green but does not grow - a time for the lawnmower men to relax a bit
  • but the lawnmower men now have to rake & get rid of the leaves
  • in the Northern hemisphere, the trees have hints of the buds of the green leaves to come; the crocus are up, other bulbs will follow & the forsythia blooms are almost here & there are signs of Spring & other hints of the rejuvenation
  • the main reason is that it is such a beautiful & vibrant colour with so many shades


The green colour is one of the most pervasive in the natural world. This colour can take a huge variety of shades, and whenever you paint landscapes, florals or living creatures, it’s crucial and challenging to choose the right ones for the situation.

Green is a secondary colour that is easy to obtain by mixing two primary colours: yellow and blue. In fact, “yellow” in this equation can vary, and range from Cadmium Lemon to Burnt Umber.

The Collection is available either printed or as a digital download:  

A4 with or without the Cut & Creates, Mini Book/Journal, Card Artist Packs as well as Cut & Create Ephemera


The 12 Shades of Green Paper Collection


The 6 Shades of Green Cut & Creates

Some ideas for colours that work with green:


Hope you will enjoy working with the many shades of green - it is the colour of life, renewal, nature, and energy & is associated with the meanings of growth, harmony, freshness, safety, fertility, and environment. 

Bye for now
Meg
www.megsgarden.com

PS. Remember Mother's Day is just around the corner

25 March, 2018

Easter eggs by Meredith Hilly


Hello everyone.
I would like to show you the Easter eggs I made using Megs Garden embellishments and papers.
I used duck eggs as they are larger but chook eggs can be used instead.
After blowing the egg yolk out I painted this egg with a moss green paint and then a coat of crinkle crackle paint. I used toilet rolls as frame work for all of my Easter eggs stands. Decorating the roll in different ways.


This velvet flower was the perfect colour for my egg.


This lovely egg I painted first. After drying I cut out pictures and scrunched them into balls. There are so many pictures you can choose from at Megs garden to cut out. Clocks , flowers , ladies. The possibilities are endless. The scrunching breaks down the paper fibre making it easier to glue onto a curve surface. Then using wood glue mixed with water I softened the paper. Gentle smoothing the paper onto the egg. Don't over work the paper as it will loose the picture and colour.


While the eggs has the wood glue mixture on it you can attach lace or ribbon to the egg.
When the egg is dry the hole used to blow the egg can be used as a anchor for flowers and leaves.


I did the same process with this egg. Glitter works great on the flower and pictures.


Adding pearls and small embellishments like dragon flies makes the egg more detailed.


The base of this egg stand was painted with pink paint and I added lace with pearls drops. I cut up the round silver trim ribbon to use  for smaller decorations. Don't ever be afraid to cut off small portions of lace and ribbon. They make wonderful embellishments.


And now for the boys.  I  choose my photos to cut out from  Alchemy 101 papers. I followed the same process as above but when the egg was dried I coated it with crinkle crackle. When this layer dried I used a dark coloured ink pad to wipe over the egg. This will go into the cracks. Before the ink dries wipe of excess with a tissue.


This egg I did not paint. I stamped it with stamps. You will need to roll the egg along the stamps to get most of the image on the stamp.


Again I used a toilet roll and painted it. Attaching the ribbon with the very cute cog and frog.


I hope you enjoyed this post as much as I did making the eggs. There is so much to be created using megs garden supplies on your very own Easter egg. Give it a try. Makes a lovely gift at Easter time without the calories.


Megs Garden

My Stash
Paint
Ink


Easter Sale on Flowers & more

Hello Bloggers

Having flowers on SALE at Easter is the thing to do!  And it has to be a good SALE!

50% OFF


1.  Flower Packs by Colour


2.  Tassels


Pages 125mm square, covers 134mm square


Stock up while sale is on - some products are limited .


Bye for now
Meg


24 March, 2018

LIFE IS A JOURNEY ~ SHADES OF GREEN

Hello Mary here to share another layout with the range Shades of Green

LIFE IS A JOURNEY 


Because I am creating these layouts for my Daughters album I turn them into a 12 x 12 layout by simple adding the A4 pattern paper to a sheet of cardstock.


I added some texture with a rose stencil and texture paste and added some pink tones with water colour paint. Under my photo more texture using one of the dies from the store. There is a huge rang of dies to choose from, this one is called Screen Frame. The butterfly has been fussy cut from the Shades of Green Cut and Create Sheet and I have used lace and sheer green ribbon and the crystal jewel to nestle the flair. Under the butterfly I have one of Megs doily's peeking out.


My title which is from The Cut and Create sheet  I have framed with a chippy I embossed from my stash and then added the pastel enamel dots either side . Meg has enamel dots in all shades in the store. To pick up the shades of green in the paper I placed the Carte Postcard from a cut and create sheet at the top of my photo, I think it ties in nicely with the greens on the PP.


I finished the layout by fussy cutting the single white rose  from the cut and create sheet and placing it as though it is falling from the bouquet .

Thank you for calling by , I hope I have inspire you  to create with the gorgeous romantic papers and embellishments.
Happy Creating
Mary x


23 March, 2018

SHABBY CHIC CARDS

today I'd like to share with you pretty cards
 made with the 'shabby chic background' collection of papers
from  MEGS GARDEN
the little angel is from a previous collection
love the square doilys
the metal greeting is from my stash
DREAM

circular doily & fussy cutting, tinted muslin & scattered beads
FOR YOU  


folded square doily, fussy cut roses, tied ribbon & lace 
BIRTHDAY WISHES
a separate tag with ribbons, lace, roses & fussy cut flowers & butterfly
SPREAD YOUR WINGS

lace & muslin cream flowers & fussy cut roses tied with a bow
CELEBRATE YOUR DAY

 circular cut out raised & die cut irregular circles
fussy cut flowers, silver butterflies & bling
HAVE A HAPPY BIRTHDAY

lots of fussy cutting, frilled lace, soft bow with a silver frame
CELEBRATE


cut out 4 images & mounted them, cut & mounted a larger image
 tied with a pink bow 
SMILE 
Hoping these cards have encouraged you to
spend time browsing MEG'S GARDEN
and 
wander through the blog to be inspired by the 'GARDEN GIRLS'
PRODUCTS USED:
Mini square & Circle doileys
L2902 lace
L3054 lace

Shabby Chic Backgrounds

Thank you for visiting Megs Garden blog
Happy scrapping 
Hugz Annette 


22 March, 2018

One Paper Torn in Half

Hello Bloggers

I took 1 piece of paper from the Shabby Chic Backgrounds Collection Card Artist Pack & tore it in half & decided to make 2 cards in totally different styles - 1 Shabby Chic & the other Slightly Grunge.  Did not think it would work BUT ...


This is the paper I chose - the Music paper

Here are the 2 cards:

1.  Shabby Chic Style


The cardstock chosen was a deep rose colour from my stash (sorry no source colour available)
I used a round doily background & layered the torn half of the music paper - this was distressed, inked & the edges curled. The pink edges were from my blusher brush

 The embellishments include a Pink Wild Rose, 2 White Paper Lilies, 1 Cherry Blossom with tinted pink edges & a Small White Paper Flower surrounded by a diecut flower with pinked edges (m356 open roses) as well as 3 paper leaves.  The pink die cut with a pearl highlight is from diecut Carousel m392.

There is no inside deco on this card since I had a slight woopsie with a bottle of glue which glued the card together.


2.  Grunge/Slightly Grunge/Masculine


The other half of the Music paper.   I was quite amazed by the results of my experiment using the 1 paper with 2 totally different styles.


The edges are distressed more than the first card, inked with frayed burlap & the corners curled. Cardstock was a light brown taupe & the layer was a scrap from old papers. The jute string was tied around the brown cardstock & the black diecut (Large Gears m277) was tucked behind before mounting on the card of ivory cardstock.  
 A Cut & Create Ephemera was foam mounted & a skeleton leaf tucked behind it. The other black diecut is from die Scribbles & Scrap m3130.


Inside the card are more scraps.  The brown/taupe cardstock creates a spot to slide a scrap of the patterned paper embellished with a vintage trinket. 


The other inside has more scraps of cardstock & cut & create pieces.
The black die cut is from the same die used on the front - Scribbles & Splat (I think this is the splat) m3130. This is a great & fun die. Some more jute string to carry the design through the card


It was fun doing this experiment which I did not think would work - I challenge you to try it.

Bye for now
Meg
www.megsgarden.com