24 December, 2020

Art on a Heart for Christmas

 Hello Paper Artists

These 3 little 'tags' also known as 'Art on a Heart' can be as simple or extreme & also whatever size you want.  They can also be done on a traditional heart shape or an extended one that I have used.  Fabulous as tree decorations or as tags for a gift.


Cardstock is cut from a heart template; ribbon attached as a hanger & then embellish as you wish.
These hearts are  2.75" wide at the top & 5" long.

The 1st burgundy one is embellished with a gold sparkle ribbon hanger, a burgundy organza ribbon & gold leaf twigs & balls


The middle one is done on ivory cardstock & embellished with a lace wraparound tied in the front. An organza & silk flower with 3 paper flowers & green leaves. The hanger is double-sided satin ribbon & the art piece is, of course, finished with pearls & a sparkled die cut.

The 2nd burgundy is done on burgundy cardstock with a burgundy ribbon hanger. The embellishment is a piece of distressed burgundy cardstock topped with a paper flower, green leaves, 2 styro balls, red berries & curled white wire. A small cream organdy bow lightens the embellishments.


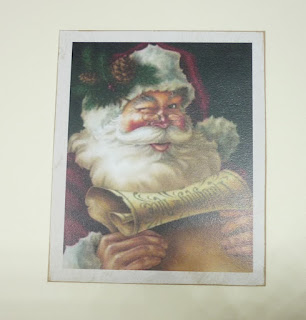
This is a 6" high image for you to copy & resize to your choice of size


And a traditional tag shape:


A green cardstock, a Cut & Create from the Christmas collection & the same gold sparkle embellishments form the 1st heart above

Hope these give you some ideas for the Holiday Season

Bye for now
Meg

Shabby Chic Joyful Time

 Hello Paper Artists

This time I have a mini album done in shabby chic style.

It also introduces you to the 'Mistletoe Fairy'

I found out about  this fairy several years ago & she was always at the back of my mind until 
this year she popped out

The mini-album is done on cream cardstock & the pages measure 5.25" square

This size is done so that the entire album can be done with 1 piece of cardstock 12x12"

The cover uses the bottom half of 1 of the A4 papers. It is embellished with gold dust, a cream velvet rose, a cream ribbon bow & a word art (freebie from the Christmas newsletter) printed on vellum. The vellum is foam mounted.  A little gold dust is also added to the velvet rose.

The cream organza ribbon has also been tied around the centre of the album & tied in a bow at the front.

The cover has a 0.5" spine to allow the 2nd section to be attached


This is the first page & second pages.  They are the back of the cover & the front of the second section.

Since the paper used on the cover was from A4, it measured 8.3" wide. I was in a quandary when I turned the cover over, before embellishing, that I either had to cut the extra off or fold it onto the inside of the cover - folded over was the answer. The gold dust was used again.  A strip of lace with cream ribbon glued on the centre with 3 tiny paper flowers & 2 paper leaves, all with some gold dust, was used on the side of the fold.

On the right side (the cover of the second section) was the top of the same A4 papers cut into a 5.25" square. A vellum envelope was glued to the page & a Cut & Create inserted. A strip of narrow lace was added to the bottom of the envelope & a strip of the same cream lace with pearls at each end. Some more gold dust was added.


This is the centre of the 2nd section - the ribbon covers another spine 0. 35" to glue onto to front section spine.

The left page has a mistletoe cut & create with the same cream organza ribbon. A die-cut star is sparkled,

On the right page, I introduce you to the Mistletoe Fairy. The same die-cut stars are used; a sign welcomes the Fairy & a little vellum book tells her story,


The front shows the fairy tossing her gold dust which, in this little book, is carried in the bottle. The vellum fold is embellished with lace. Inside is her story.


The page on the left is the back of the middle section & the right is the inner of the back cover

A piece of lace with double-sided cream ribbon acts as a tuck spot for the 2 tags - one has some word art on vellum with pearls while the other has a cream & green lace


The back of the mini-album is a cut & create which is fussy cut, then gold dust  & a cream organza ribbon added.


a jpg file for you to click & copy

20 December, 2020

Library Pocket Journal Insert in Burgundy with Cream

 This is my final project using the new Christmas Collection:

 Burgundy with Cream

...at least for now...

Recently I have been having lots of fun altering some books,
and making some fun new journals.
I'll be sharing that with you in upcoming posts.

Today I am sharing a fun journal insert idea.
I have decorated a library pocket using this pretty collection.

Here it is:


I have used a cut file from My Scrap Chick to make my library pocket and tag.
Both the pocket and tag were cut from kraft cardstock.
I've collaged the bottom of the pocket with elements from the collection:
a fussy cut Santa image,
a piece of the decorative red paper,
a decorative element strip,
and a piece of the music paper.
To finish off the pocket,
I wrapped the flap with some lovely red jute twine.

Here you can see them side by side.
I fussy cut another Santa, and added him to the side of the tag.
Then I fussy cut the sentiment, and adhered it in place.
The back is left blank for journaling.
Finally, I added more jute twine to the top of the tag. 

This fun library pocket will be inserted into my altered Christmas book project!

Meg's Garden Products Used:

Burgundy with Cream

* * * * *

 Thanks for stopping in today!

Don't forget to visit Meg's Shop
 and look at all the other beautiful items!
 
Also, don't forget to sign up for her newsletter HERE.
That way you won't miss any news!

* * * * *

18 December, 2020

Quick and Easy Christmas Cards in Burgundy with Cream

Hello, everyone!

It's Nancy back to share some more fun projects!
Again, I'm using the new Christmas Collection:

 Burgundy with Cream

This time I have made a selection of quick and easy Christmas Cards.
They look like so much more because of the beautiful papers.

We all need the option to make pretty cards that are easy to mail too.
So these digital products make them flat and fabulous!

Here are the first two cards:


For these two cards I simply resized two of the papers from the collection.
I distressed the edges with both a tool and ink,
and added them to burgundy cardstock card bases


I wanted you to see a closer look at these beautiful Digital Sentiments.
They are so elegant and the final touch to finish the cards.
You'll find them HERE.

Here are the next two cards:


For these two cards I used the card fronts from the collection. 
I was inspired by the frame around the card on the right to do some embossing.
I placed the piece on my scoreboard and simply followed the lines
with my embossing tool.
I repeated the process for the other card front.
If you look closely you can see it.
Then I adhered the card fronts onto burgundy cardstock bases.
To finish them off, I Stickles to each of them.
On the left, I added a frosty one to each of the snowflakes.
On the right, I added gold glitter to all printed old glitter bits. 


Meg's Garden Product Used:

 Burgundy with Cream

* * * * *

Thanks for stopping in today!
Don't forget to visit Meg's Shop and take a look at all the other beautiful items!
 
Also, don't forget to sign up for her newsletter HERE.
That way you won't miss any news!

* * * * *

17 December, 2020

Happy Holidays on vellum Word Art

 Hello Paper Artists

A Holly card image is my choice for this quick & easy card.

It is mounted on cream cardstock & embellished with a burgundy organza ribbon tied in a bow with long tails. The tails are looped & glued to give depth to the ribbon.  Some holly berries & green leaves are the only other embellishment.

The word art is printed on vellum & foam mounted above the berries at an angle. (the foam dot should not be seen like this - should have been further to the corner under a berry)

Inside the card is a smiling Santa cut & create


Inside card - spot to tuck sentiments or $$


Bye for now - more cards coming

Meg


15 December, 2020

Oh Santa!!!

 Hello everyone & welcome!

Leanne here with you today to share three Christmas cards that I have created with the Christmas in Burgundy with Cream collection, available from Meg's Garden Papercraft Etsy Store. 


To create my cards I started with 3 pieces of white cardstock measuring 21x14.8cm. Then fold each piece in half to create each card base. 
Next select the digital patterned paper backgrounds and the images for each card.
You will also need some plain coloured cardstock, lace and embellishments that you wish to decorate your cards.
Next start adding the layers and embellishments to each card as shown.
These are quick, simple and easy cards to create. I do hope I have inspired you to create one or all three cards today. 


Please don't forget to stop by Meg's Facebook page, YouTube channel and of course Meg's Etsy store and visit the blog regularly to see the gorgeous design teams inspirational ideas. 
 
Until next time.
Thank you so much for stopping by,
Have A Very Merry Christmas !
Leanne...🎅

13 December, 2020

A Card designed to Stand for Display

 Hello Paper Artists

Stand on a table, fireplace mantle, bedside table - anywhere you want a touch of Christmas

Cream cardstock is the background - each section is 12" long & folded in half to make each piece 6" sq.  A 1x6" piece folded in half joins the two


The front is done with another of the images from the Card Collection. It is kept fairly simple - the Christmas branch is embellished with gold dust. A burgundy organza ribbon bow is attached to the top corner & a piece of word art on vellum is foam mounted on 1 corner.

There are 4 inside pages to this card.

this is the 1st - Cut & Create images are tucked into a side image from the card paper & a small gold bow added. The Merry Christmas image is from the Christmas newsletter freebie - I printed it on cream cardstock

this is the 2nd - opposite the previous one

the same embellishing is done with Cut & Creates

this is 1 of the Card images - no embellishing has been done - the cupid is sweet enough


this is the last page. The side image from the Card paper is used here as a spot to tuck in a burgundy tag with a ribbon & a Christmas word art.

The tuck spot is embellished with a gold ribbon & 2 tiny paper flowers.

The back of the double standing card has a simple Santa image

You can use these ideas for any art project whether it be a card, journal, or wall art


Bye for now

Meg

Shop for Papers

11 December, 2020

A Chocolate Box

 Hello everyone & welcome!

Leanne here with you today and I have a handmade gift box to share with you.

I have used the delightful digital paper collection called Christmas in Burgundy with Cream.
Papers are available from Meg's Garden Papercraft Etsy Store.


The base and lid for my box is constructed in cream cardstock. 


Next I cut pieces from the digital burgundy with cream patterned papers to fit each panel of the box. Then paper distress the edges of each piece and then ink the edges with distress ink: vintage photo before fixing each piece in place. 


I have embossed the lid and handle then inked each piece before fixing the pieces to the box.


To decorate each panel I have fussy cut images from the cut and create sheets. Each of the ephemera pieces were inked then adhered to the panels.


Back of the box.   Hello Santa!


To finish I have added a touch of sparkle with Stickles glitter glue, baubles, rhinestones, die cut snow flakes and a gold bow.
I hope I have inspired you to create this sweet little gift box and fill it with treats for teachers, family or friends this festive season.

Check out Meg's Blog, Etsy Store or sign up for the Newsletter, so that you will be up to date with all of the latest digital paper releases + you will see all of the wonderful creations from the design team.

Until next time.
Do take care,
Have a great day.
Leanne

09 December, 2020

Burgundy with Cream Tag box and Tags

A soapbox came in very handy to decorate and keep my tags in
I have also fussy cut some holly transparency images to
decorate my Tag box


                                       I hope you have enjoyed your visit to Megs Digital delights

                                                                      Cheers Trish