30 August, 2013

Handbag with Vintage Postcards by Adriana Bolzon


Hello Bloggers, today Adriana will share her creation of a "Handbag with Vintage Postcards"

Adriana explains her project, "Hi everyone, 
today I have a project which I have created for my 
Meg's Garden Design Team work for this month, 
it is a Handbag
and inside are 
4 Vintage Ladies Postcards.

Using the new papers from Meg's Garden 
Designed by Denise -


The handbag.


I covered the outside of the bag with 
Adhered some German Scrap border
with glue around the bottom edges of the bag.

I attached a Brass Latch and hook - Scalloped 
for the closure of the bag
(there are so many to choose from
Meg's Garden website) also I
attached a Striped satin Ribbon - Brown and latte colour
 for a handle.


I also created 4 postcards, 
which fit quite nicely inside the bag.

The size of these postcards are 9cm x 11cm
Smaller than a normal sized card and a bit
larger than an Artist Trading card.
You could place these on top of card, if you like!  :)

"Put on the Bling" Postcard
Materials used from Meg's Garden are
German Scrap border
Elements - French Cinema

"Glamourous" Postcard
Materials used from Meg's Garden are


"Elegant" Postcard
Materials used from Meg's Garden are

"Unique" Postcard
Materials used from Meg's Garden are


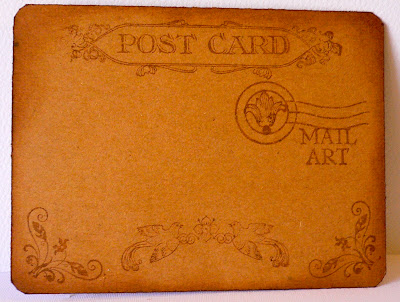
On the back of every postcard
I stamped elements with the  


Other materials I have used in creating this project

Imaginarium Designs Chipboard
Clear pebble
Tim Holtz Label - Imagine
Glitter Glue
Silver rhinestones
Vintage Photo distress ink pad

Please check out all the wonderful products at
 Megs Garden Website
and see inspirational work from the other DT members
all on the

Thanks for looking , Cheers :)
Adriana XX "

What a fabulous project from one of the Queens of Vintage - well done Adriana.  This is a great project to remind everyone about the Vintage Challenge - some great ideas in this one project.

Bye for now
Meg
www.megsgarden.com


27 August, 2013

Geraldine shows us a 3D LO using papers

Hello Bloggers,


'Hello - tToday is my first Meg's Garden  Design Team member blog post and I 'm sharing a layout of my daughter Mackenna.

 I wanted to show you how to create a layout using simply '3 sheets of paper'.
Well maybe simply isn't the word to use because there is a lot of fussy cutting here which takes quite sometime to do.... but well worth the dimensional effect created.'


Megs Garden Products:


Thanks for visiting the Meg's Garden Blog. Till next time.  XX Geraldine.'

How fabulous is this. WOW Geraldine - well done. Thank you so much for showing us this technique. Well bloggers time to get out your fussy cutting tools & give it a try.

Bye for now
Meg
www.megsgarden.com

26 August, 2013

Nineteen LO by Annette

Hello Bloggers

Annette shows us another project & explains:

'The beautiful papers from the range' Automobiles & Top Hats inspired by ' Great Gatsby'
available at Meg's Garden were perfect for twins Leigh & Stevie's birthday photo ...
I created this LO as a DT assignment for Stuck on U Sketches ..August 16th  sketch reveal.'


'Meg's Garden products used:
Taking roadster for a spin P6357
Roadsters front seat blanket P6359
1. Using P6357 as my base paper I cut around clock hand with a craft knife, ink edges
2. Cut a circle out of P 6359 & cut in half, ink edges
3. Cut a scrap of script paper from my stash centred on the page & tucked the half circles top and bottom, distress & ink edges
4. Fray the jute a little & adhere along base of script paper,
 adhere a scalloped circle above jute on right
 5. Mount a 10cm x 10cm photo on inked corrugated cardboard, adhere to centre
 6. Add trimmings

Other items used:
wooden gears, photo turns, brads, metal clock, key, thickers & flowers
As you can appreciate these papers were perfect for the twins photo
I hope I have inspired you to visit Megs Garden & have a play with this fantastic range
Cheers
Annette '

Fabulous LO Annette - this range of papers certainly love what you are doing with them - well done.  The embellishments are perfect; love how you framed & then double framed the photo - fantastic.

Bye for now
Meg
www.megsgarden.com

24 August, 2013

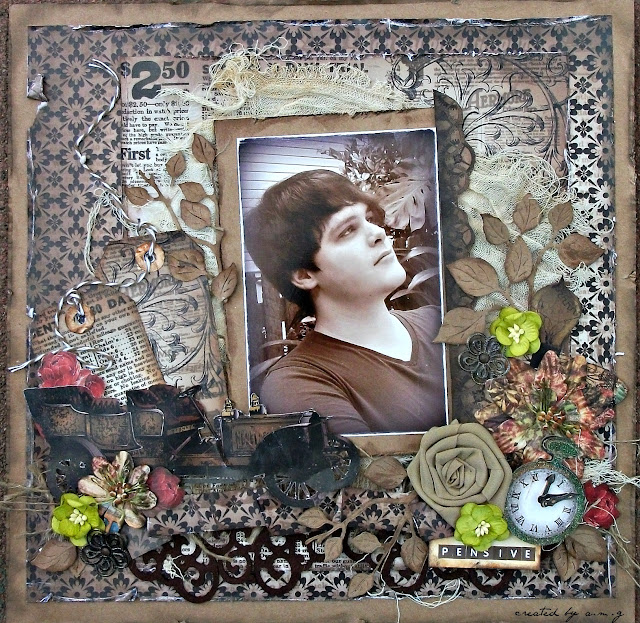
'Pensive' Layout by Annette

Hello Bloggers

This is Lynette's first project as a DT member & it is fab. She uses another of the papers in The Top Hat & Automobile Collection called the Front Seat Blanket.

'I oohed & aahed when I opened my box of goodies - I love this range of papers ... so perfect for masculine layouts.
Using Kraft as my base card, I trimmed P6359 down to leave a border & distressed & inked.'


Cut P6354 & off set on page.. fussy cut the car, light globe, red roses & gears from P6357 strip.
Covered the manila tags from P6354 strip
Folded cut strip of P6359 for under photo

Inked leaves & distressed & inked all edges


Meg's Garden Products used :
Take a Roadster for a Spin P6357
Automobile Parts P6354
Roadsters Front Seat Blanket P6359


Other Products:
Gathered from my stash:
 muslin, flowers, felt border, clock, twine & metal filigree flowers, ink & alphabet

Great LO Annette & welcome to the blog - well done.
Love all the elements - the lime green paper flowers are the perfect lift to the brown of the LO along with the hints of burgundy.  You have really done a great job in utilizing the strips.  I also like the way you have angled your photo.

Bye for now
Meg
www.megsgarden.com


22 August, 2013

Let's Take a Ride from Sandra - LO & 2 cards

Hello Bloggers,

We continue with the Roadster papers today with a LO & 2 cards from Sandra:

Let’s take a Ride
'I loved this paper so much I found it hard to cover any of it so I began this layout by using cardstock with stamping, and then embossing in gold a script stamp.  To add a bit more dimension I then stamped with a background crackle stamp in brown to blend with the brown cogs on the top right.  The centres of some cogs were stamped in the centre with gold ink.
I fussy cut the car and compass on the bottom half of the page so I could slip my vintage photo behind these elements.'


This is one of the other papers in The Top Hat & Automobile Collection:

Meg’s Garden Product:


Other Products Used:
Spellbinders Sprightly Sprockets Die
Stamp & Timber Brown Ink'


Cards
'I just had to make a couple of cards with the rest of the paper in this range.  I had the extra piece (4x12" strip) that’s supplied with Meg’s Garden papers and some of the top half of the 12X12 sheet used on the layout.'


'I also used some cogs and the leafy die on the ‘Best Wishes’ card and I chose some of the beautiful flowers for the second one.'

 Meg’s Garden Product:

Another marvellous use of the papers, the strip that comes with the 12x12" paper & the pieces left over after the 1st project is done - well done Sandra. Love all the elements  of the 3 projects.

Bye for now
Meg
www.megsgarden.com


20 August, 2013

Top Hat & Automobiles Collection project from Denise Ann

Hello Bloggers,

This week we are going to feature the 'Top Hat & Automobiles Collection paper designed by Denise Ann.
It has been called a 'man's paper' but these projects will show that it also more then that.

Today we feature 3 projects from Denise Ann herself & she shows us how she uses her papers very effectively.  The 1st project is a LO where she has combined several parts of the paper.


This is the actual paper so that you can see how she has cut pieces from the paper & then used them on different projects

Top Hat & an Automobile P6355
The 2nd project from Denise Ann shows the hand being used on a Layout with some of the Gatsby strip from the side of the paper as well as the the car cut out used as a 3D layer on top of some chippies with it all mounted on some green cardstock. 

Here we have her 3rd project which uses the playing cards from the paper, the Top Hat as a layer, some more of the side strips along with the red scrolled shape from the top highlighted with some chippies.

Fabulous projects Denise - well done.  Perfect use of the papers on the 3 projects.

Bye for now
Meg
www.megsgarden.com

18 August, 2013

Stacks of Happy Hues card from Heather

Hello Bloggers,

Gorgeous card from Heather:
Title : ‘Stacks of Happy Hues’ with Heather


'Hello everyone , Heather back with you again after being away on a short break . Have you missed me ? I’ve certainly missed all of you, and creating with these glorious papers .
Today I am showcasing a card with stacked embellishments .. Denise has designed these papers  to blend and flow together perfectly .


Process
1. My base is a deep purple cardstock which I cut into 12” x 6” and folded in half .
2. Cut another piece of cardstock slightly smaller than 6” x 6” , to create my front cover. 
3. I adhered the Christmas paper to the card and stitched around the edge .
4. Beginning with a Tim Holtz Die cut I mounted that onto my base piece. I used various Sizzix dies and began layering them . I included some cardstock to bring out the richness in the papers along with kraft  for contrast .
5. I completed my cluster with a bloom and two leaves .
6. The inside is embellished with a border punched piece on the left side and some washi tape on the right. Finished off with a tiny strip of paper and a tab folded around the edge of the card. Use a stamp if you desire .  

Handy tip 
Sometimes with this technique only tiny sections of the pieces can be seen but this adds to the magical appeal.  In my opinion embellishing the inside really completes a card with style. 
These are such quick and easy cards with lots of dimension and texture.


Megs Garden Items used
Copper paper leaves
Leafy foliage diecut
P6326 - Christmas Music
P6329 - Christmas Berry Stripes

Other items
Deep purple cardstock
Kraft cardstock
Washi tape .
Flower.


Thanks for looking , big hugz from Heather x'

Totally Love it - well done Heather & Welcome Back - we have missed you & your fabulous projects. The combination of colours here is magical & the layers as well. Just beautiful!

Bye for now
Meg
www.megsgarden.com