Showing posts with label cornsilk flowers. Show all posts

01 March, 2019

FRENCH ROSES COLLECTION - FAMILY LAYOUT & NOTEBOOK

Hello again Bloggers,

Well the months are certainly moving along and it is hard to keep up with all that is happening in the New Year.

For you today I have created a layout using Meg's Garden new Collection - French Roses.  Such beautiful soft colours in this range as you can see.


A small amount of fussy cutting with images of papers and cut and creates to add that special touch.


Finally I added more trim and beautiful flower  and metal bee.


Next for you, I have covered a little notebook that I have had for awhile and thought it would make a lovely gift for a friend to place in their handbag......what do you think???
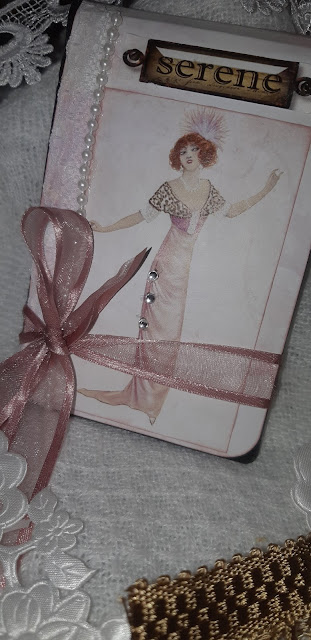
It was such fun to do and has a very elegant feel to the notebook.


I trust you have enjoyed the journey today and be sure to check more out on Meg's Garden  HERE.
Until next time....happy creating.....Love Liz

08 May, 2017

White Flowers on Green Mini Album

Hello Bloggers
Finally finished this album which ended up being very 'wide' & as you go through the pics you will know why.
I used vanilla cardstock inside the book & green cardstock for cover.. 

There are 7 pages in total that are 11 3/8" with the 3/8" score & fold in the centre at 5 1/2" in from each edge. Each page has an outside front 5 1/2", an inside left 5 1/2", an inside right at 5 1/2" & an outside back 5 1/2".

There are 2 pages tied with ribbon that have an additional inner set 
- pages 3 & 5.

Video of Mini album
Front Cover with green cardstock, vintage trinket corners & handle, butterfly transparency, silk flowers
& crown jeweled pin.  The Life was torn, distressed & curved with foam mounts.


Spine with vintage trinket, puffy rose, champagne tassel, key charm & bottle

Back of book with vintage trinket, puffy rose, green leaves & charm

Side view of book. Inside pages were 11 3/8" - scored with 3/8" at centre.
In addition, there were 2 pages  towards the centre that  were tied together with ribbon as seen above

Cherish side is attached to back of front cover. The rose is fussy cut & a foam mount added inside to keep the rose open for the tickets.  The back of page 1 is left as is

Inside page 1. Ephemera added on both sides with lace belly band

Back of page 1 & front of page 2 used ephemera, lace, heart doily & vintage trinket with pearl

Inside of page 2 - corners torn to open for ephemera, tickets & flowers

Back of page 2 - ephemera & doily tucked behind ephemera on green.
Front of page 3 on the right is the 1st of the double pages. The ribbon was attached to the back of page 3 with ephemera tucked into the ribbon.  This page is  16 3/8" - 3/8" at centre with 3 1/4" folded in on each side.  The inner piece  is 8 6/8" with 2/8" at centre. 

View of page 3 with ribbon untied.  The edges of the flaps & the inside smaller page were deckle edged & the same matching paper used on the outside & inside of the flaps

This one shows the left flap open, the inside of page 3 & the outside of the smaller insert - the lace allows ephemera to be inserted

Back of the insert page & right flap

The back of the insert page is  on the left, the right flap is open & the inside of page 3 

The  inserted page is now open & shows the embellishments

The back of page 3 & front of page 4 sere just decorated

Inside of page 4

Back  of page 4 has a fussy cut wreath which is decorated with green tassels & ribbon.
The left page is the front of the second page that has a mini insert tied with ribbon - page 5

Close up 

Inside of page 5 & front of the insert page. There were no flaps on page 5. The insert page had green cardstock to allow ephemera/photos/journaling to be tucked in.  The insert page has vintage trinkets folded over the edge for turning
Inside the insert page - same size as inner of page 3


Back of insert page & inside of page 5.  All the pages had the same papers used on them

Back of page 5. The front & back of page 5 has a small vintage trinket & pearl in front of the ribbon.  On the right is outside front of page 6 with a lace belly band

The insides of page 6 were simply embellished

Outside of page 6 with 'non white' flowers.  Ont the right is the outside of page 7. The fan ephemera was fussy cut & folded to appear as a fan

Insides of page 7 has matching pieces to tuck in notes, pics, journaling. The frames were fussy cut & could have pics in them

Back of page 7.  The right side is the back of the back cover with the rose fussy cut to allow tuck ins which fell out when photographing
All pages were glued directly to the spine.

Hope this has given you some ideas for mini albums.  The embellishing can easily be used on cards, scrapbook pages & more

Bye for now
Meg

19 August, 2016

Blue Ladies mini book

Hello Bloggers

I love doing mini books & had started one several weeks ago using the Watercolours in Blue Book papers but was then stopped in my tracks when my website failed to publish;  I then had 2 weeks of computer dramas that stopped my design brain totally.

Finally got back to my mini book but all my original ideas were lost - the only thing I had done was to cut everything & make my pages etc. from pale blue cardstock - Bazzil Petalsoft.


On my list of 'To Dos' was to learn videos so that I could upload projects to YouTube - it was way down on my list but I decided it was time & pushed it to the top; I said sorry to facebook & blog postings & tried out my mini book pics in the software.

Here it is:


Not sure how the music got into it & still do not know how to add commentary
 but we are in the baby steps phase.

Products Used:


Laces - Lace 42 & L2976 on cover, spine & middle pages, L6899W on almost all pages

Pins of Jewels  on front cover

Vintage Trinkets  on front & back covers
 - handle (al 121), corners (al 128) & filigree (al 104)

Flowers & Leaves - throughout the book 
 Celestial White pack (da800) & Organza w pearl (org pearl)

Art prints by Monet -Ladies in White  S131 

All others in the book papers pack

Other notes:
Distress Ink - frayed burlap, Spine was done with the Petalsoft cardstock with the edges torn & distressed, the cabinet cards were made into little books, the laces on each page were designed as pockets for pics.


I have the new book papers Vintage Journal on my craft making desk & I am 
looking forward to making it.

 - lots of papers to cut & ideas to churn through, what colours will I use with it, what embellishments - rough or smooth & textures to investigate.  There will be no laces, flowers or frillies on this one.

Hope you enjoy my little book which I have called 'Blue Ladies' after the Monet ladies & the Ladies in hats by Harrison Fisher .

Bye for now
Meg
www.megsgarden.com


03 August, 2016

'Dream today' with Chantily Cream by Katrina Thompson

Hello everyone. Today I have created a layered card using the Chantilly Cream Papercrafter Pack. This collection of prints will give you all such an amazing assortment of images to create with. I love the neutrals and earthy tones as well as the pops of colour that you can work into your projects. A step by step guide follows. Please enjoy! Katrina x


Select an assortment of images, background papers and flowers that coordinate.


Start playing with your layering. When you've found a good combination, trim,
ink and attach your layers. I found the Antique linen and dried marigold inks
both worked well to blend & enhance the image and background.

The flower is a combination of the leaves and base of the organza lace with diamante flowers 
together with a large petal from the Carabella Roses and a paper rose in the center.

The cardstock you choose will also change the look of your card. I have chosen to stay with
neutral colours and now select from an assortment of smaller flowers for the clusters.

I originally had lace on the top and bottom of the 'Dream' word but found when attaching it
that just having it on the base was enough and then it also didn't cover too much of the image.

I've taken the base petal from the cornsilk flowers to wrap around the paper flower and have used some of the stamens from the cornsilk flower to tuck off to the side.

The finished bottom cluster.


Thanks for looking, until next time,  - 'Dream today' & Happy Creating!! K x


01 August, 2016

Chantilly Cream - 'Love' by Katrina Thompson

Hello everyone!! I have some more Chantilly Cream goodness today on the blog, to hopefully inspire you all. I have used the Chantilly Cream Papercrafter pack and with a few flowers to embellish you will find the endless combination of images from this pack can give you so many variations for whatever project you may wish to adapt to. I hope you enjoy! K x


Select your combination of images and background papers. Notice I have sliced the
cream  rectangle. I really wanted to use it but it wasn't as long as I needed so by splitting
 it and hiding the split under the other layers, we've instantly made it longer.

Create your own frame by cutting the center from this
amazing flourish and using it to frame the flowers.

Arrange your layers to gauge the fit before inking and attaching.

The flowers are a combination of the Carabella rose, the organza lace flower with diamante,
an open paper rose and the small flowers from the cornsilk flowers.

All layered with the flowers, some muslin and the Tattered net trim to embellish.
I have inked with Scattered Straw and Dried Marigold.

The cornsilk flower is tucked into a paper petal.


Use your 3D tape between your layers to give you depth.

Thankyou.... and until next time, Happy Creating! K x