Showing posts with label Irit. Show all posts

13 June, 2015

Flower Power layout with Irit

Hello my dear crafty friends and welcome to my last post for Meg's Garden!
It was a great shabby year here on Meg's Garden site and I am very glad that I was a part of this fantastic team.
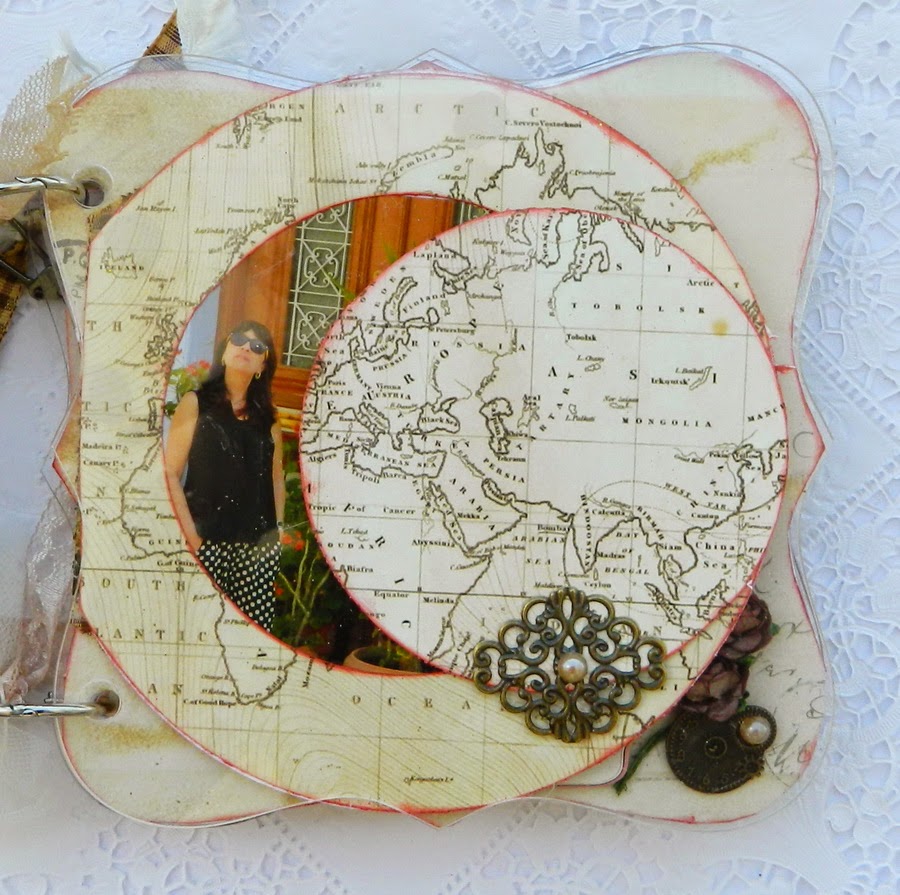
So as my finale I made a scrapbooking page  with Forgotten Meadows collection and added some stamping over it to make it more interesting.


I made this page with a gorgeous butterfly and flowers photo and called is " Flower Power".
The diamond shaped openning was made in the second layer of paper and I stamped flowers inside.
Then I added fussy cut flowers on one corner and Meg's Garden fabric flowers on the upper corner and misted them with pink mists to get the colors that fit my photo.
More stamping was made on the front of the page.
 The chipboard title was heat embossed with pink embossing powders and arranged over the diagonal diamond side.


Products used :
Meg's Garden products used for this project:
Other products:
Stamps- Rubber Dance
Ink- Ranger
Chipboard- A2Z Scraplets


14 May, 2015

Folded gift card holder with Irit

Hello my dear crafty friends and welcome to my Meg's Garden monthly post.
This time I decided to make a folded gift card holder with Meg's Garden new delicious Forgotten Meadows collection.
First I made the cover with old recycled chipboards and wrapped them with a 12*12'' paper from the new collection. Then I made the fancy cover with heat embossed chipboard and Meg's Garden flowers, trinkets, lace and doily.
I added the trinket on the top of the frame and glued a charm bird over it.
All paper flowers were inked around the edges with brown distress ink and I added a hand cut  from other paper flowers over the basic paper on the cover.


And now for the inside of this gift card holder.
I glued another paper- this time from the journal kit as the size was a good fit over the wrapped cover. Then I added some stamped butterflies and a stamped sentiment - the same doily from the cover is seen here as it was folded to the half.
I made the right " book shaped" side with 4 printers papers, folded into accordion and arranged to the deep frame.
Then one single envelope from the kit was glued as a base for the gift card/cash money gift to put inside.


You can see the folded paper  on this photo:


And some close up to butterflies here:


The last close- up to the card/cash envelope:


I hope you like my project and with Meg's Garden gorgeous Forgotten Meadows you can make a lot of similar projects/ mini books/ cards or scrapbooking pages.

Meg's Garden products used for this project:
Other products:
Stamps- IBS
Ink- Ranger
Bling- FWAB
Chipboard- Tando
Happy Spring and Happy Crafting to you all!


30 March, 2015

Happiness with Meg's Garden and my grandkids all together

Hello my dear crafty friends!
This is Irit here and today I am going to share my March layout made with Meg's Garden new delicious Butterfly Garden collection and my dear grandchidren's studio photos.
This layout is a perfect example for baby scrapbooking with totally non baby products. All you need for this kind of scrapbooking are good photos with great backgrounds and outfits and lovely delicious vintage paper collection (such as this Meg's Garden one).


 The background paper was punched around with a mix of border punches and then I added stencil work with a couple of stencils and a light yellow painted texture paste. I also inked the edges with this teal ink and then adhered the stencilled paper over the basic one.
A few cut out paper were added on the back of the photo as my matting; each was in a different size and inked with a couple of inks around the edges.  I misted over the  page again and then glued my photo over the paper rectangles.
Meg's Garden paper doily was added on the back of this paper cluster for the interest. I made a flower cluster with Mag's flowers, ribbon, metal trinkets and paper lace piece on the lower photo corner and added a chipboard title that was lightly misted  too.


 A few paper cut butterflies were added randomly over the page.
The overall feeling of this page is light vintage Mixed Media and it fits my photo and my scrappy mood during the scrapping process.


Products used:
Meg's Garden:
Other products:
Chipboard title- Sweet Stamps
Stencils- Tando Creative
Inks: Ranger
 Punches: Martha Stewart, EK Success


04 February, 2015

Butteflies are Hope!: altered art with Irit

Hello my dear crafty friends!
I made this altered wooden word HOPE and a matching tag for Meg's Garden February blog post with this very new and awesome Butterfly Garden  collection and a lot of other Meg's Garden products.


The very old and forgotten wooden Hope was in my closet for like 5 years and  I finally found a reason the alter it: this new Butterflies collection was sure a symbol for Hope.


So I traced the letters from the backside and glued them over the front\, adding a bit of blues to this colors 9I think blues are a great for for Hope).
Then I added all kinds of Meg's Garden embellishments, such as ribbons, vintage metal trinkets, hand cut and glittered butterflies, colored flowers and .... This was actually done and I love the final result a lot. Hope you like it too.
 Then I decided to add a big handmade tag and I used the same paper collection and the same color pallet with pretty much similar embellishments to make this match.


I made a big tag and added a small one with hand cut words from the paper. Some die cuts were added on the right tag side and I added  flowers, trinket, ribbons and ...yes, glittered butterflies again.


Products used from Meg's Garden shop:
Butterfly Garden  6*6'' paper pad
 Butterfly Garden  12*12'' collection
Temptations in blue embellishments
Other products:
Dies- Spellbinders
Wooden word
Pearls
 Inks

24 January, 2015

Only you French Garden easy folded mini album

Hello my dear crafty friends!
Today I am going to share  my third project made with Meg's Garden most beautiful French Garden mini book kit.
This time I made this folded from one single 12*12'' (30*30 cm) cardstock book . A few years ago I made a full tutorial about this kind of folded mini album and since then it's my most visited post. So here is a link to my own previous tutorial and then you  are going to see the new book with the same folding.
Folded book tutorial by Irit Shalom

I made the base using corrugated Kraft cardstock and as this kind of an album should be pretty flat (the only way to close it after all is to leave it flat), I made a bit of embellishing over the cover and the inside  is pretty much minimalistic.

And the side view of this cover:

I added Meg's Garden flowers, but misted them a bit with a light pink mist to get the color that fits the ribbon and embossing powder colors.
All ribbons, transparency butterflies, paper lace , fibers  and a metal piece are from Meg's Garden shop. I just added some pearls and a chipboard title .

Now we begin to open my book by unfolding the cover to the left.

And a bit of a side view of this page:


Another unfold with middle section up:

 Now the middle piece is going down and we can see actual photos of my lovely grandchildren.


And the full unfolded mini with more lovely photos:

As you can see it's a very easy album and you don't need more than a good basic cardstock, lovely photos and great Meg's Garden products. 2 hours mostly and you have this gorgeous gift album made and ready to become the most precious present to your loved ones.

Meg's Garden products used:
French Garden kit
Vintage trinkets
Butterfly transparency
Ribbons
Paper lace


24 November, 2014

My dream garden with French Garden collection

Hello my dear crafty friends!
Irit is here again  and this time, after a few months of altered art made with Meg's Garden gorgeous products, I am back to scrapbooking. This is my second project made with this delicious collection, but again, this is my " Hello,  Mixed Media scrapbooking" post in Meg's garden blog.


The new French  Garden collection is the most perfect one to make dreamy, shabby and colorful layouts and this is the first one of this kind.
I used the patterned paper as my background paper, without any cardstock and added a few  cut pieces from another papers from this collection.  Lucky me had those delicious  peonies photos  that are the perfect fit for the paper. I added background texture paste masking with  light and dark green pastes and surrounded my photos with Die- Versions die cuts of background, fence and bird cages, all made of the same patterned paper.

My photos were actually embedded into the background as I added  some pieces under, over and in between photos.


Transparency butterflies from More Butterflies set were hand cut and glued randomly over the page.
I added some vintage metal findings from Meg's Garden shop over the piece paper and embellished them with pearls. Some trims  and ribbons were added too. As the last touch I added 3 big flowers, some doily trims and a big chipboard heat embossed title.


All the page was misted with a mix of light yellow and pink mists.


 Meg's Garden products  used:
 French  Garden collection
More Butterflies transparency
Vintage metal trinkets
Paper flowers
Doily lace
Fibres
Ribbons


10 November, 2014

My Vintage art album with French Garden

Hello my dear crafty friends and welcome to my new Meg's Garden post.
This time I made this standing mini album using the new collection from Meg's Garden called French Garden Book kit.


I folded this stand to be my album base and this is how it looks from the side, just to show you how easy this fold is. I used a good chipboard piece 6*12'' long and scored it to 6-3-6 '' to make this fold.


This is a title side here again:


Most of the products are from Meg's Garden shop, but I added this ART sticker from PHP company, some bling and a word Vintage. All piece was inked with Rusty Hinge distress ink from Ranger.
Some embossing with brass, green  and gold were added over the chipboards.

And this is how it looks from the album side:


 The whole mini album has 8 pages and as much as I wanted to add more, it became very bulky and impossible to  close.

And now for the inside pages:


I used French Garden papers and vintage women pieces  and cut outs on each page and added a word that describes this page.
And the next page here:


And more of the pages:


And the  back cover with just a few trims on the bottom:


The whole construction was binded with a spiral and  this is like those calendars we all see around, but hand made one.
Hope you got some inspiration from my vintage album and you sure can do yours with a similar technique.
 Meg's Garden products used :


26 October, 2014

It's clear All about me

Hello my dear crafty friends!
Irit is here and this is my second project made with new Meg's Garden most gorgeous Sherlock new mini book kit.
This is the frist in Meg's Garden new poroduct line of exiting mini  book kits.
The papers are designed by Kerry-Jean Watson and it's available in download printable version and in printed version I used here.

As you may understand  from this collection's name it's mostly vintage and even masculine line of papers.
But then who says you can't  make a girly mini album with the very same papers?  Not me!
And as I already challenged  myself to make a girly mini album, I challenged myself  second time   to make it about myself.


As a fact: I am the most non photogenic person on the Earth.  I maybe have 5 good photos in the last 10 years. But then why not to give it a try? So I picked 5 pretty recent photos from our  trip to Cyprus and made 5 paged acrylic mini album ALL ABOUT ME.
Making acrylic album was the third self challenge: the papers are single sided  and you need to cover the ugly white with the same  size of paper on the back. Then you want to see something clear and maybe even to see layers of photos. And the best possible glue for acrylic pages is not the best " non seen" one.
So here is an overall look of my album:


I made some textured paste swirls over the clear spaces left after I made a cluster of Sherlock's tag on my cover. I added a flowers cluster on the corner, some metal trinkets and a chipboard title covered with red embossing powder.


The inside of the cover page has this envelope pocket that it good for anything you want to keep  inside:  ephemera  or just your thoughts.
I added the trim to cover the " ugly white" left from the cover  paper cluster and added a doily and a transparent clock just for the interest.


The first page has this very small photo glued from the back side of this page and covered with a small paper circle on the front.


Again, this is the back of this page and it was made to cover the white side of the previous paper. I made my only journalling over this page.


The next page has the back glued photo and the front paper frame .


The back of this third  page is a classic paper- border- photo- embellishment page.


This forth page is the most " clear" one and I wanted it to stay this way. And this is  how it looks with the next, fifth page on the back.


This is how the third, previous page, looks from the forth back...


Th last , fifth page , from the front side


The back cover has another envelope for more " memories" to keep.


Products used from  Meg's Garden
Meg's Garden products:
Sherlock mini book kit
Charm packs
Vintaj brass
Paper flowers
Fabric flower
 Doily
Transparency Butterflies
Transparency Clocks
 Chain Tim Holtz

Other:
Chipboard title- A2Z Scraplets
Ribbon with pearls, pearls- Prima
 Mask- Tando Creative
Ink- Ranger
Embossing powder, texture paste