Showing posts with label jute ribbon. Show all posts

13 July, 2018

THE FRUIT PICKER ~ SHERLOCK 111 A NEW CASE

Hello !
Mary here to share another layout using the Sherlock 111 A New Case Range. I have really enjoyed creating with this range. I create this layout for a challenge where the Criteria was "Country" and this is what I created

The Fruit Picker


I enjoyed playing with texture paste and mists , stamps , die cuts , Mesh ribbon and jute with this layout . I've also added a hot air balloon charm and bee charm to the layout


I have also layered the strip filigree over the round filigree and added some Jute Twine and gold colour paste . The PP layered under my photo of one of my Mothers brothers is from the 4 x 12" strip that comes with the 12 x 12 papers. Under the papers I have used staples to adher the mesh and jute ribbons.
The die cut I have used is Megs Store .
Thank You for calling by .
Mary x


08 July, 2018

The Earth without Art is just Eh ~ Sherlock 111 A New Case

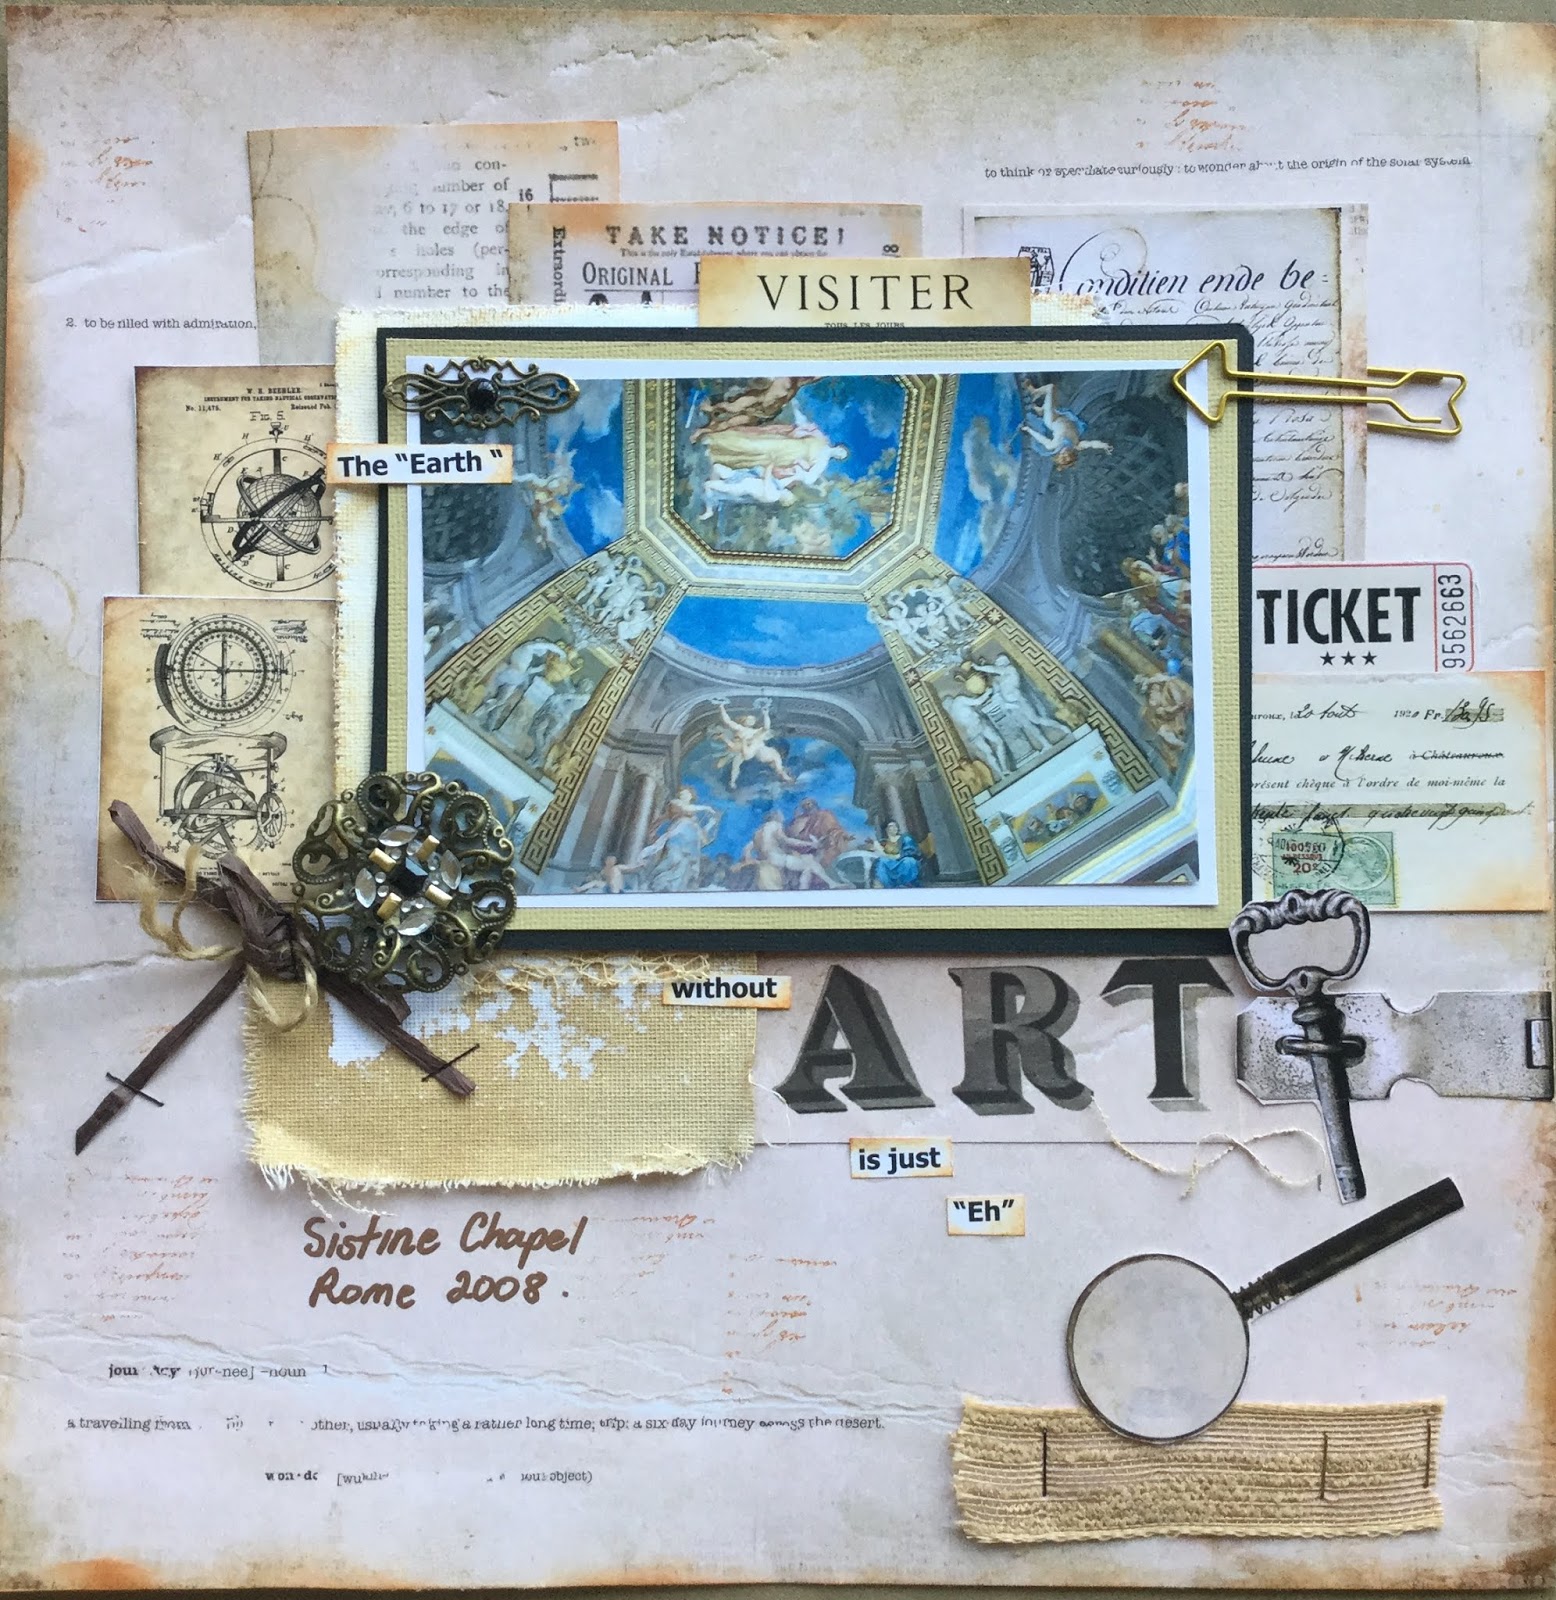
Hello fellow scrappers, Mary back to share another layout created with the Sherlock 111 A New Case Range.

The "Earth" without "Art" is just "Eh"


To create this layout I have layered my photo taken at the Sistene Chapel Rome in 2008 on Cardstock and coffee stained canvas and then layered images from the cut and create sheet around the photo.


I placed a little mesh ribbon peeking through under my photo and placed a round Filigree in the corner of the photo and then added raffia and string . I've used staples to adhere the dark brown rafia and also the natural  jute ribbon in the corner.
Thank You for calling by and I hope you take the time to pop over to Megs Store .
Happy Creating
Mary x

02 June, 2018

SHERLOCK 111 A NEW CASE

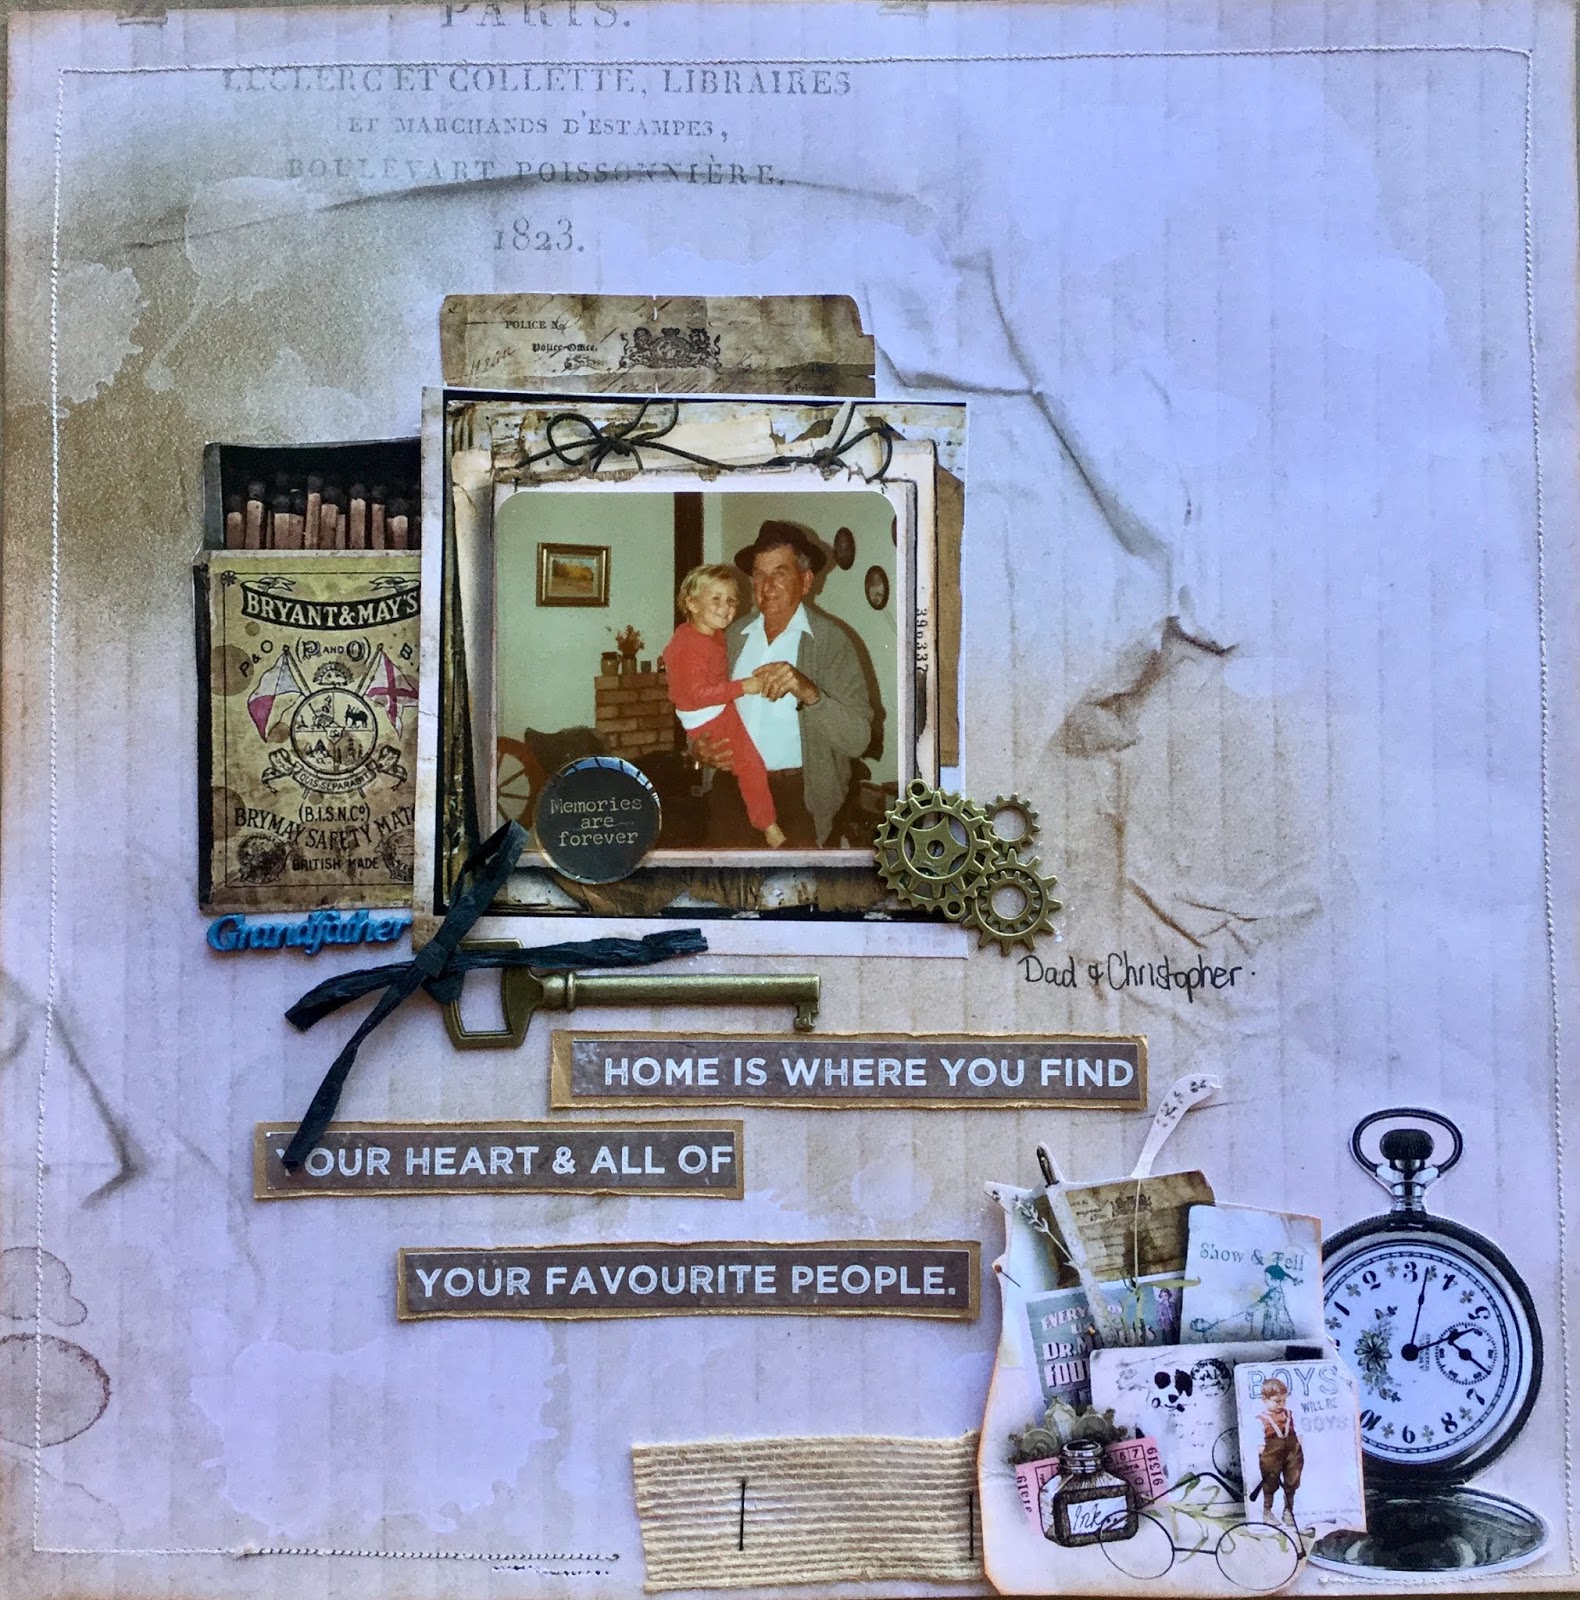
Hello Mary here with a layout using the new range Sherlock 111 A new Case.

HOME IS WHERE YOU FIND YOUR HEART AND ALL OF YOUR FAVOURITE PEOPLE


I kept this layout of my father and my middle child simple as I didn't want to take away from the pattern on the paper.


I have cut images from the cut and create sheet to layer in the bottom corner and stapled some  Jute ribbon to the page.


I also layered some coggs in the corner of my photo and placed the key underneath tied with black raffia. The box of matches I cut from the cut and create sheet and wanted to add this as my father was a smoker from a young boy. For a mat for my photo I layered images from the cut and create sheet .
Thank You for calling by, I hope you find time to be creative and visit Megs Store for a whole range of beautiful products to create with. Check out the DT inspiration on the blog for some lovely inspiration.
Happy Creating
Mary x


03 May, 2016

Chantilly Cream Trio of Cards

Hello everyone, Patti here sharing a trio of cards I've made with the gorgeous Chantilly Cream collection from Meg's store.  I may have a bit or bob here or there from one of the previous lines but it's primarily Chantilly Cream. 


This first card is the largest at 5" x 7" on a cream cardstock base.  I love the purples!  I even changed up  the cream colored Gardenias from the store and tipped them with Tim Holtz Distress ink in the new Wilted Violet so they'd blend better with the rest.


This card has 3 layers and each layer is matted with a solid purple mat.  I've distressed each one with the Tim Holtz distressor. I tucked some bits of purple lace that my friend Manuela made for me between the layers and ended with the Dream tag from a previous collection.


The bottom of the card is wrapped with purple ribbon from the store and slipped behind it is a little tuck in for a special message.  I finished it off with this gorgeous butterfly that has just a hint of sparkle from Diamond Stickles.


Card two is a 6" x 5" card using the same cream cardstock (Spellbinders Celebra'tions Cuddle Cream cardstock).  I rounded the card base corners with my 1/2" Corner Chomper and used the Scallop Chomper on the mats.  Everything was inked with Tim Holtz Distress ink in the oldie but goodie Vintage Photo.  


I was so taken with these lovely polka dotted flowers which are called Powder Puff Lychee, I clustered one with some bits of lace tucked behind along with loops of burlap and the gauze ribbon. Wrapped along the side of the one mat is Ivory Jute Ribbon

My inside journaling mat has been pushed and shoved here and there from a collection several times back, I had bent the bottom of it and just couldn't find the right spot to place it.  Well it worked perfectly for the inside, and the bottom that was bent?  I fold it under and glued it to the back, perfect, looks like that's what I'd planned all along! So as I always say, what doesn't work today may be just the thing for the next project!


The last of the trio is a standard A2 sized card, 4 1/4" x 5 1/2" on a Kraft cardbase.  This has lots of layers of strips of paper torn and inked.  The focal image, the flowers was taken from one of the Chantilly Cream cut aparts.  I used two of them layering the buds and blossoms on top of one another to give dimension.  All but the scalloped lace are from Meg's store.


I ran the lace through the openings on my tag and tied it in the front and then tied a strip of coffee stained seam binding around that.  Love all the little pieces of lace and ribbon on this card.


Inside I added a mat topped with the Botanical strip from the collection.  Along the bottom I added a butterfly I'd saved from a prior collection.

I hope you've enjoyed my trio of cards and will join me on the video for a more in depth look at them. Be sure and check out Meg's store for a delightful array of papers, laces, flowers and what nots. Wonderful embellishments for your next project.  And don't forget you can also download the paper in digital format to have and print instantly at home.

all supplies from
Meg's Garden of Papercraft Delight


https://www.youtube.com/watch?v=dmU15ETp9DM


30 March, 2016

'CHERISH' and 'CIRCA 1950'

Hello Bloggers,

I hope that you had a really lovely Easter with family and friends and managed some 'Me Time' to catch up on your hobbies.

I had the opportunity to be a little creative with some of Meg's Gardens lovely collections and did a little mixing and matching which worked perfectly.  For my first layout 'Cherish' is have used  'Chantilly Cream' cut and create and 'English Rose Garden'.
 Some of Meg's Garden lovely small flowers, doilies, lace and ribbons and a little washi tape for the borders.
The extremely versatile 'cut and create' I backed onto cardstock and then applied Dimensional Magic, which gave the pretty pictures an added lift.

As I had a little extra time, I decided to work with Meg's garden 'Cafe au Lait' collection.  I have used an old family picture of my family  teamed with a little coloured gesso to match.


A little close up of textures used with this wonderful collection.
Well Bloggers I trust that you have been inspired this time to do a little 'mixing and matching' of Meg's Gardens Collection and be sure to keep an eye out for next month's new release.  It is absolutely amazing and I am sure you are going to love it.
Until next time........happy scrapping.......Love Liz

18 March, 2016

Chantilly Cream Greeting Card

Hello my crafty friends, this is Patti back with you using up some of my leftover Chantilly Cream bits and bobs.


I hope you'll join me on todays video where I even reveal my messy desk!  I'll share how my 'mind' process works on creating a card with bits and pieces.  Such a fun project, I just love doing this and seeing what evolves.  I've used mainly Meg's Garden Chantilly Cream collection, there may be a stray item or two from another collection or my stash.  I've used a 6" square card base today, using Spellbinders Celebra'tions Cuddle Cream cardstock, one of my favs.


I've layered this gorgeous Gardenia flower with a few of the Copper Paper leaves and tucked in some tiny flowers here and then.  I went back off camera and scrunched and tucked in some tiny pieces of lace I'd been saving, just what the flower cluster needed for depth.


On the right side I cut a doily in half and pleated it in the middle.  A small staple holds the pleats together until I get it glued in just the right spot.  I added a tiny bow of dyed seam binding in the lower right and even though you don't see it in this photo I used my Scallop Corner Chomper on the outside corners of the card base.


After I finished filming I thought this upper right corner was a little naked so I went back hunting for a sentiment and found this Live Today snippet.  I fussy cut it out and backed it with a couple of layers of packaging scraps.  The antenna are the left over piece I snipped off the pearl spray that's tucked into the flower cluster.  I went over the antenna with Diamond Stickles to give them a little sparkle. The layers are distressed with my Tim Hotlz distressor and then tucked between are little pieces of lace.


Inside is a simple distressed mat of the Chantilly Cream striped paper with a trimmed flag of lace and a strip of Meg's lace over top.  Thanks so much for joining me today, I hope you'll stay and watch the video.  All supplies will be linked directly below the video.


Supplies from Meg's Garden

23 February, 2016

Chantilly Cream Folio Mini

Hello everyone it's Patti here today sharing a new folio mini I've made.  I'm wondering if you're like me.  Do you have things in your crafty cupboard that you've pulled out often only to put them back again because you just could visualize what to do with them?  That's been my case with the Tim Holtz small folio.  I couldn't wait to get it and then didn't know what to do with it once I had it.  Well that all changed with I received my last Design Team package from Meg's Garden.  I knew immediately that I had been saving that folio for the Chantilly Cream Collection.


I added the beautiful Organza Lace Flower over the top of the Jute and Mesh Ribbons and topped it off with a dragonfly charm.  On the right flap I added an oval trinket and glued a brad I had in my stash (prongs cut off) to match the one I'd added to the Wish at the bottom. I added some Faber-Castell Whipped Spackle which I had mixed with a Bronze Pearl X powder and applied it with the help of a 13 Arts stencil called Cozy Evening. To complete my front I misted the front cover of my Chantilly Cream dot paper with Tattered Angels Dazzling Diamonds and Candlelight Glimmer Mist. 


Because the folio expands out and up when opened it was a little trickier to get photos for you today that did it justice. When you watch the video walk through it will show you in much more depth how these pages interact.  


I simply adore the images in the Chantilly Cream Cut and Create ephemera papers including this little girl, in fact I used her image in a couple of spots in my folio including here on the front inside cover. After fussy cutting her out I backed her with Kraft cardstock and inked her heavily with Tim Holtz Distress ink in Ground Espresso.  I tucked flowers from the Fantasy Blooms Ochre pack into her hair and bodice.  Leaving her open on two sides allows my to tuck in my folded photo folder behind.


This shows the first flap of my folio and I've included this small photo of the folio before I started altering it.  The little flaps in the front are the ones in the photo above only turned vertically.  I added graduated pages to the strips which include my decorative pockets, embellishments and areas for tuck ins.  Above you can see I added a diagonal belly band across the bottom to act a stopper for the inserted mats.  Using the Mesh Ribbon over the Kraft Cardstock is a winning pair and then adorning it with the fussy cut butterfly completed my first flap.  I did leave an opening on the side for a tuck in mat.  The solid mats are all cut from the Kraft cardstock, inked with the Tim Holtz Distress ink in Ground Espresso and Corner Chomped with a combination of one or more of the Scallop and Cloud edges.  Notice at the top  you see how you can take just a small snippet from the paper (the stamp and botanical) and when fussy cut makes the perfect tuck under for your mat.  Using just one tassel cut from the strip was enough to finish it off the end of my band.


Here is the next flap in my folio. I created a clustered pocket with the little scraps I had left over. This is a fantastic way to use up little bits and bobs you have left.  Start with a solid base behind and then glue your bits on top until you get the look you like.  I do several practice runs just placing my little scraps here and there until I get a look that is pleasing to my eye and then begin gluing them down.  I trim away the excess to create the straight side and bottom and then ink the edges.   


Here is the front of the next flap, I cut the pre-made strip that came with the folio into two sections and removed the extra pieces so I could have the two swinging pockets. 


Here's the back side of those same pockets.  You can see where I've reused my cute little girl and fussy cut a panel from the paper to create the belly bands.


The next flap is placed toward the middle of the pre-made folio flap and then the excess top and bottom is cut away so you have a 5 1/2" square pocket (this is from the Cardmaker pack).  I again took a few of the cut and create pieces to make my stopper across the bottom. Shown on the small photo to the right is the back of this swinging pocket.  Using an element from the collection I created a wide belly band to tuck my photo booklet into (this is an 8" x 4" piece of inked Kraft, scored in the middle and then folded to house 4 photos.

As each of the folio strips advance I increased the width of my pockets so that you get larger and larger photo mats either tucked on the front as shown here or in the side pocket these areas are large enough to hold 5" x 7" photos.


I used the frames from the collection and extended them across the two pages to create bottom pockets.  The inserted mats are adorned with fussy cut butterflies.  I glued the back of the butterfly completely down on the back of the mat but left the bottom front of the butterfly loose to tuck the photo underneath.


Now that I'm almost to the end of the folio the page is really large allowing for a good sized mat in the pocket and under the belly band.  Again I've used snippets from the paper for embellishing the jute and lace band and adorned the side with one of the Fantasy Blooms.


You know that old saying, I saved the best for last?  That's how I feel about this page, I often say a project takes on a life of it's own and that's the feeling I had here.  I loved how the page flowed together with the lace, mesh ribbons, butterfly and pockets.

Please join me on the video where you'll see a much more in depth look at the page and pockets.  All supplies to Meg's Garden will be linked directly below the video.  I'd be most extremely if you visited me at A Soul's Heartbeat either on Blogger or Facebook.


Supplies from Meg's Garden of Papercraft Delight


11 December, 2015

Old World Santa Card

Hello friends, it's Patti here with an Old World Santa Christmas Card featuring the Vintage Christmas Papercrafter Pack from Meg's Garden.  This is a 5" x7" card with a Kraft cardstock base. 


I used the same Kraft cardstock to create my envelope, this is a box envelope allowing space for the embellishments to slide inside without being crushed.  I added a fussy cut Santa to the front and a cut out to the back flap.Using the same Tim Holtz Distress ink in Gathered Twigs I had applied to the card around the edges to soften them a little. 


I used some of the Velvet Flowers and leaves along with a piece of Jute ribbon to adorn the top right of the card.  By pinching and gluing the ribbon in spots you get this nice flowing look. 


Here I tucked a swing out Santa, which has been fussy cut from the Papercrafter pack and placed a magnet behind him so he swings out to reveal a special tag and message and pops closed to keep it safely tucked inside.


To give my card that very special winter element I've used Deco Art's Snow-Tex around elements on the front, inside and back of the card.  When it dries it looks just like snow has fallen here and there.


Inside I placed fussy cut pieces from the decorative papers along with a mat cut from Spellbinders Nestabilities Divine Eloquence dies.  Using a combination of Tim Holtz Distress inks in Vintage Photo, Old Paper and Antique Linen to give the mat the same old world feel as the paper.

Thanks for joining me today, be sure and check out these gorgeous papers and embellishments from Meg's store.  If time is short you can always purchase the digital edition of the papers and download instantly to print at home.


~ Supplies from the Store ~